Stacy Risenmay https://www.notjustahousewife.net/ DIY Projects, Home Decor, & Gardening Mon, 25 Nov 2024 20:43:24 +0000 en-US hourly 1 https://www.notjustahousewife.net/wp-content/uploads/2021/06/cropped-favicon-32x32.jpg Stacy Risenmay https://www.notjustahousewife.net/ 32 32 Painted Kitchen Cabinets https://www.notjustahousewife.net/painted-kitchen-cabinets/ https://www.notjustahousewife.net/painted-kitchen-cabinets/#comments Sat, 23 Nov 2024 06:16:49 +0000 https://www.notjustahousewife.net/?p=27589

Read More

]]>
It was about 8 years ago that I painted my kitchen cabinets this light, neutral gray. It helped my kitchen be light and bright. But the paint was starting to wear off in places from being touched and wiped down so often. And I was itching to add more color to my house. So, I grabbed my paint sprayer and changed things up! Here is the reveal of my painted kitchen cabinets.

This post is sponsored by Wagner but all ideas and opinions are 100% my own.

Picking A Paint Color

I had the HARDEST time picking a shade of green for the cabinets. For months I thought I had already settled on one. When I changed the color of green I painted my fireplace to a darker shade, I was then going to paint my kitchen cabinets the original fireplace color. But when I placed the color chip on the gray cabinets, I realized how light and how gray the green really was. If I was going to add color, I wanted to add COLOR. Not a muted green, but a really vibrant one.

green paint chips

These were my top choices. Yes, this is the narrowed down amount! Then I finally narrowed it down to four. Once I had four chosen, we got a sample can mixed in each color. I painted a white poster board in each color so I could see a larger sample. It is crazy how much different a color looks when you change the sheen and when it is larger scale. I ended up choosing one called In The Garden (the square paint chip right above the handle). How perfect is that?

Prepping To Paint Kitchen Cabinets

The hardest part was cleaning the cabinet doors. Turns out that a light, warm gray is the perfect color for hiding how bad grease residue has built up. Even though I wipe my cabinets down weekly, the cabinets near the oven had a thin layer that wouldn't sand off well. So after scrubbing them really well, I was able to finally sand them lightly with a 220 grit sandpaper.

The cabinet bases also got washed and sanded. Then everything had to be washed again to get rid of the fine dust. The sanding not only ensures that everything is off of the cabinets and they are 100% clean, but it also helps the new coats of primer and paint to adhere properly.

If I am painting a dark color over top of a lighter color, I like to use a tinted primer. You can buy pre-tinted primers or have your primer tinted at the store. Once I realized my cabinets were basically primer gray, I was more excited to say goodbye to the color.

I chose to brush the paint onto the cabinet bases instead of spraying. My kitchen is small enough that I can paint it by hand very quickly. Faster than it would take to tarp and tape everything. But when I paint larger kitchens, I will tarp things off.

Several thin coats is better than one or two thick coats. The first coat will look streaky and that's okay. I like to use a foam brush so there aren't brush marks. You can also use and additive like Floetrol that extends the paint dry time and helps the paint self level.

Spraying The Kitchen Cabinet Doors

Now it was time for the fun part! I always test the spray on a piece of cardboard before spraying my project. That way I can play around with the spray pattern and output and get it just right. I used the Wagner Flexio 3500 with the detail finish nozzle.

I always spray the back of cabinet doors first. That way, if they get dinged up when I flip them over to paint the other side, it's the backside and not the pretty front.

Once they had completely dried (I like to let them dry overnight), I turned them over and sprayed the front. I ended up painted three coats of paint per side.

The color looks really light when the paint is wet, but dries darker.

Painted Kitchen Cabinets Reveal!

I am so happy with how the kitchen cabinets turned out! The finish is so smooth and professional looking. And I am thrilled with how the color looks. It livens up the whole kitchen.

green base cabinets in kitchen

It is actually really hard to photograph my kitchen because no matter what time of day it is, there is a ton of bright sunlight. There are 3 big windows. One facing south, one east, and one west. It was hard to find a time when the lighting wasn't super harsh. BUT, the natural light is exactly why we felt comfortable doing a darker color on the cabinets.

green painted kitchen cabinets

Like with many colors of paint, it looks different depending on the time of day. In the morning light it comes off having more of a blue undertone and seems darker. In the day time it looks very warm and a bit lighter.

painted green kitchen cabinets

One of my favorite things about this cabinet upgrade is the contact paper I added to all the drawers and cabinet shelves.

kitchen cabinets and floral botanical contact paper

It had enough various shades of green that I figured at least one would match my paint color. I was pleasantly surprised when it came at just how well it matched! I ordered it from Amazon (affiliate link) and used three rolls.

Kevin always sits in front of the camera when I do a shoot thinking it will earn him a treat. I decided to add this one in since he was in the last kitchen cabinet post. Plus it gives you all a chance to see him post surgery. His cancerous ear tumor was successfully removed (along with his whole ear).

green painted kitchen base cabinets

Are your cabinets painted? What color are they and do you like it? Let me know in the comments below :)

PIN For Later:

collage of painted green cabinets
]]>
https://www.notjustahousewife.net/painted-kitchen-cabinets/feed/ 1
DIY Checkered Vase https://www.notjustahousewife.net/diy-checkered-vase/ https://www.notjustahousewife.net/diy-checkered-vase/#comments Thu, 26 Sep 2024 19:40:41 +0000 https://www.notjustahousewife.net/?p=27529

Read More

]]>
I have a healthy obsession with all things checkered. I also love vases of fresh flowers. And one of my favorite crafts is glass etching. I put them all together for this fun and easy project. The first attempt at making this vase was a complete fail. So here is the right way to make a DIY checkered vase!

DIY Checkered Vase - Glass Etched!

My son and his cute new wife both have birthdays in September just a few days apart. They also both loved checkered things (remember their DIY dance floor!) so I actually made this for them as part of their birthday gift.

glass etched vase with checkerboard pattern

Step 1: Cut The Vinyl

The first round of this project (that ended in failure) I used electrical tape to make the squares. I have used electrical tape to glass etch in the past, but this tape was 1.5" thick and was harder to work with than thinner tape. It stretched out and made slightly wonky lines. So I scrapped that one and started again. This time I used vinyl. I had some gold leftover from the wedding. I could have used my Cricut machine but since it was just strips cut into squares, I used this paper cutter.

There was a bit of math involved to figure out the size of the squares. I measured around the vase and then divided that by how many squares I wanted each row to have. You need to have an even number in order for the checkered pattern to work out.

Step 2: Placing the Vinyl

The first row is the trickiest in the sense that it has to be perfectly spaced in order for all the others to line up. I used the backing of one of the square as a spacer so I knew where the next one needed to go. After the top row was done, the rest was easy peasy. I just lined up corners to corners.

Step 3: Add Glass Etching Cream

Glass etching cream is so fun to use! I apply it with a small craft brush. I dab it on pretty thick to ensure even coverage. Once all the squares without vinyl were covered in the cream, I let it sit a few minutes before rinsing it off. I used the same paint brush to help remove the the glass etching cream. You want to avoid getting it on your skin.

When it is wet, it doesn't look super opaque, but once it dries, you can really see it. Peeling off the vinyl was the most satisfying part!

peeling vinyl off of glass etched vase

I love this method because it is subtle but still adds a fun touch to your decor. I have also glass etched a vase with stripes, one with hearts, and even one with ghosts for Halloween!

glass etched checkered pattern on vase

What pattern would you glass etch on a vase?

PIN For Later:

checkered pattern glass etched onto vase with flowers
]]>
https://www.notjustahousewife.net/diy-checkered-vase/feed/ 3
DIY Vegetable Garden Fence https://www.notjustahousewife.net/diy-vegetable-garden-fence/ https://www.notjustahousewife.net/diy-vegetable-garden-fence/#comments Tue, 10 Sep 2024 14:41:40 +0000 https://www.notjustahousewife.net/?p=27473

Read More

]]>
My toxic trait is that I always think I can get a project done faster than I really can. Call me optimistic, but I really thought I could get this garden fence done in a week. It turns out it was way more technical than I thought it would be. The perfectionist in me reared its ugly head and slowed things down a bit too. Maybe it is because this project challenged me, but I am so PROUD of how it turned out and it is one of my favorite recent projects. This DIY vegetable garden fence took 3 weeks to complete but was worth every (extra) minute! 

This post is sponsored by Wagner but all ideas and opinions are 100% my own.

My Fence Is Hiding A Secret!

Not only is this wood fence pretty, it has a fun secret! Truth be told, I didn't really need a fence for the garden. I don't need to keep animals out and my kids are old enough to be careful when stepping in the garden to get a stray ball. But I WANTED a cute, decorative fence. I wanted a way to define the space like you would with a rug in a room.

The MAIN reason I wanted a fence though, was to hide the sprinklers. The way we water our large garden is with sprinklers on 3 foot long stems. The sprinklers along the front of the garden are just poking out for all to see. They have always bugged me. I came up with an idea and how to execute it and luckily Shane was willing to help me see if it would actually work.

Fence Posts

This fence is made up of 2 different types of wooden posts. We had 8 solid 4x4 posts and 5 "sprinkler hiding" posts.

I didn't want to cement the posts into place for several reasons. In my research I came across a type of fence post where you pound it into the ground and then screw the 4x4 post into the base. We have such heavy clay soil that I knew these would be very secure. 

For the sprinkler fence posts, I needed a hollow 4x4. I am sure there are a bunch of ways to go about this, but given the tools we had available, this is what I came up with.

We cut a 2x4 down a bit so instead of being 1.5" thick, it was 1" thick. Using the table saw, we scored lines on the side so it would be easier to chisel out.

We then cut another 2x4 in half lengthwise to create sides. We cut them to be thinner at the top. This way there would be a bigger space for the sprinkler head at the top, and the rest of the post opening would be narrow for the stem. We needed the walls to be thicker at the bottom so we could screw the fence panels into them later.

Once assembled, I coated the bottoms with liquid rubber. This will hopefully slow down the rotting process. It seemed like the best option since we were not using cement. And as an added bonus, it will help these posts match the solid posts that have the black metal base! Win, win.

X Fence Panels

I love anything with an X detail! I have several fences pinned that have this fun pattern. There are multiple ways to create an X for a fence panel but I like the look of one specific way the best. And of course it is the hardest one to execute! Instead of having one board go behind the other, I decided to notch out the boards so they fit inside each other. For the fencing material we went with 2x4s since they are strong and inexpensive. 

I hate math so I let Shane take the lead on this part. He figure out the angle for the blade on the table saw and then cut two lines in the center of each 2x4 (cross board). Then I used a cutting tool to finish cutting out the piece. I had tested out a couple other ways but this cutting tool was a great way to get the job done fast. Or at least faster...

I cut the sides, top, and bottom of each panel out of 2x4s. When all the pieces were cut, I sanded each and every one with my sander. I knew that this wooden fence would get touched a lot and probably climbed on and I didn't want anyone getting slivers. It was very time consuming, but worth it.

I screwed them together to create a rectangle box. Then I added the cross pieces in the center to form the X. I had to use a rubber mallet to fit most of the cross pieces together where the notches were. It was a nice snug fit! 

The the Xs got screwed into the frames. They were nice and solid without being too heavy. I made 12 panels total. They were each 76.5 inches long and 31 tall. I wanted a 5 inch gap at the bottom of the fence which made the total height of the fence 36 inches. 

Assembling The DIY Vegetable Garden Fence

Once the solid 4x4 posts were set, we dug down 18" and  placed the hollow posts in the hole. We unscrewed the short side and placed the sprinkler inside. Our garden sprinklers are on a flex line so it was easy to move them into place. We packed the dirt down around the line and then screwed the short side back on.  

With all of the posts now set, the next step was to hang the fence panels! We simply screwed the side of the panel directly into the side of the post. For the hollow pickets, we had to put the first screw farther down to where the wall was thicker. We also used screws that were slightly shorter than the ones we used on the solid posts. 

Staining The Fence

Our privacy fences are stained a light gray. I have loved the look of the greenery from the yard against the gray so I chose to also stain this vegetable garden fence the same color. Or so I thought.... When I started spraying the stain I realized it was a lot darker than the stain I had used in the past. One look at the label on the can verified that it was indeed a darker gray. So I quickly grabbed some paper towels and wiped off as much as would come off. I actually really liked the look once I did that so I kept up the routine. Spray, spray, wipe, wipe. 

I used my Wagner Flexio 3500 with the detail nozzle. The staining was my absolute favorite part of this whole process! Probably because it was the easiest and fastest part of the project. Can you imagine how long it would have taken to stain this 80 foot fence with a brush?! It got in the little nooks of the Xs so nicely too. I put down a plastic tarp but luckily there isn't a lot of overspray with this sprayer.

It is SO HARD to try and photograph an 80 foot fence! The photos don't really do the whole thing justice, but I am so in love with this fence. It completes my garden area. 

And not only are the sprinklers perfectly hidden, they pop up and work beautifully! 

This seemingly simple fence gave me a run for my money but will hopefully last years and years. It's not perfect, but I am glad I took the extra time to make sure it was as straight as possible and that everything fit well.

Q&A

Why Don't You Have A Gate?

For now we do not have a garden gate on this fence since it doesn't run the full length of the garden space.  We kept both ends open because of the shape and how both ends curve. We can access the garden from both ends and walk around in the garden. If we decide we want a gate opening in the future, all we have to do is take down one panel and convert it into a two little gates. 

What If I Need To Keep Animals Out?

This fence would still be super cute with chicken wire, hardware cloth, wire mesh, or some other type of wire fencing attached to the backside with a staple gun. This would allow you to still have the X design and have your garden or garden beds be animal proof. It would keep out even small animals. You could even dig down and have some of the wire fencing buried in the ground to prevent animals from digging.

What other vegetable garden fence ideas do you have? What styles do you like? In your opinion, what would make good fences? Are you team white picket fence? Or would you rather a wire fence? I'd love to hear what you think in the comments below :) 

]]>
https://www.notjustahousewife.net/diy-vegetable-garden-fence/feed/ 9
How To Create A DIY Wedding Bouquet https://www.notjustahousewife.net/how-to-create-a-diy-wedding-bouquet/ https://www.notjustahousewife.net/how-to-create-a-diy-wedding-bouquet/#comments Fri, 06 Sep 2024 09:00:00 +0000 https://www.notjustahousewife.net/?p=27278

Read More

]]>
This year will go down as the year of the weddings for our family. We had two wedding receptions in our yard this summer. One of which was for my oldest son. I DIYed everything for the wedding, including the flowers. I do have a couple of years experience working in a floral shop, but I still consider myself a complete novice. But even if you have zero experience, with a few tips, you can create a DIY wedding bouquet!

This post is sponsored by Digz but all opinions and ideas are 100% my own.

diy wedding bouquet

Growing the flowers for both weddings and creating DIY wedding bouquets, centerpieces and arrangements, saved HUNDREDS if not thousands of dollars. Flowers are a huge part of the wedding budget. So if you have a wedding coming up and want to save money, learning to throw together some simple bouquets is a good place to start.

Elements Of A Bouquet

Before we start into the tutorial, you need a basic understanding of the different elements that go into a bouquet. You have you greenery, focal flowers, filler flowers, and line flowers. I have a post that goes into greater detail about these elements if you are interested.

Greenery are things like ferns, eucalyptus, or clipping from bushes. It's the base that you build off from. Focal flowers are the main flowers that steal the show like roses, peonies, or dahlias. Filler flowers are smaller and support the main flowers. Line flowers are tall skinny flowers that give the bouquet dimension. They are things like delphinium, veronica, or snapdragons.

examples of different elements of a bouquets

Think about your color scheme and look up online different examples of flowers from each of these categories. This will give you an ideas of what to grow, or what to ask for when reaching out to local growers or even neighbors. If you find that you didn't grow enough of a certain flower, or need to supplement for another reason, going to places like Trader Joe's, other grocery stores, and markets are other great places to get flowers on a budget.

All that being said, you don't have to include all the elements into your bouquet. Some of the most beautiful bouquets I have seen have only had focal flowers. Or maybe focal flowers and some greenery. Play around with it and have fun!

How To Create A DIY Wedding Bouquet

I have grown cut flowers for 3 years and love how they brighten up my vegetable garden. You can read all about the benefits of growing cut flowers HERE. Since I knew my son was getting married well before it was time to plant seeds, I was able to choose what I was going to grow based on the color theme of the wedding. Once you have you flowers all growing happily, here's how to create a DIY wedding bouquet from flowers in your yard!

Cut & Collect The Flowers

The best time to cut and collect the flowers is in the morning. The moisture content in the plants will be the highest then and it will cause less stress on the flowers. Cut the stems long enough to create a bouquet. Skip the flowers with shorter stems. You can use those in centerpieces, but you will need long stems for bouquets.

cutting flowers in the garden

Only use sharp tools to cut the flowers. Whether you use snips or scissors, ensure they are clean and sharpened.

cutting zinnias in the garden

Make sure to have a bucket, vase, or something else filled with water. As soon as you cut the stem, place it in the water. And when you have all your flowers cut, take them inside. Don't leave them in the sun for longer than necessary.

bucket of flowers

Clean The Flowers

Now it is time to prep the flowers by removing all or at least most of the leaves. If you leave the leaves on, the flowers will wilt faster since there is more per stem you are trying to keep hydrated.

preparing flowers for making a bouquet

Any time you pull a flower out of the water for any amount of time, you will need to create a fresh cut on the stem before placing it back in the water.

Making The Bouquet

Now it is time to create the bouquet! You can do this one of two ways. It will depend what you are comfortable with.

You can either create the bouquet in a vase like you would for any vase floral arrangement. This will free up both your hands and will keep the flowers hydrated while you work. Then when you are done, you can grab the stems and pull them out of the vase. You still may need to adjust a few things before securing them together.

creating a diy wedding bouquet out of zinnias

Or you can create the bouquet while holding the stems in one hand. This is my preferred method. It can get hard towards the end when you have a huge handful of blooms, but for me this just feels easier to play around with the design for some reason.

creating a wedding bouquet

Securing The Bouquet

Once you have the bouquet the way you want it, you will need to secure it. You have a few options. You can use a rubber band, a zip tie, or clear floral tape. I prefer to use a rubber band because it is easy to add and easy to hide when you add the ribbon. If you use a ziptie, make sure the nubbon is in the back of the bouquet and add enough ribbon to hide it well.

making a wedding bouquet

Keep it Hydrated & Cool

I make the bouquets the day before the wedding and then keep it in a vase of water in the fridge until it is needed. If you can, in between the ceremony and the reception, place it in water to keep it looking fresh all day.

There is also a floral spray called Crowning Glory that will help your blooms from losing moisture and prevents them from browning.

collage of DIY wedding bouquets

What are your favorite flowers to be used in a bouquet? I'd love to hear what your wedding flowers were like!

Happy Gardening :)

Some Of My Favorite Gardening Accessories:

All Digz gardening gloves and accessories are available at Home Depot.

]]>
https://www.notjustahousewife.net/how-to-create-a-diy-wedding-bouquet/feed/ 2
Best Way To Paint A Door https://www.notjustahousewife.net/best-way-to-paint-a-door/ https://www.notjustahousewife.net/best-way-to-paint-a-door/#comments Thu, 05 Sep 2024 21:57:52 +0000 https://www.notjustahousewife.net/?p=27457

Read More

]]>
We have lived in our home for 17 years and in that time we have either had a painted brown door or a stained brown door. I recently have been feeling that I want more color in my life and got the itch to paint my kitchen door. Sometimes you just need a fresh coat of paint. Here is the best way to paint a door to get a smooth, professional finish.

The Best Way To Paint A Door

Our dutch door was previously stained a walnut color. It faces south which means it gets sun exposure ALL day, everyday. Over the years, the sealer on the door has faded to look milky white and splotchy. I could have resealed it like I did with my front door, but like I stated above, I was in the mood for some more color in my life. So here is the best way to paint a door!

Take The Door Down

The first thing you need to do is take the door off. It is tempting to paint the door while it is still on the hinges in the door frame. But if you do, you have to do more prep. You have to tape around the hinges and door knobs and if you are going to spray, you have to tarp and tape everything in the room around your door. Even though it seems like a pain to take it off the hinges, and remove the door hardware, it is worth it. This goes for interior doors as well as exterior doors. 

Sand

Once the door is off the hinges and the hardware has been removed, I like to lay it on a table with a blanket, drop cloths, tack cloth, or old towels under it to protect the other side from dings or getting scratched. Then I start lightly sanding the surface of the door with a fine grit sandpaper. 220 grit is my go to for painting prep. 

If there are any dents or scratches, putty them with wood filler before sanding.

Tape

When there is a large area to cover, I like to add contact paper to the largest part of the area and then just tape around the edges. If you don't have contact paper on hand, regular paper works well too. Just make sure to use painter's tape along any seams where multiple papers overlap. 

Paint The Door

Make sure to choose the right paint for your project. If you are painting an exterior door, the side that faces the outside will need exterior paint. Either choose a paint that has a built in primer, or add a coat of primer before painting. A paint job is only as good as the quality of the paint used.

I have painted many doors with brushes and even a foam roller and there are tricks to getting a smooth finish with a brush, but even if you know the tips and tricks, it still takes a long time and you may still end up with brush strokes showing. Once you start painting with a sprayer, you will never go back to a paint brush. 

Sprayers work great with any type of paint. So whether you use an oil-based paint or water-based paint, a paint sprayer is the way to go. Not only is it faster, it gives you the best results with the most beautiful finish. No more brush marks!

I always turn the sprayer down to a fine spray to apply thin coats. A few thin coats are better than one or two thick coats. You have less of a chance for drips if you do light coats. 

Once I'm done with the second coat of paint, I remove the tape before the paint has fully dried. If you wait until the paint has dried, you run the risk of it peeling paint off your project along with the tape.

Allow the paint to fully cure before you put the door back on the door frame. Drying time will depend on the brand of paint, the kind of paint you used, as well as the humidity and temperature. 

I've seen the cutest photos online of big doodle dogs peering out of a dutch door while the top was open. I tried to recreate that look with Kevin our Frenchie, but he obviously needed help. He wasn't amused. Hahaha! Don't worry, he got plenty of treats for his "efforts".

He would much rather be hanging out on the kitchen porch watching us do project on the driveway.

I considered painting my kitchen exterior door green and even thought I might go for yellow. But ultimately I decided to go for navy blue since y window boxes and other planters are already navy blue. Plus, the cool thing about paint is, I can always change it to green or yellow in the future if I change my mind. But for now I am loving the blue! New paint makes the whole door feel new! 

PIN For Later:

]]>
https://www.notjustahousewife.net/best-way-to-paint-a-door/feed/ 4
How To Build A Dance Floor https://www.notjustahousewife.net/how-to-build-a-dance-floor/ https://www.notjustahousewife.net/how-to-build-a-dance-floor/#comments Mon, 26 Aug 2024 19:05:38 +0000 https://www.notjustahousewife.net/?p=27311

Read More

]]>
My oldest son recently got married and we DIYed pretty much everything, including the dance floor. When we priced how much it would be to rent a dance floor for one day, I was shocked at how much it was for even a small one. It was $700-$900 to rent a small dance floor. I was confident we could build one for much less that we could then reuse for future events. Here is how to build a dance floor! Or at least how we decided to do it :)

DIY dance floor at wedding

How To Build A Dance Floor

Out of everything, or sweet daughter-in-law was the most excited about having a dance floor. She wanted a fun reception with lots of dancing! So we made figuring out a DIY dance floor a top priority!

diy dance floor with couple dancing

Create The Panels

We chose to make our dance floor 16 feet by 16 feet. It took 8 pieces of plywood. We built a base for the plywood and then attached the plywood to the base, creating 8 panels. The 8 panels were then connected to make the dance floor.

I wanted to make sure that it was very solid and that while lots of people were dancing on it, the plywood wouldn't bow. To ensure that wouldn't happen, we created the frame for each piece of plywood and added 5 braces. The braces were each 16 inches apart.

building a dance floor

Putty & Sand

Once the panels were all assembled, we used wood putty to fill in small cracks and holes and bondo for any larger areas that needed to be filled.

Once that dried, we used sanders to smooth everything. No one wants to get a sliver while dancing!

sanding diy dance floor

Marking The Checkerboard Pattern

We could have made things easy and just stained or painted the whole thing one color and been done. But we wanted to have a checkerboard pattern. We used a chalk line to snap the lines for the 2 feet by 2 feet squares. Then we went back over the chalk lines using straight edges to draw on pencil lines. Originally we were going to use a laser level but it was so sunny it was hard to see. Snapping chalk lines was super fast and worked well.

I then taped off every other square. Instead of running painters tape in long lines across the whole floor, I chose to tape each square individually because if I had run long lines of tape, the tape would have gone inside the lines of ¼ of the squares and I would have had to of taped twice for each color instead of just once for each color.

marking lines for checkerboard pattern on dance floor

Staining & Painting The Floor

All of the furniture we were using for the reception was a darker stain color so we stained the dance floor a walnut color. I did the stain first because I knew the stain would more than likely bleed under the painters tape. This way, I could paint over the bleeding. If I had done it the other way around, it would have bled onto the white paint and would have been a mess.

staining checkerboard pattern on dance floor

Once the stain was dry, I removed the tape and taped it again in preparation for the paint. Before I started painting the squares white, we painted dark brown paint along the tape to seal it. That is my secret weapon to getting the crispest lines ever. If any of the dark brown paint bled through, it would match the stain enough that you wouldn't be able to tell.

Once the dark brown paint was dry, we painted the off white paint. It took three coats. Plywood sure sucks up paint!

checkerboard pattern painted on dance floor

Finally taking the tape off was so satisfying! I always take the tape off right after the last coat of paint is applied before it has a chance to completely dry. If you wait for it to dry, you risk it peeling paint off your project.

taking painters tape off

Sealing The Dance Floor

I chose to use a water based sealer since we had painted half of it white. I didn't want the sealer to yellow the white paint and oild bases sealers so just that. We applied 3 coats of polycrylic with a sprayer.

sealing diy dance floor

Assembling The Dance Floor

I don't have photos of us assembling the dance floor because the day of the wedding was insane. A huge storm came through and we didn't know until the last minute if it was even going to happen. But this is how we did it:

We took the plywood off of the bases. Everything was labeled so we could put them back on in the right order. We then screwed all the bases together so it was one giant base. Then we reattached the plywood to the base. It was so sturdy! There were not any gaps, cracks, or bowing. I danced barefoot all night and never felt anything but a smooth surface.

The Cost Of The Dance Floor

The cost of the lumber was about $350. The cost of the paint, stain, sealer and tape was another $100. So for HALF of what it would have cost to rent, we had a prettier dance floor that we can use again and again for future events.

My favorite thing about the dance floor was that we ALL worked on it. Shane & I plus all our boys and our new daughter-in-law. The groomsmen even came the night before and helped my son paint the edges gold. It was actually a lot of fun working on this together and it was my favorite DIY of the whole wedding.

diy dance floor with checkerboard pattern
]]>
https://www.notjustahousewife.net/how-to-build-a-dance-floor/feed/ 6
Life Lately {Big Family Update!} https://www.notjustahousewife.net/life-lately-big-family-update/ https://www.notjustahousewife.net/life-lately-big-family-update/#comments Sat, 29 Jun 2024 01:07:25 +0000 https://www.notjustahousewife.net/?p=27264

Read More

]]>
Holy cow! If you would have told "toddler mom" me back in the early to mid 2000s that life only got busier, I would not have believed you. How is it that when your kids get older, time not only speeds up, but you have even less free time? I have been struggling to find a way to get everything done.

It has been a while since I have given a family update. We have had some changes and some fun things happen so I thought it was time to share.

Our oldest son proposed to his girlfriend a while back and she said YES! That means we have an upcoming wedding! We have been planning since early this year and are looking forward to an end of summer wedding with the reception in our backyard. Yep! Another backyard wedding! At least we have a few months in between. *In case you missed it, our friends' daughter had her reception in our yard in June.

I have been doing a TON of work in the yard as well as DIY projects but haven't shared since I am kind of waiting for the wedding to reveal them. I am also growing all the flowers for the wedding. So the pressure is on for the garden and cut flowers to succeed.

Pincushion Flowers

Since most of my time is going towards wedding prep, it makes it a bit hard to keep up with the blog and social media. But I do have a few things to share soon, including a family room refresh and a big kitchen project!

Another fun thing that happened earlier this year was I became a service missionary for our church. Once a week I work at our temple. You can serve inside the temple, but I opted to serve outside helping with the grounds. Since I am a gardening introvert that prefers plants to lots of people, it's the perfect way for me to help.

Our second son is still serving a mission for our church in the north east and will miss the wedding. But his 2 year mission will be done in 6 months so we are getting close! I am looking forward to having him home.

The summer has been full of family reunions, church youth camps, driving kids around, BBQs, and trying to spend time up the canyon as often as we can.

I hope your summer is full of projects, family, and free time to enjoy the things you love. If you have a minute, I'd love to hear about any projects you have going on! Comment below :)

]]>
https://www.notjustahousewife.net/life-lately-big-family-update/feed/ 8
DIY Wedding Arch https://www.notjustahousewife.net/diy-wedding-arch/ https://www.notjustahousewife.net/diy-wedding-arch/#comments Tue, 11 Jun 2024 04:43:57 +0000 https://www.notjustahousewife.net/?p=27235

Read More

]]>
I recently had the opportunity to host a wedding reception on our backyard. Our dear friends from Las Vegas had a daughter getting married and she chose to get married here in Utah. She asked if she could have the wedding reception in our yard and I was so happy to be able to help out.

This post is sponsored by Wagner but all ideas, projects and opinions are 100% my own.

wood hexagon arch for wedding

As part of the wedding preparations, we discussed the fact that we needed an arch of some kind for the happy couple to stand by. The bride's father is also into DIY and woodworking, so he wanted to build it. He did not want to bother with the staining, so I offered to tackle that part. I love staining!

Our friend in his garage/shop after building the arch

He had it all labeled and bundled together nicely so that it was easy to reassemble it here in Utah when they got here.

Once it was assembled, it was so easy to stain it using my Wagner Flexio 3500 sprayer.

Not only did I have a giant hexagon arch to stain, but I had 35 hexagon centerpieces too! It went by so much fast wit the sprayer than if I had brushed the stain on.

staining wood centerpieces with sprayer
I used the Flexio 3500 sprayer with the fine finish nozzle

Once I was done spraying, I grabbed some paper towels and wiped off the excess stain. They dried outside overnight and were ready to go by the wedding day. With everything else we had to do right before the wedding, it was so nice to be able to stain everything quickly!

hexagon wedding centerpieces

Another way I was able to help with the wedding, was with the flowers. I have a ton of white peonies in my yard so as they were in the soft bud stage, I cut them and stored them in my fridge. Over 3 weeks, I collected over 100 blooms. Then the night before I put them in water so they could open.

We picked up a few other flowers from Trader Joes, and I was able to create the bride's bouquet and 35 centerpieces.

Our friends had brought the eucalyptus from Vegas that was trimmed off trees on their property. Having both the peonies and the greenery saved them so much money!

peony bridal bouquet

I think the arch turned out so nice! The bride and groom were thrilled :)

hexagon wedding arch
The bride's dad also made the sign with their last name to hang from the hexagon.

Because I was coordinating everything and running around like a crazy person, I was not able to get many photos. Plus I always feel weird about posting photos of people's faces without their permission. So here are the few shots that I did get.

backyard wedding idea collage

We had 5 pots lining the driveway with string holding photos of the bride and groom. The poles are just PVC pipe that painted gold. I added a 2" wood ball to the top from the craft store. It was such a simple thing but was very impactful!

When our friend cut out the couple's name sign, he was left with this board. Instead of using it as scrap wood, he turned it into a light up sign! We decided to hang it by the fountain since it looked so good with the vines as a background.

lit up name sign for wedding

Even though I was all over the place (and very sweaty!) we managed to get a photo of use under the arch we made together.

I am so glad Shane and I were able to help our best friends create a beautiful celebration for their daughter. We are so happy for them!

DIY wedding arch with bride and groom
]]>
https://www.notjustahousewife.net/diy-wedding-arch/feed/ 5
Why I Grow Flowers In My Vegetable Garden https://www.notjustahousewife.net/why-i-grow-flowers-in-my-vegetable-garden/ https://www.notjustahousewife.net/why-i-grow-flowers-in-my-vegetable-garden/#respond Thu, 16 May 2024 05:20:11 +0000 https://www.notjustahousewife.net/?p=27211

Read More

]]>
There's nothing better than going into your own backyard to pick a fresh tomato or cucumber. Amongst many fruits and veggies, I also grow a variety of flowers. There are so many benefits to having flowers with your veggies! Here are the reasons why I grow flowers in my vegetable garden.

Why I Grow Flowers In My Vegetable Garden

I decided 4 years ago that I wanted to grow cut flowers (flowers with long stems meant for bouquets). I didn't really have a space where I could do that so I ended up planting them in the vegetable garden. The first year I only grew a few types. But them I realized how much I loved growing them and increased the varieties.

picking an onion out of the garden

More Pollinators & Beneficial bugs

The first thing I noticed was that my garden was filled with more pollinators than usual. Everything from honey bees, butterflies, to bumble bees and hummingbirds. They are attracted to the bright colors of the flowers but also stay and pollinate the blooms on your vegetables.

Insects like lacewing, ladybugs, and dragonflies are also attracted to sweet smelling flowers. Lacewing larvae eat aphids, white flies, and other small pests. The adult lacewing feed on nectar from the flowers. Dragonflies eat mosquitoes (in all the stages of their life) so they are definitely an isect you want in your yard.

beneficial insects attracted by flowers

Adds Color!

Flowers add so much color and visual interest to your vegetable garden. Don't get me wrong, I love my nice straight rows of green veggies. But a pop of color here and there is so cheerful.

zinnias growing in a vegetable garden

I love the different textures the flowers bring to the garden space as well.

cosmos growing in a vegetable garden

More Time In The Garden

I find that since I have started growing flowers in my vegetable garden, that I spend more time out there. I check on the progress of the flowers to see if they are blooming yet. I also go out and collect flowers to bring inside quite often.

globe amaranth flowers growing in a vegetable garden
Globe Amaranth and Morning Glory on the Trellis

When you spend more time in your garden, you have a better chance of catching problems (like pests, weeds, and diseases) early before they get out of control.

craspedia flowers
Craspedia Flowers

Repelling Pests

Some types of flowers will even deter pests! Flowers like Marigolds and Nasturtiums are well known for repelling bugs such as white fly, squash bugs and aphids.

petunias

Lavender, Bee Balm, and petunias are also great flowers to plant if you want to help keep pests off your veggies.

Bouquets

The reason I wanted to grow cut flowers in the first place was to have access to fresh flowers for my home. I have had so much fun growing them and playing around with different types of arrangements. I love to give them to family and friends. I have some tips for arranging bouquets in THIS POST.

different examples of flower bouquets

If you are interested in learning more about growing cut flowers from seeds indoors, check out this post HERE.

The types of flowers I am growing in the vegetable garden this year are:

Cosmos, Zinnia, Sunflower, Bachelor Buttons, Dahlias, Craspedia, Delphinium, Nasturtium, Globe Amaranth, Pincushion, and Coneflower. I also grow Feverfew, Yarrow, and daisies in other areas of the yard.

vegetable garden with flowers

Do you grow flowers in your garden? What kinds do you grow?

PIN For Later:

reasons to grow flowers with your vegetables
]]>
https://www.notjustahousewife.net/why-i-grow-flowers-in-my-vegetable-garden/feed/ 0
Raised Garden Beds With An Enclosure https://www.notjustahousewife.net/raised-garden-beds-with-an-enclosure/ https://www.notjustahousewife.net/raised-garden-beds-with-an-enclosure/#comments Tue, 07 May 2024 17:39:17 +0000 https://www.notjustahousewife.net/?p=27183

Read More

]]>
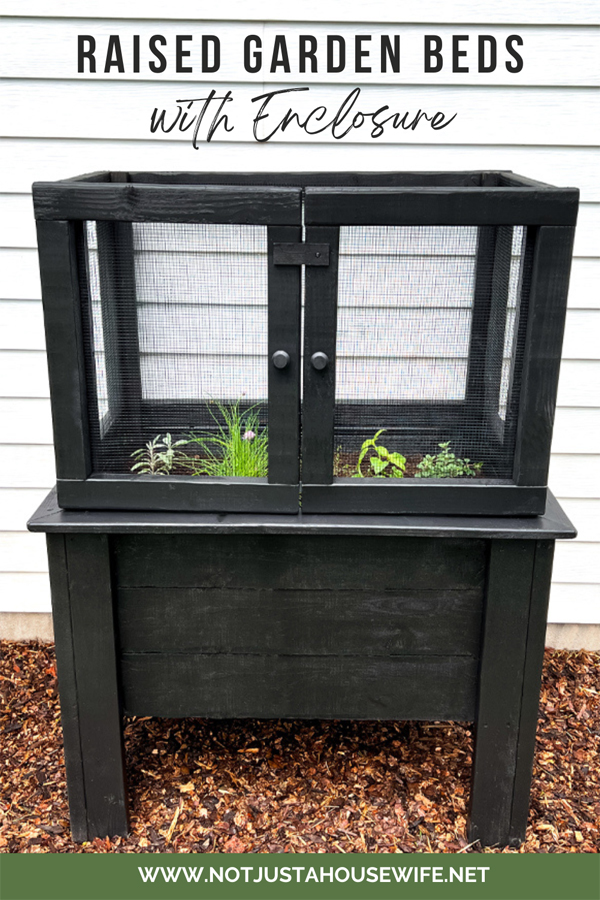
It has been a couple of months since I posted here on the blog. This has been one of the busiest springs ever with lots of projects and some fun news. I can't share everything just now, but a family/life update post will be coming soon. Speaking of family, I have a project I recently did for my mom and an AMAZING giveaway to share today. I built my mom some raised garden beds with an enclosure.

This post is sponsored by Wagner. All ideas and opinions are 100% my own.

Raised Garden Beds With An Enclosure

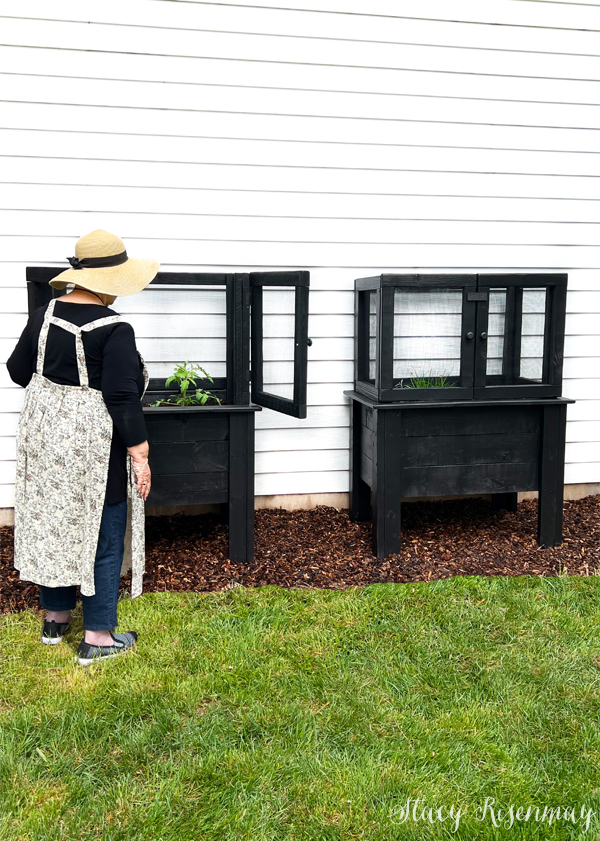
My mom expressed an interest in being able to grow a few things in her yard. Due to age and mobility issues, I knew that the garden would need to be close to the her house and elevated enough that she wouldn't need to bend over. I decided to build a couple of raised garden beds and place them against the back of her garage. This spot is just outside her kitchen door which is perfect.

Prep Work

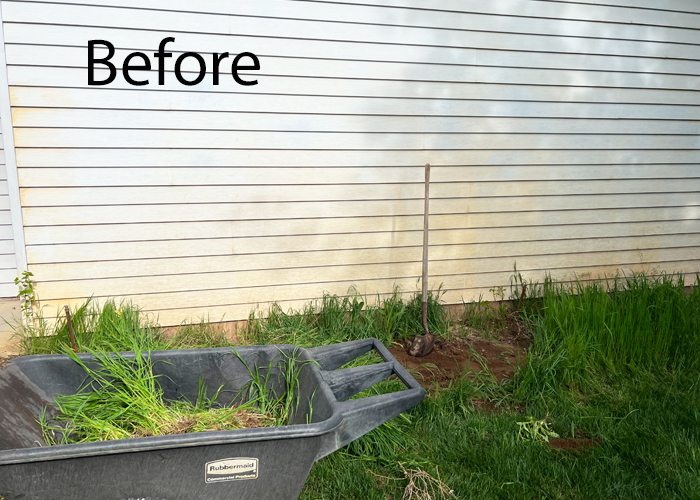
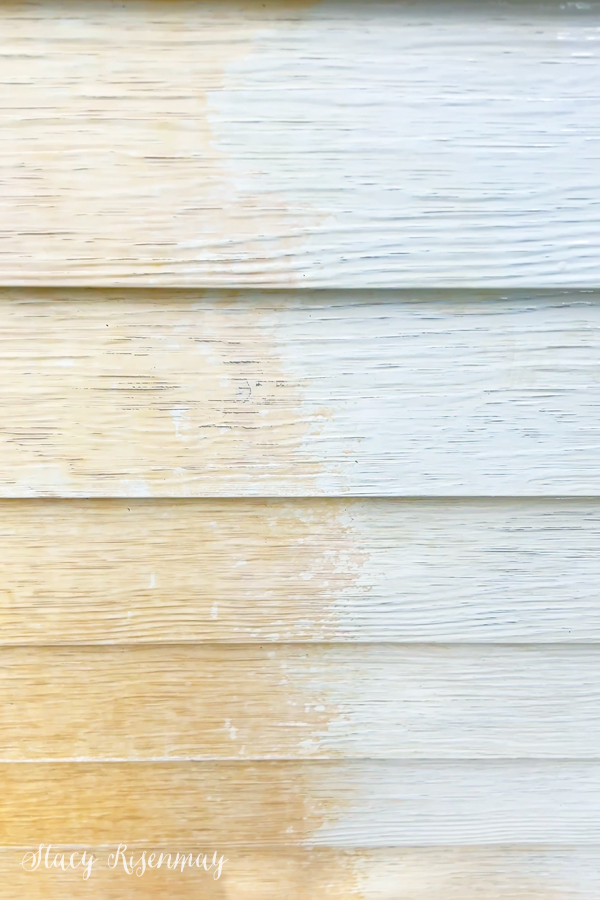
The siding has iron stains just like the front of her house from the sprinklers (well water) hitting it over the years. When I did her front porch makeover, I used Iron Out to clean the majority of it off, so I did that again on the backside of her garage and house. It definitely wasn't perfect after, but much better!

cleaning siding with iron out

Building The Raised Beds

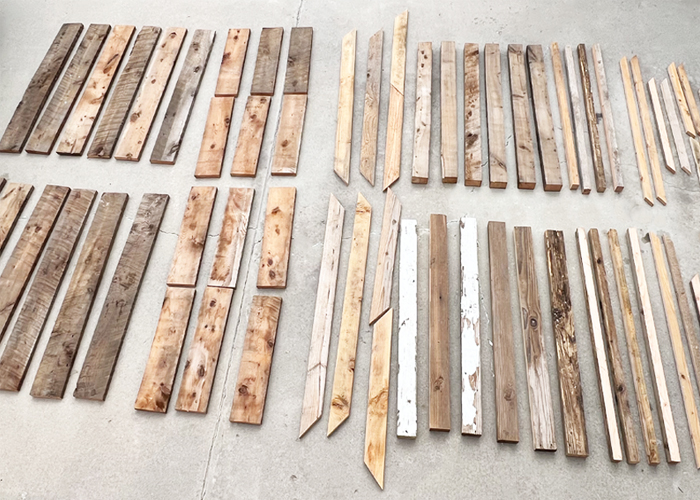
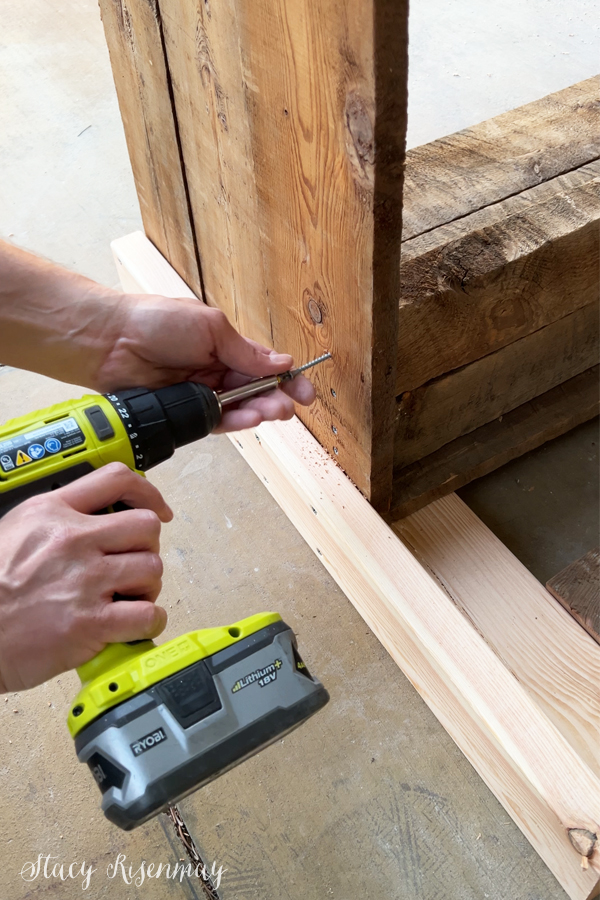
I have an overabundance of scrap wood in my garage from past projects, so I my goal this year is to use as much as possible to free up much needed space. Shane and I were able to cut enough for the planter and only needed to buy some 2x4s for the legs and some 2x3s for the enclosure.

scrap wood for building garden boxes

Shane did some of the assembly one evening while I worked on clearing the ground behind the garage.

building raised garden beds

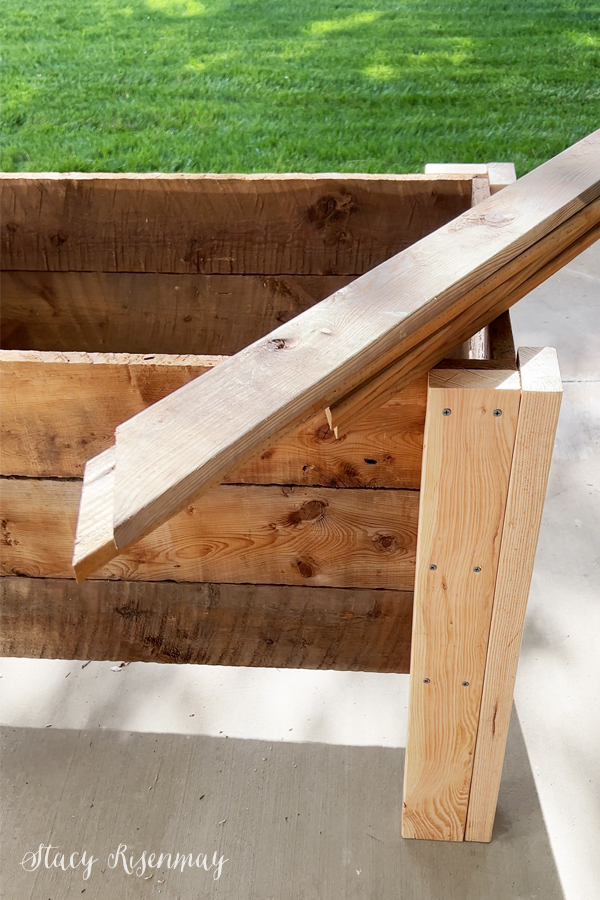
I added 1x4 boards as trim on the top to hide the top of the legs and to beef up the look of the sides.

adding trim to to of garden boxes

While working on her planters, I had a few visitors. My mom lives fairly close to the mountains and occasionally will get deer in the fields surrounding her house. There is so much for them to eat out there, but on the chance that they venture close to her house and notice the veggies growing in her raised garden beds, I decided to add some sides with metal mesh.

deer in a field

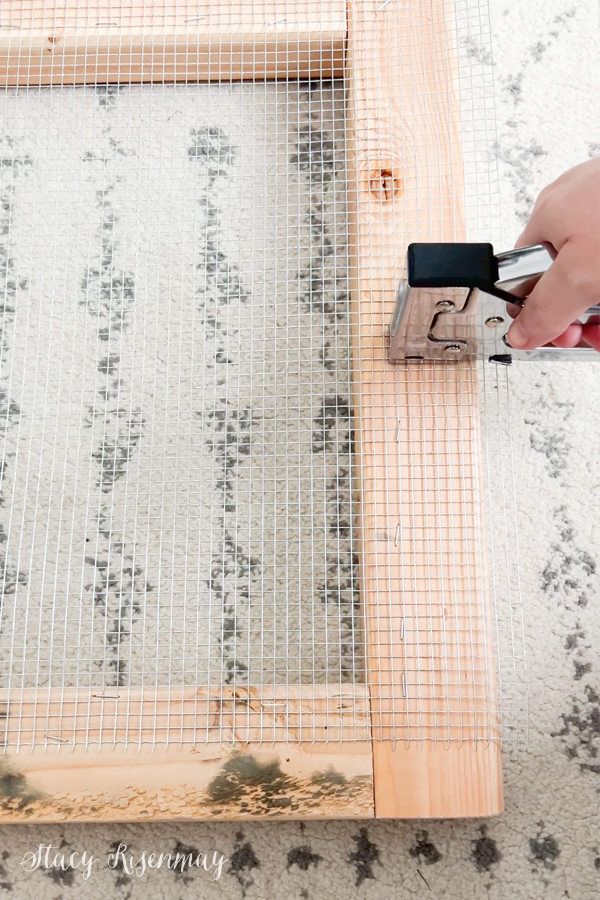
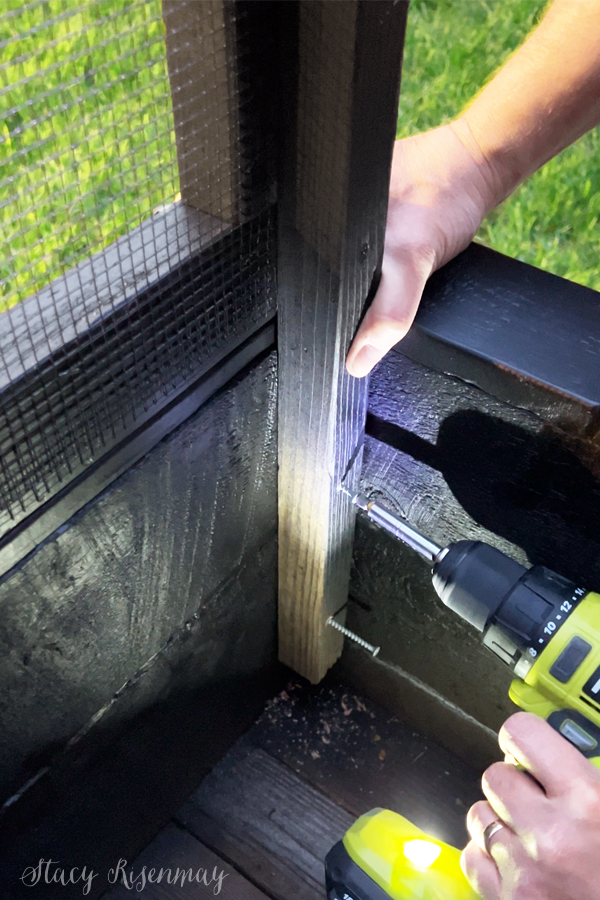
I used 2x3 boards to build the enclosure and stapled hardware cloth to the back sides.

making enclosure walls for garden boxes out of 2x3s and metal mesh

Painting the Raised Garden Beds

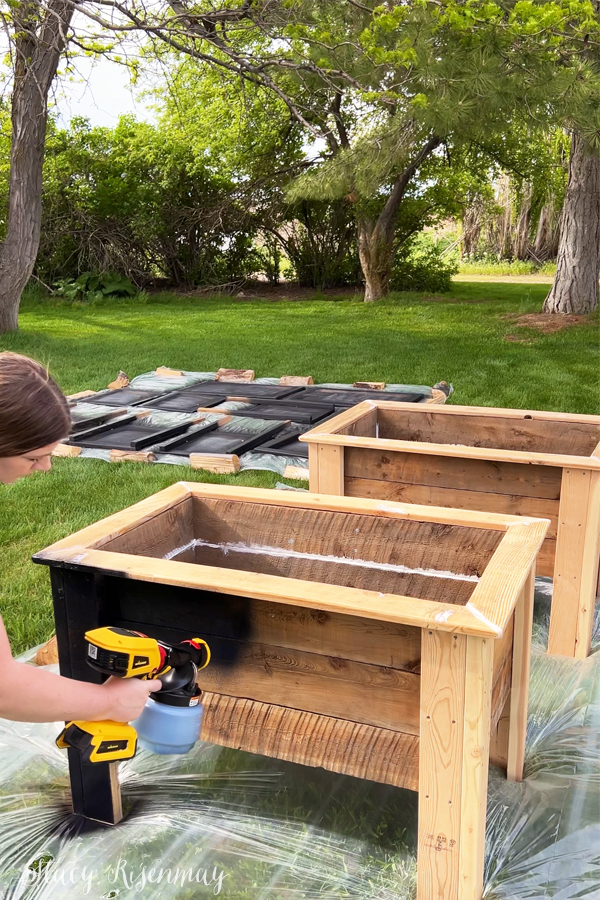
I was so excited to paint these because I had a new sprayer to try out. IT IS CORDLESS! It comes with two batteries and depending on the spray settings, each battery will last 7-20 minutes. The sprayer also comes with two nozzles. One for smaller projects with a fine finish and a larger one for covering more area.

Wagner Flexio 3550 Sprayer is available on Amazon
painting garden boxes black

I decided to paint the planters black because they were a mix of old and new wood and because my mom's house is white with a black roof and black shutters.

I used the small spray nozzle for the enclosure pieces since the boards were skinny and then easily swapped out and used the bigger nozzle for the planter boxes because I knew the old, dry wood would suck up the paint. The fact that the nozzles can detach from the motor makes for easy clean up too!

switching out nozzles on the wagner flexio 3550 sprayer

Once the paint was dry, Shane and I attached the enclosure pieces to the garden boxes. Having the 1x4 trim on the edges ended up really helping because the enclosure pieces rested on them.

adding enclosure to garden boxes

We moved the planters in place. I had leveled the ground (there were big piles of dirt back there covered in weeds) and added a thick layer of bark.

Planting!

We filled the bottom with sticks, pinecones, and some bark before adding several bags of garden soil.

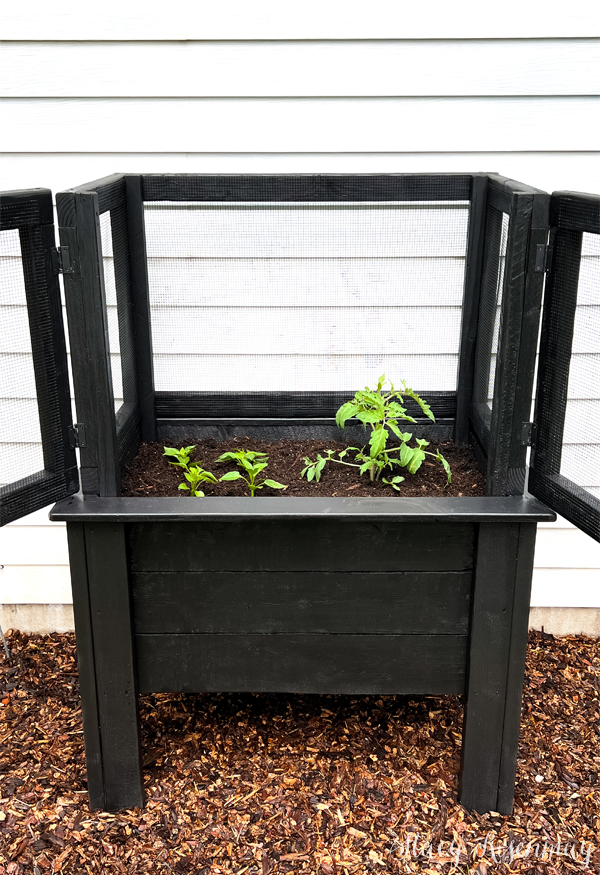
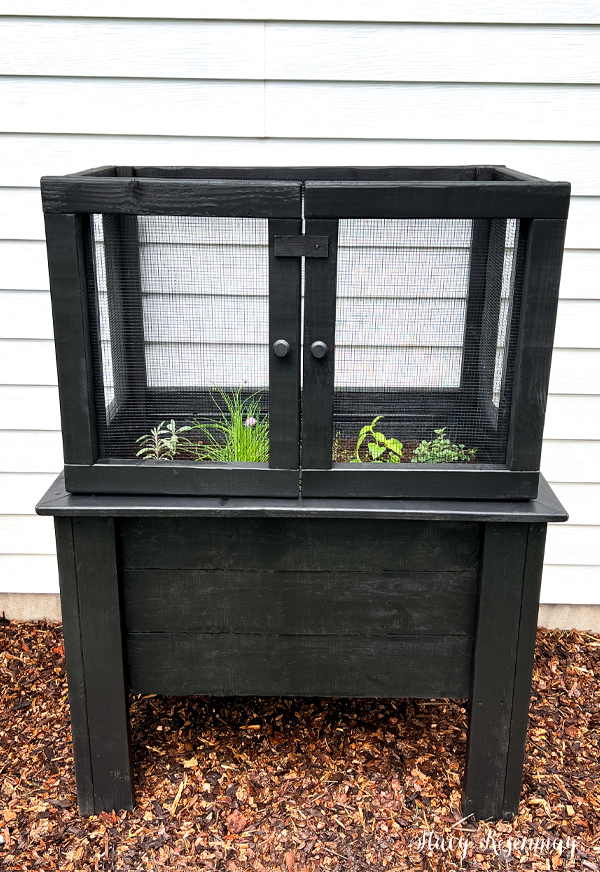
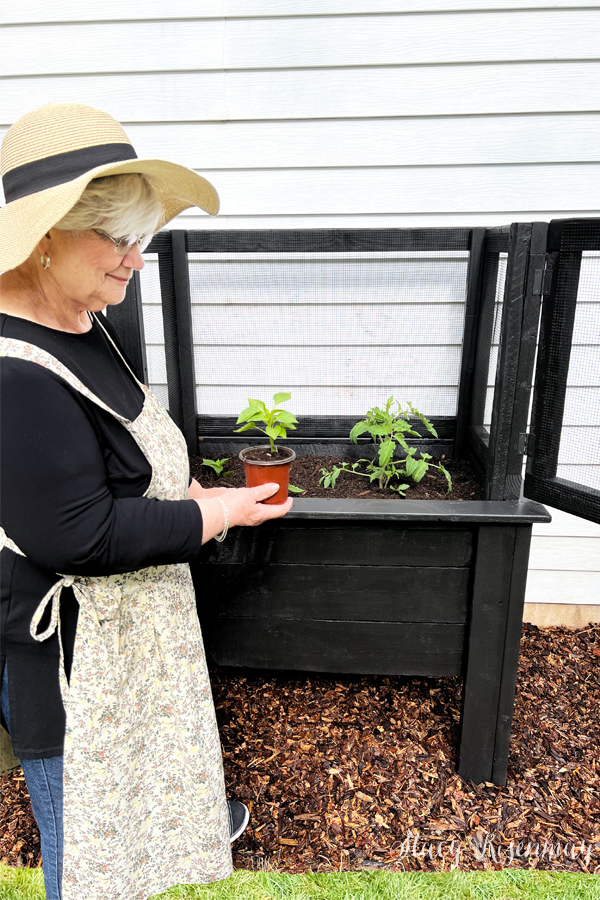
This is when we revealed the finished planters to my mom! She and I got them planted them up. In one garden bed she has a tomato plant and 4 bell peppers. The other one has thyme, oregano, chives, sage, and basil.

planting vegetables in raised garden beds

I can't wait to see them as the plants get bigger and fill to garden beds!

The metal latches I wanted to use were out of stock so we added a temporary wood latch. I am going to add two (top and bottom) to each planter to make it really secure in case a curious deer or two find out about the veggies.

black raised garden beds with enclosure

I also did a poor job photoshopping grass over the few bare spots along the bark. Later this week I will need to reseed the lawn in these areas. But overall, this space is done!

GIVEAWAY!

Wagner has generously offered to giveaway one Cordless Flexio 3550 to a lucky winner. To enter, comment below telling me what you would use the sprayer for first! For a second entry, pin one of the images from this post and comment telling me you did.

You must be at least 18 years old to enter. You must be a resident of the USA to enter. The giveaway will go from May 7, 2024 until May 15, 2024.  The winner will be chosen by random.org and will be notified by email. The winner will have 48 hours to respond before a new winner will be chosen. The shipping of the prize is the responsibility of the company, in this case Wagner.

PIN For Later:

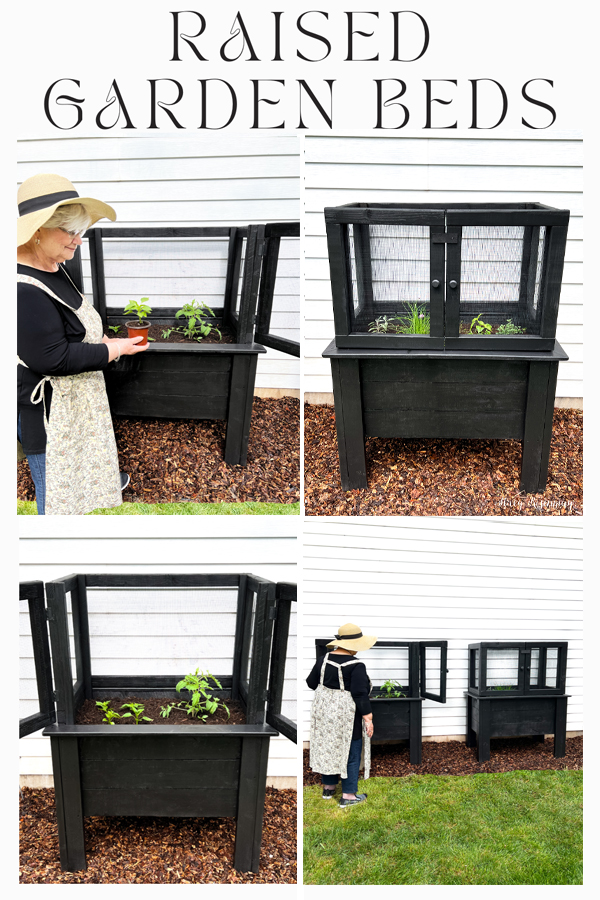
raised garden beds with enclosure
raised garden bed with an enclosure
]]>
https://www.notjustahousewife.net/raised-garden-beds-with-an-enclosure/feed/ 49
5 Creative DIY Drawer Knobs https://www.notjustahousewife.net/5-creative-diy-drawer-knobs/ https://www.notjustahousewife.net/5-creative-diy-drawer-knobs/#respond Thu, 14 Mar 2024 20:54:41 +0000 https://www.notjustahousewife.net/?p=27174

Read More

]]>
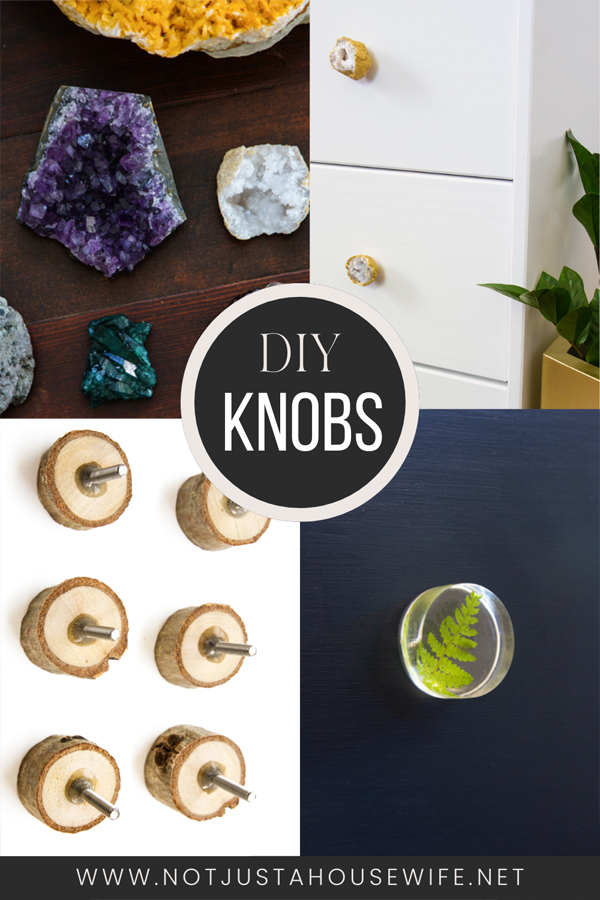
Over the years I have created some fun knobs for our dressers and cabinets. Making your own is an inexpensive way to customize furniture for the space based on your home decor style. Here are some of my favorite unique ideas for DIY drawer knobs! 

This post contains affiliate links 

DIY Drawer Knobs

We all over to see and old piece of furniture get new life with a makeover! It is fun to see it transform with new stain or paint. One part of the makeover that may not get the all. the attention at first, is the hardware. There are TONS of options out there, but have you ever considered making your own?

Supplies:

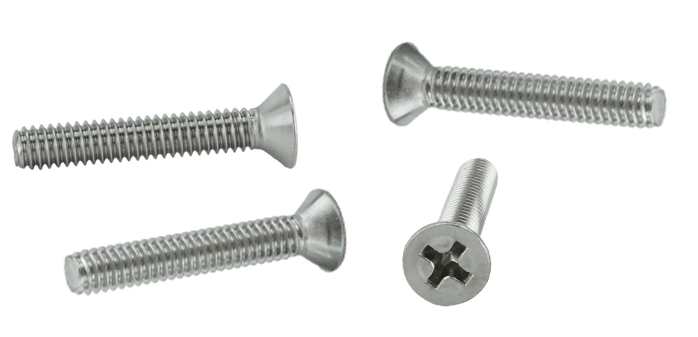
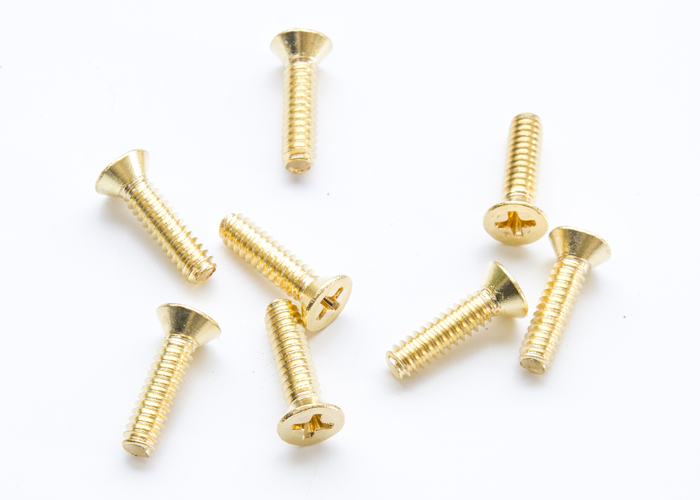
#8-32 Machine Screws (Flat Head) 

Hex Machine Screw Nut or Cap Nut (Optional)

2 Part Epoxy Glue

Drill & Drill Bit

Let's Talk About Screws

The flat heads helps when gluing.

The standard size screw for cabinet hardware is a #8-32 screw in whatever length is needed. If you are using existing screw holes in the cabinet door or drawer front, you will need to verify that it is in fact the right size. Some knobs get screwed part way into the drawer front while others go all the way through. It depends on the thickness of the drawer or cabinet door and they design of the original knob. If the hole goes all the way through, you will need to have the screw a bit longer than the depth of the wood and then attach a nut on the end. This is the most secure way to keep the DIY knob attached. If you are adding new holes, you can decide which size or type of screw you use. 

Wood Slices

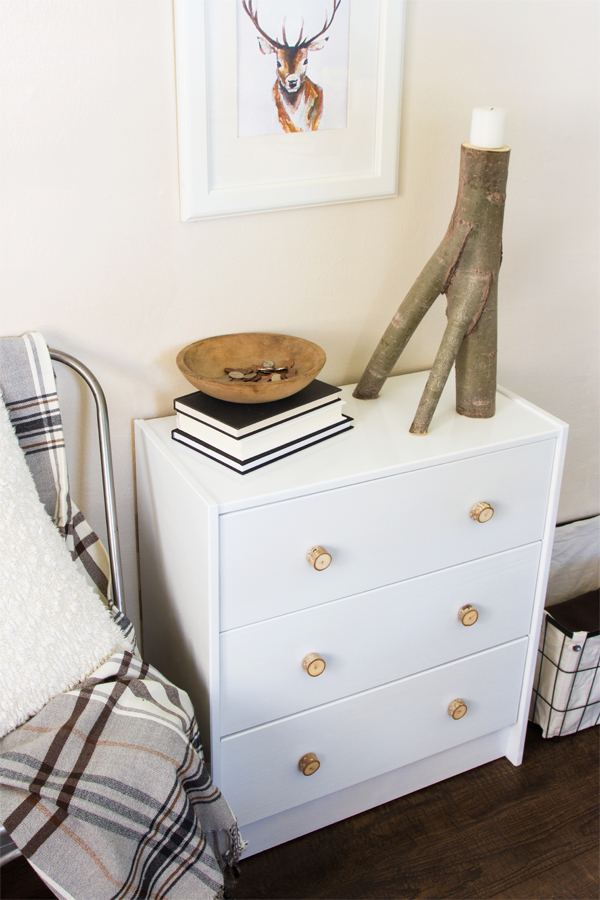
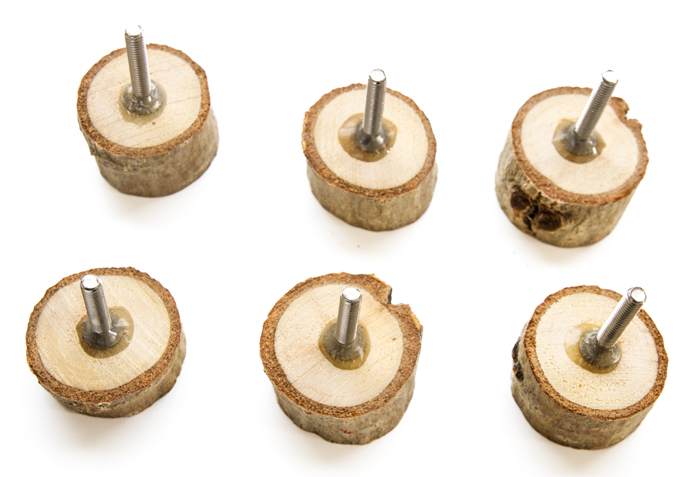
I made these wood knobs for my son's mountain themed bedroom. They are perfect for a rustic feel. You could even use driftwood for a more beachy vibe. The species of wood used, the size and shape, will all make for unique knobs! 

The first thing I did was grab some branches from our yard that had been trimmed off our tree. I used my miter saw to cut uniform pieces that were about and inch, or inch and a half across and deep. A miter saw is the easiest way to cut branches, but if you don't have access to one, you can use a hand saw, or jigsaw as well. 

I sanded then a bit with a fine grit sandpaper to make sure there were no rough parts. You could seal them with poly if you wanted.

I used 2 part epoxy to attach the machine screws to the back of the wood slice. I prefer to get screws with a tapered, flat head so they lay better while the glue dries. 

These lasted on my son's dresser for few years before a couple broke. I think if I were to make these again, I would have drilled a shallow hole in the back of the wood slice for the glue and screw head to fit in. 

Geodes

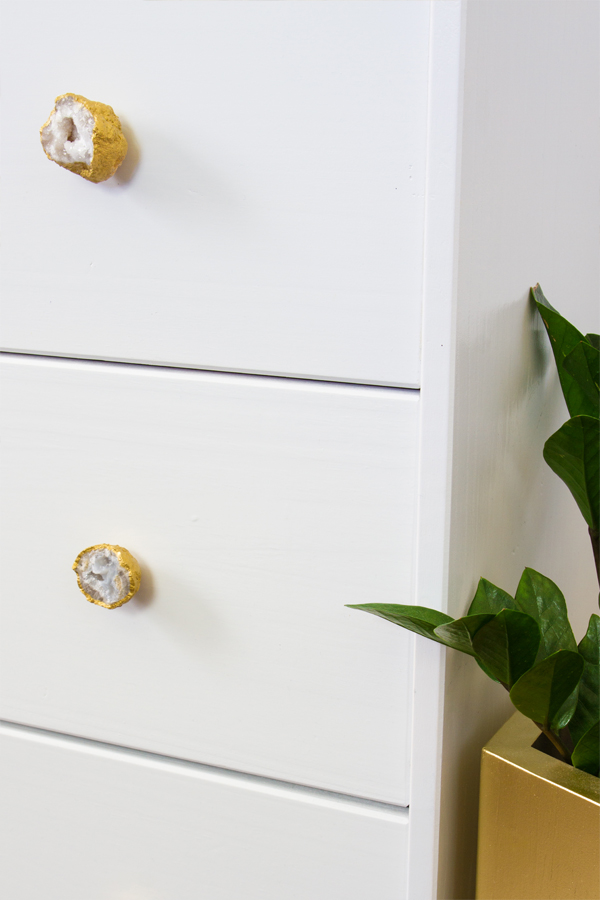
​When my boys were little we used to order the "Break Your Own" geodes online and then have fun breaking them open with hammers. They would get so excited to see the crystals growing inside! Because of this, I had a lot of geodes that were all roughly the same size and shape. I decided to make some truly beautiful drawer knobs for a friend's dresser. 

You could use just about any gem, mineral, geode, or rock. Think of how stunning a piece of furniture could be with a combination of colors!

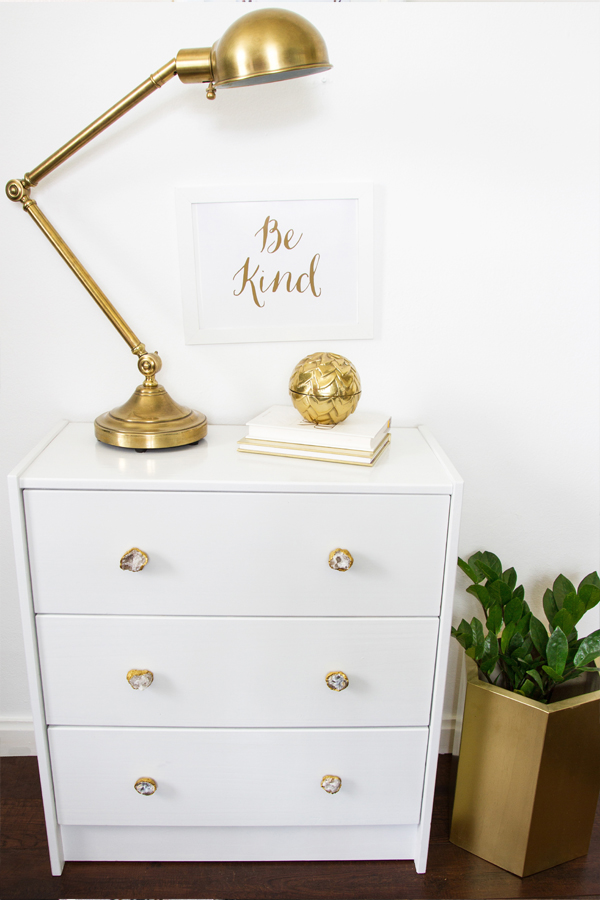
I decided to pain the plain, rough exterior of the geodes to be gold. I even bought gold machine screws! So once the 2 part epoxy was dry, I painted them so that the glue would blend in and look like it was part of the geode.

I love the way they look against the all white dresser! 

Rocks

You don't need a fancy crystal or gem. You can use regular rocks as well! River rock or smooth rocks from the beach are perfect for this. When we visit a new place on vacation, we like to take a little something home with us to remember the trip. Sometimes it is a bit of sand, shells, or rocks. Whether you are buying river stones or you find rocks, they are a good item to use for your new knobs. 

I had some larger rocks that were so smooth and pretty that I also decided to create wall hooks with them! I followed the same steps, except I used 4 inch long wood screws instead. 

The wall hooks needed to stick out from the wall a bit. I also cut some metal pipe in 3 inch long pieces that slipped over the screw and served as a spacer. It also looked better than a skinny screw sticking out from the wall. 

Resin

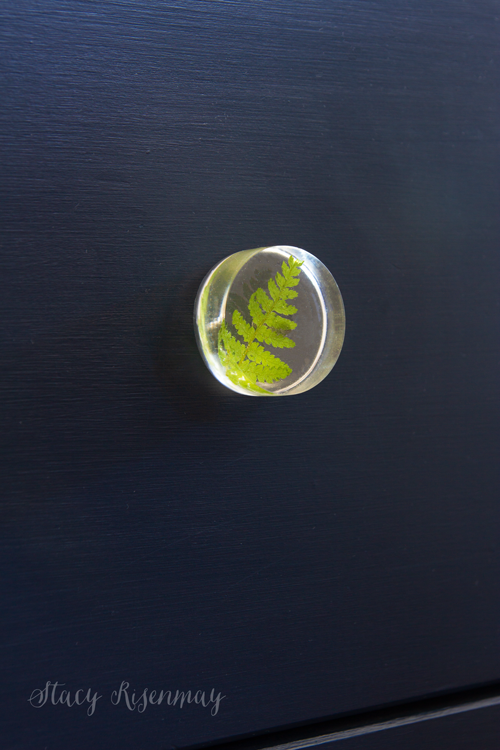
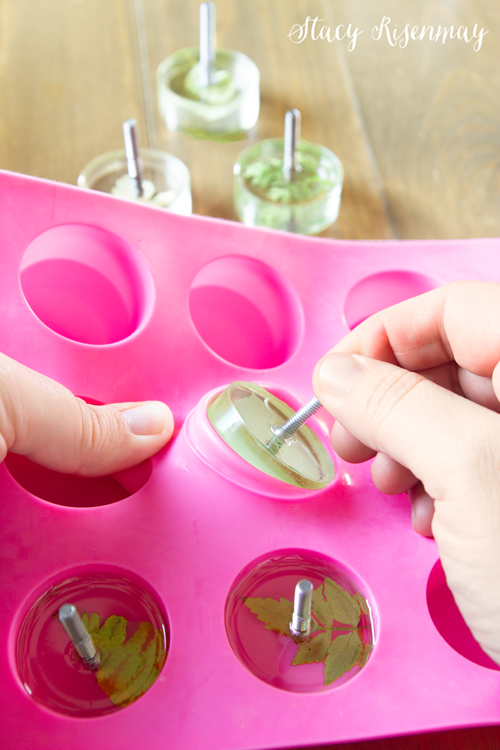
Several years ago I shared these resin DIY knobs. I had them on another dresser in our home and I loved how the green of the leaves looked against the dark blue paint of the dresser.

For the full tutorial on for these pressed leaf resin knobs, you can read THIS POST

Shells

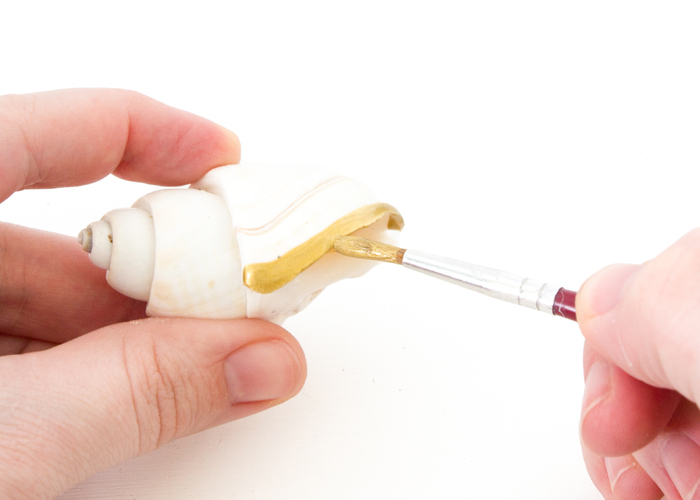
Shells are another fun thing to collect when traveling. I had left over gold screws from the geodes so I added a little gold detail to them. 

I made these shell knobs using the same 2 part epoxy.

Other DIY Dresser Knob Ideas

The possibilities are almost endless when it comes to creating your own DIY version of cabinet knobs or dresser knobs. You could use small plastic toys, small ceramic knick knacks collected over the years, large buttons, coins, or napkin rings. Whether you buy them from the dollar store, antique store, or find them on a nature walk, making your own DIY drawer knobs is a great way to add some uniqueness to your space in a subtle way. You can add so much personality to a piece with these little touches!

What are some DIY ideas for knobs that you can think of? Have you ever made your own knobs before? 

]]>
https://www.notjustahousewife.net/5-creative-diy-drawer-knobs/feed/ 0
Adding Texture To A Planter https://www.notjustahousewife.net/adding-texture-to-a-planter/ https://www.notjustahousewife.net/adding-texture-to-a-planter/#respond Mon, 26 Feb 2024 22:02:10 +0000 https://www.notjustahousewife.net/?p=27108

Read More

]]>
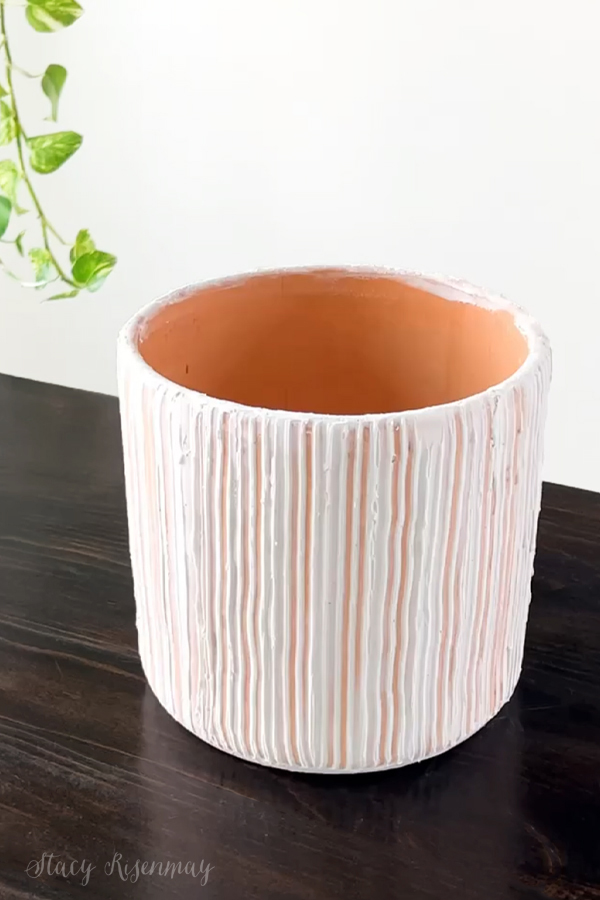
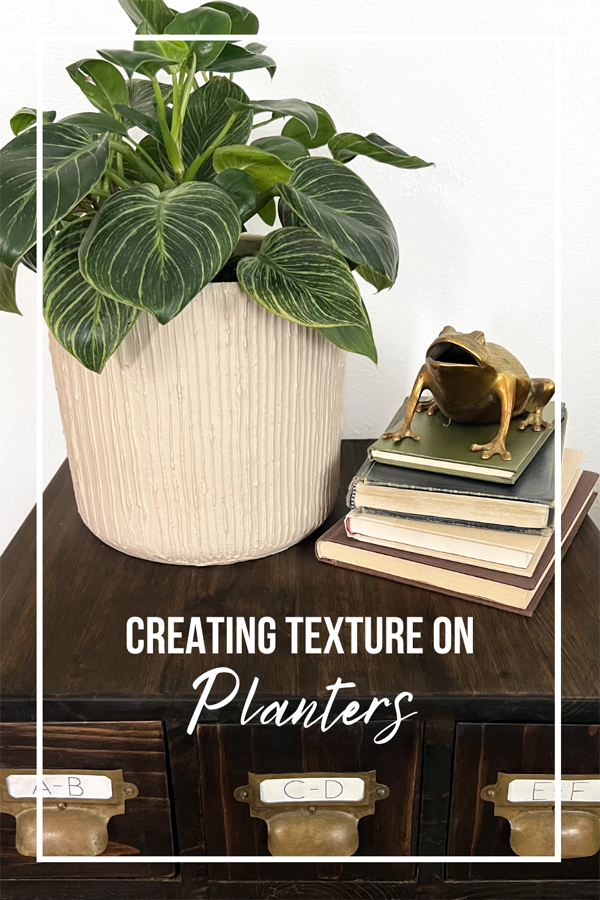
I will admit I have more planters than I should. More planters than even plants. But it is nice when you have a plant that needs to be repotted, to have options. I had a couple of terracotta pots lying around and while I loved the shape, they were a bit plain. I decided to add some texture. Adding texture to your space is a great way to add visual interest. Here is how I added some fun texture to these planters!

Choosing A Medium

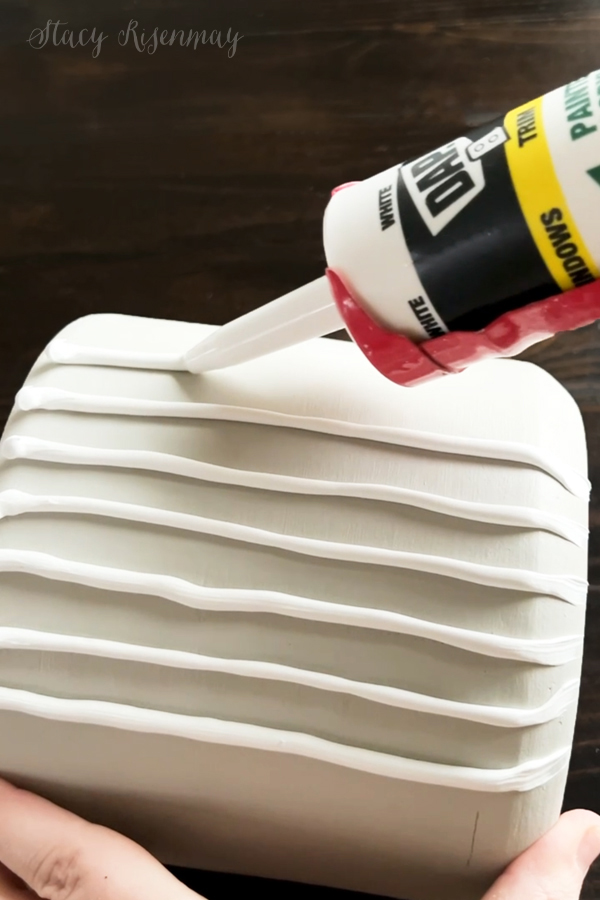
I have seen a lot of videos on social media of people using joint compound (drywall mud) to create textured art pieces for their walls. While it would work for an art piece, I don't think it would have been a good choice for a pot that gets handled often and gets wet. After weighing the options, I decided to use paintable caulk.

Adding Texture To A Planter

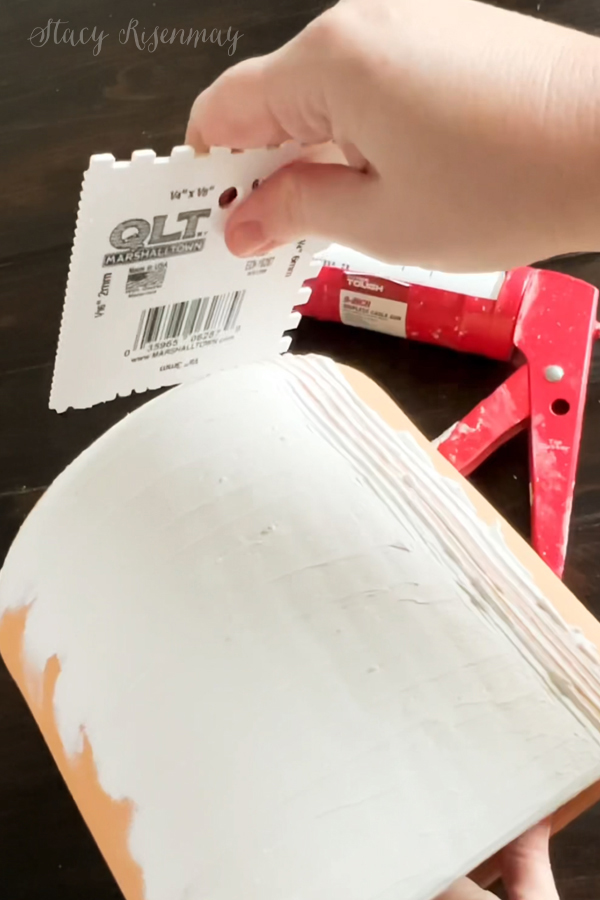
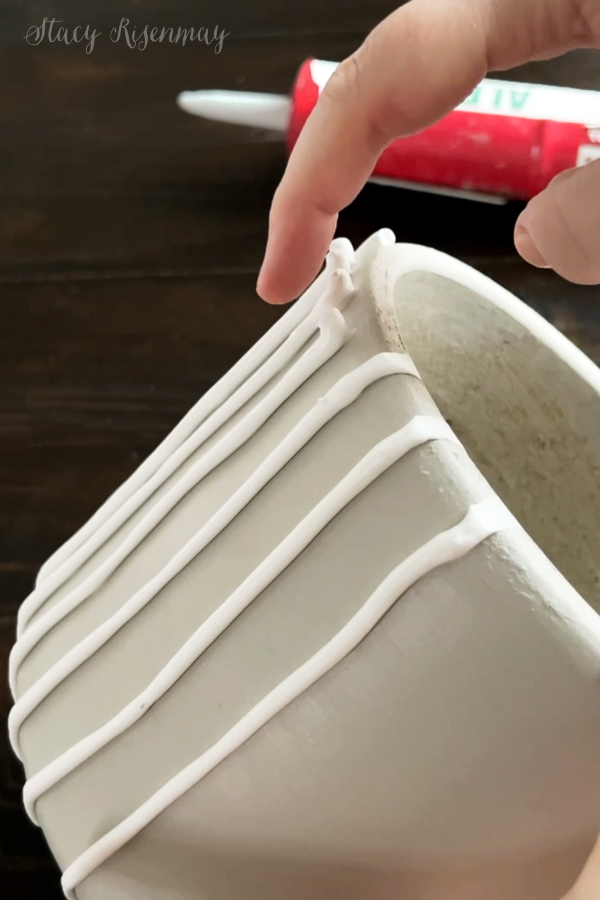
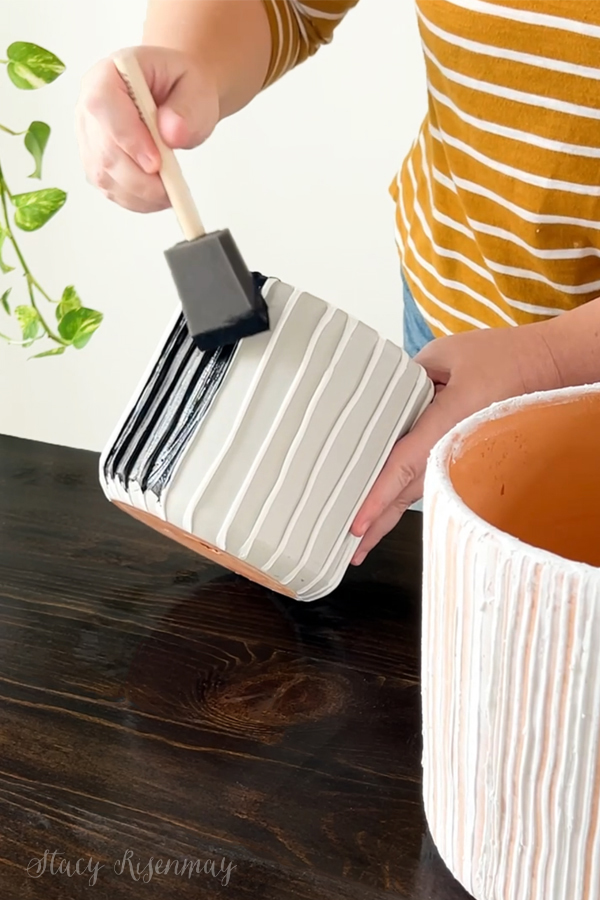
I spread the caulk around, only doing a small section at a time. Then I used a notched tool to create the lines. I played around with all the sizes but like the smaller notches best. The caulk that got removed by the tool as it scraped, was then added back on the pot for the next section so none was wasted.

You can really have fun with this and use all sorts of things to create the texture. You could use a fork, wire brush, a sponge, or even leaves.

I love projects where you can be creative and you don't have to worry about everything being perfect.

You can use the caulk to make all sorts of designs! I made some lines on the second pot but you could also do dots, squiggles, or even a face. Have fun with it!

Once the caulk was completely dry, it was time to paint. Because caulk still has some flexibility to it even when dry, I don't suggest using spray paint.

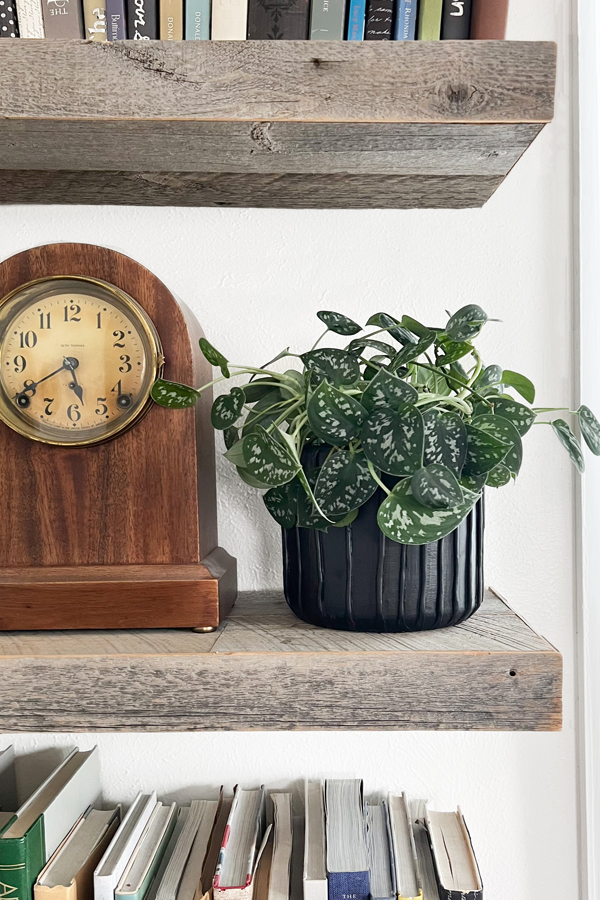
I love the pots even more now! They look great filled with the plants that needed a bigger home.

Pin For Later:

]]>
https://www.notjustahousewife.net/adding-texture-to-a-planter/feed/ 0
DIY Log Candle Holder (+Planter!) https://www.notjustahousewife.net/diy-log-candle-holder/ https://www.notjustahousewife.net/diy-log-candle-holder/#respond Thu, 22 Feb 2024 12:30:00 +0000 https://www.notjustahousewife.net/?p=27103

Read More

]]>
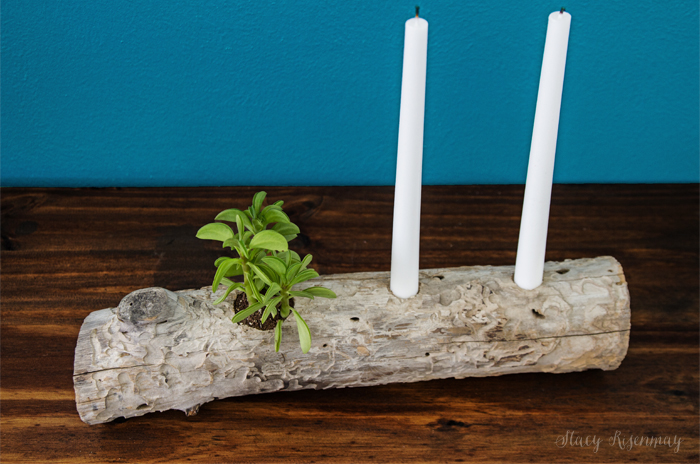
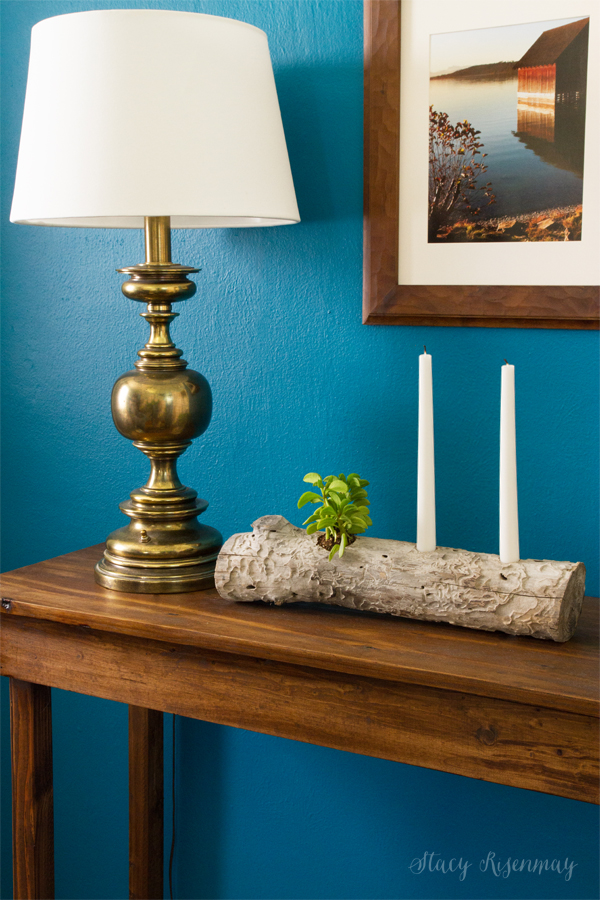
Are you looking for a unique decor item to place on an entry table or maybe to use as a centerpiece on your dining room table? Do you love adding natural elements into your home? I have the perfect project for you! Not only is it very inexpensive, is an easy project to make. This DIY log candle holder also functions as a planter! So go foraging in the woods or grab some unused firewood, because we are about to make a random log look better than it ever has!

DIY Log Candle Holder (+Planter!)

Let's make some natural candle holders that will be a great addition to your cozy home. First you just need to gather a few supplies. You probably already have them all in or around your home.

Supplies:

  • Log
  • Drill
  • Spade Bit, or Forstner Bit (Bore Bit)
  • Small Plant
  • Candles

Step 1: Choose Log

I went into our backyard to our wood pile and got a log that the bark had already fallen off. You can certainly use one with bark. The type of wood (tree) will also change the look of this project. You could go with something straight and colunar, or pick a twisted, gnarled branch. Birch logs with its black and white markings would be beautiful too! The natural beauty of each log makes each of these handmade pieces unique! 

I liked how my piece had insect burrowing lines along it. Whichever type or size of log you choose to use, make sure to clean it well before starting. If it is too long or has uneven ends, cut the ends with a saw or sand the rough edges.

Depending on your log, you may need to saw part of the bottom off to create a flat surface. A flat bottom will ensure that it doesn't roll. Obviously you don't want something that is on fire to be able to tip. Wood candle holders should be sturdy. You could also use battery operated candles if your log isn't as stable as you would like. 

*Note: If your log or branch has recently been cut down and is fresh (wet) wood, it may need to dry out before being used for projects. 

Step 2: Drill Holes

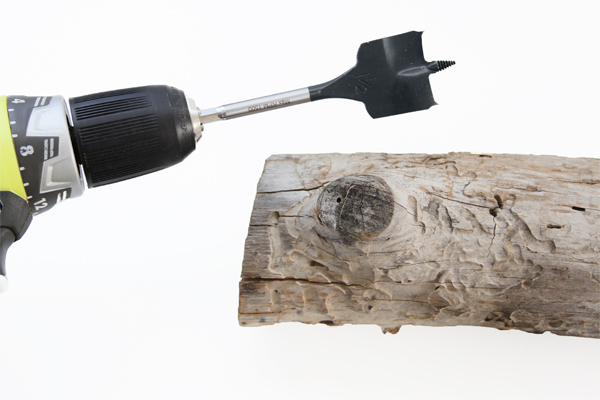
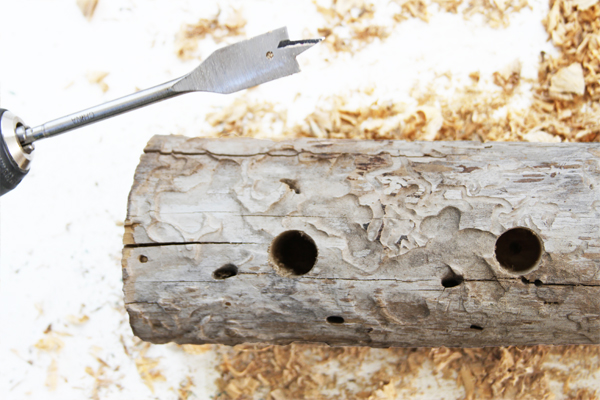
Once your log is clean and dry, you will start by drilling holes for the candles. Choose which candles you will use so you know which size holes to drill. I chose to use taper candles but you could use tea lights candles or any type of smaller pillar candles. I chose a large drill bit that was the same diameter as the base of the candles. You could also use a drill press if you have access to one. 

I also chose to do 2 candles but if you make a longer candle holder, you can add as many as you want. It would be stunning to have one that went the length of a dining table! 

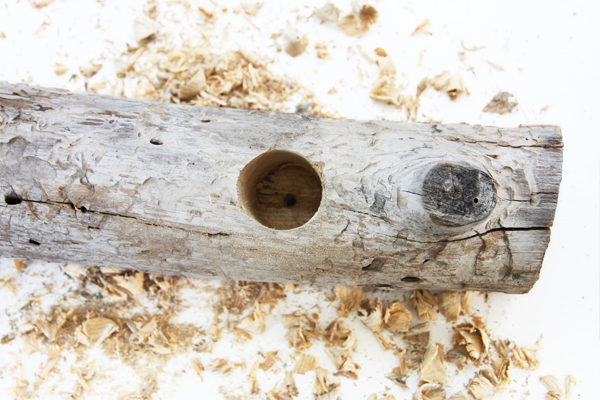
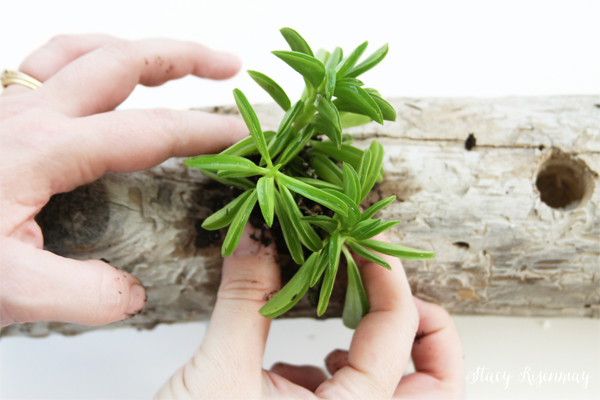
Then you will need to drill a larger hole for the plant to go in. I used a paddle bit but a bore bit also works. You will need one that is at minimum 2" wide. The bigger the better since you will need to fit dirt and a small plant in it. 


The last step is the add a plant. The best type of plants for a small planter like this would be succulents. They like to dry out in between waterings and are less fussy than small terrarium plants like ferns. But if you were creating this log centerpiece for a wedding or other event and just needed them to be planted for a short period, ferns would look beautiful in these wooden candle holders. 

If it will be in your home as a more permanent part of your decor, then something more waterwise is better and will last for a long time before needing to be repotted. You can find succulents that are already in 2" and 3" pots at your local nursery or online at Amazon

Now all that is left is to light candles! I love adding in bits of nature into my home like this natural wood and some greenery. These rustic candle holders are perfect for that! I love that you can take a scrap piece of wood and give it new life. This simple DIY project is one of my favorites from my book, Natural Accents. 

Create your own natural piece of home decor by creating your own rustic wood candle holders or try some of these other DIY projects:

]]>
https://www.notjustahousewife.net/diy-log-candle-holder/feed/ 0
Building Hexagon Planters https://www.notjustahousewife.net/hexagon-planters/ https://www.notjustahousewife.net/hexagon-planters/#comments Wed, 21 Feb 2024 05:36:02 +0000 http://www.notjustahousewife.net/?p=13618

Read More

]]>
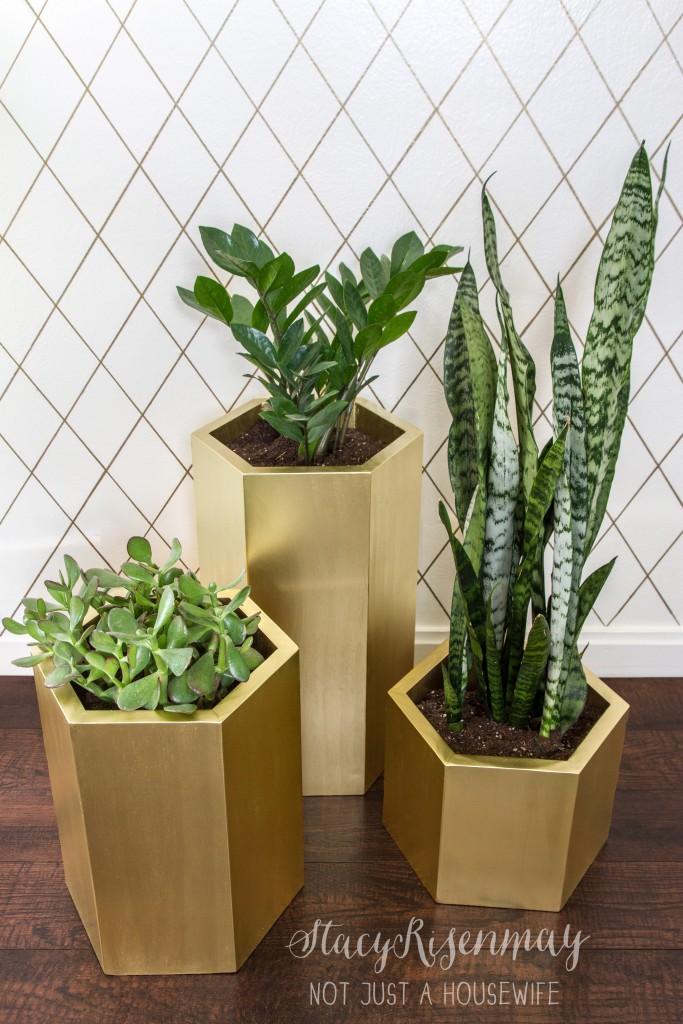
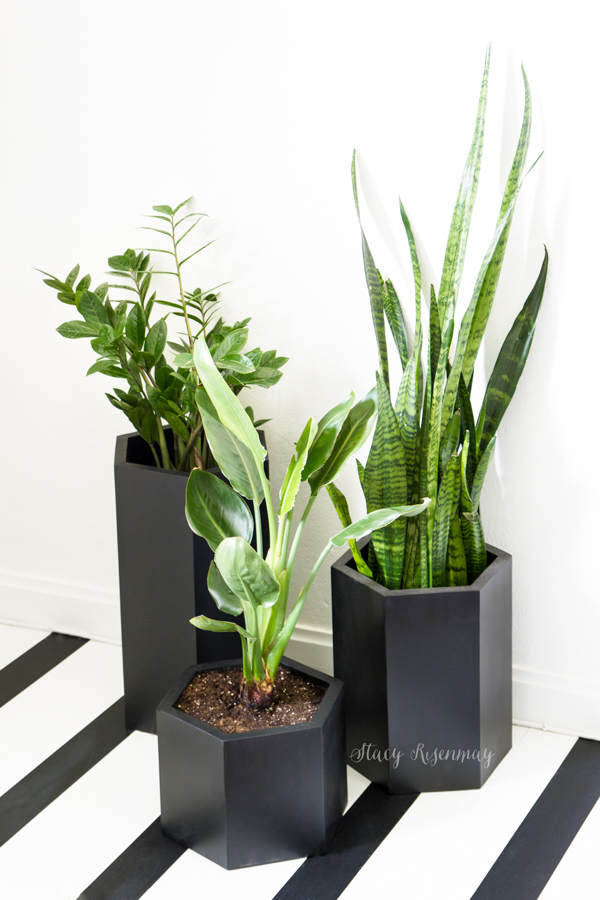
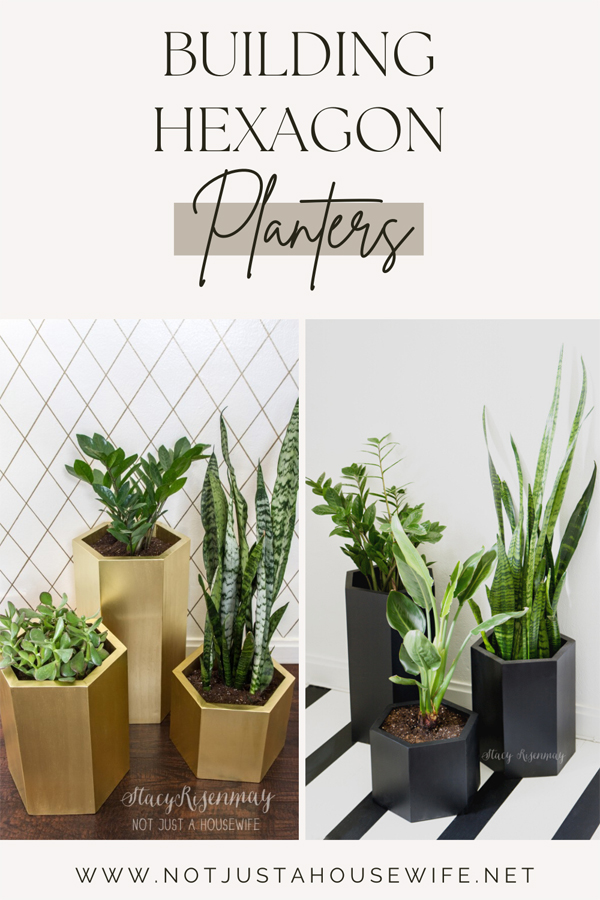
You may recognize these hexagon planters if you have been a long time reader. They were originally featured in my book, Natural Accents. I have decided to share the tutorial on how to build a hexagon planter here on my blog. 

gold hexagon planters

Hexagon Planter Tutorial

This is a fun woodworking project that only requires a miter saw, a table saw, and brad nailer.  And if you made a short, small planter only, you could get away with only using a miter saw and not the table saw. You can choose to stain it or paint it. Customize the sizes too! Use these angles to create other hexagon projects as well like a hexagon picture frame, centerpieces, or a hexagon wall planter. 

Supplies for Hexagon Planter

  • Measuring Tape
  • 1x6 Boards
  • Miter Saw
  • Table Saw
  • Wood Glue
  • Nail Gun
  • Pencil
  • Drill with Large Drill Bit
  • Plywood

Step 1:

I chose to use pine boards, but you could also use cedar boards. Especially if these planters will be in an outdoor space. Cut your boards to the length you want. The length you cut them will determine how tall they are. You will need 6 boards per planter. My planters were 8 inches, 13 inches, and 18 inches tall. 

Step 2:

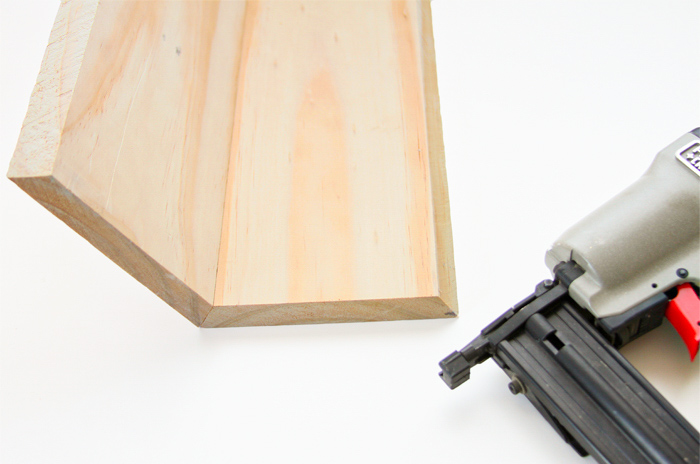
Once they are all cut to length, you will need to make an angled cut on each of the long sides. Set your blade to 30 degrees. 

Step 3:

Add wood a thin layer of wood glue to the edges that are to be joined. Only use a little bit of wood glue so it doesn't ooze out as you attach them. If it does, simply wipe it off with a wet rag.

Then, using a nailer, attach the boards together until you have them all nailed together to form the hexagon shape. 

Step 4:

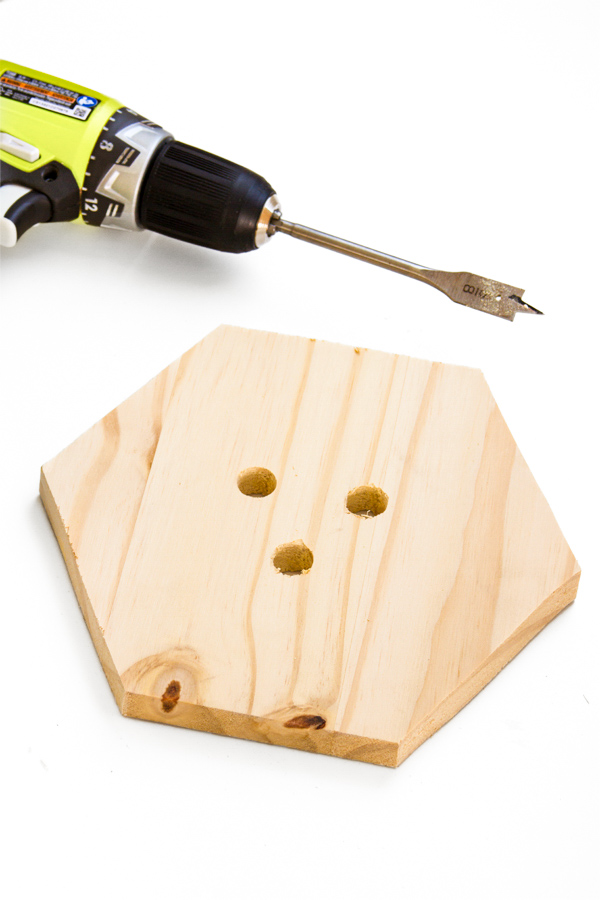
To create a bottom of the planter, place the hexagon onto a scrap piece of plywood (or any other wood that is wide enough). Then trace the inside of the planter onto the board. Use a miter saw or jigsaw to cut out the hexagon shape.

Step 5:

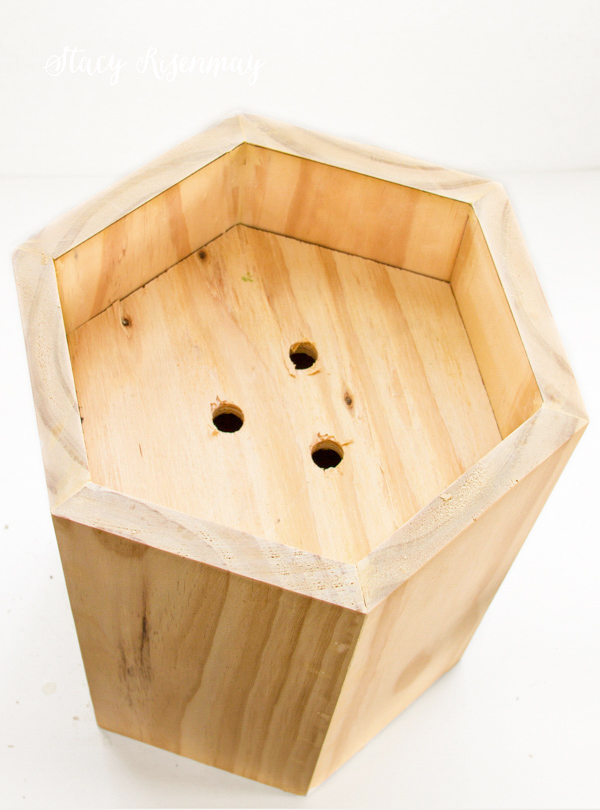
Drill at least one large hole in the bottom board for drainage. Drainage holes are important not only for the health of the plant, but also so the wood doesn't rot. 

Step 6:

Attach the bottom to the planter using wood glue and brand nails. I chose to attach the bottom higher up into the planter so I could have a bowl or something to catch any water that may drain out of the planter. 

*If you are using this as a catch pot (as in you are not adding soil directly to this planter), you can skip the drainage hole step. Simply add a liner or bowl to the inside of the planter before you add your plant inside with its plastic pot. You will need to add the bottom piece of the planter high enough up into the planter so it isn't too deep for the plastic pots. 

The planter is upside down in this photo. This is showing how high off the ground I added the bottom piece so I could place a bowl beneath it.

Step 6:

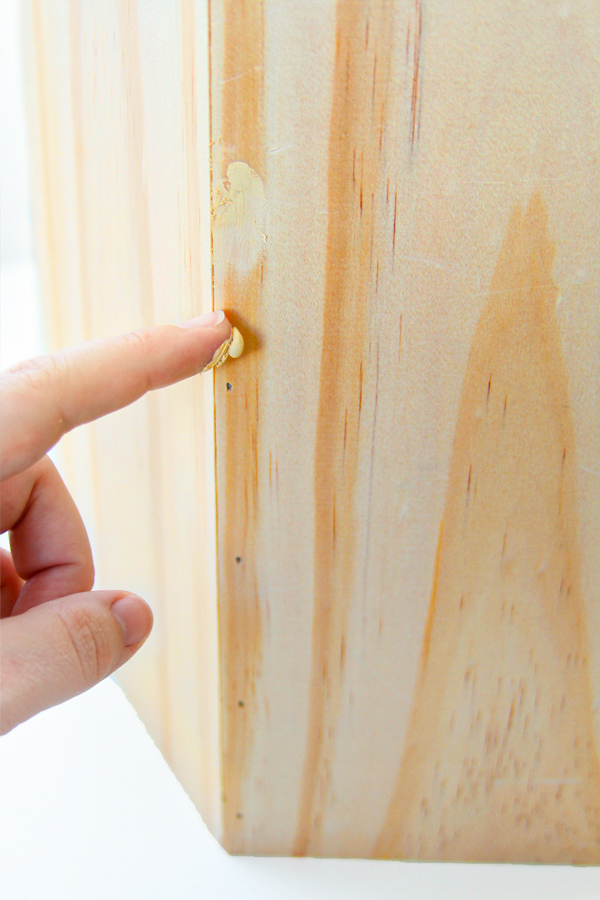
After it is all assembled, fill the nail holes with a stainable, paintable putty. Wait for it to harden, and then sand smooth. 

Step 7:

Now you are ready to paint or stain! I first chose gold paint for mine, but later decided to go with black since my office decor changed. They look great by themselves or grouped together. 

Customized planters are a great way to add something unique to your space. Whether you use these for houseplants or outdoor plants, they are a fun addition to your home. 

PIN For Later:

Click The Images To See These Other Planters:
]]>
https://www.notjustahousewife.net/hexagon-planters/feed/ 27
White & Gold Valentine Decor {Wood Burned Vase} https://www.notjustahousewife.net/white-gold-valentine-decor-wood-burned-vase/ https://www.notjustahousewife.net/white-gold-valentine-decor-wood-burned-vase/#comments Thu, 15 Feb 2024 01:31:56 +0000 https://www.notjustahousewife.net/?p=27045

Read More

]]>
I know Valentine's Day is one of those holidays where you either love it or hate it, but I love to decorate for this holiday. During the long winter days, it is nice to have an excuse to have fresh flowers around and eat chocolate. This year I decided to go with white & gold Valentine decor instead of the traditional pink and red like last year.

White & Gold Valentine Decor

Since I recently painted my fireplace green, I wanted to see how it would look with a more neutral looking color scheme.

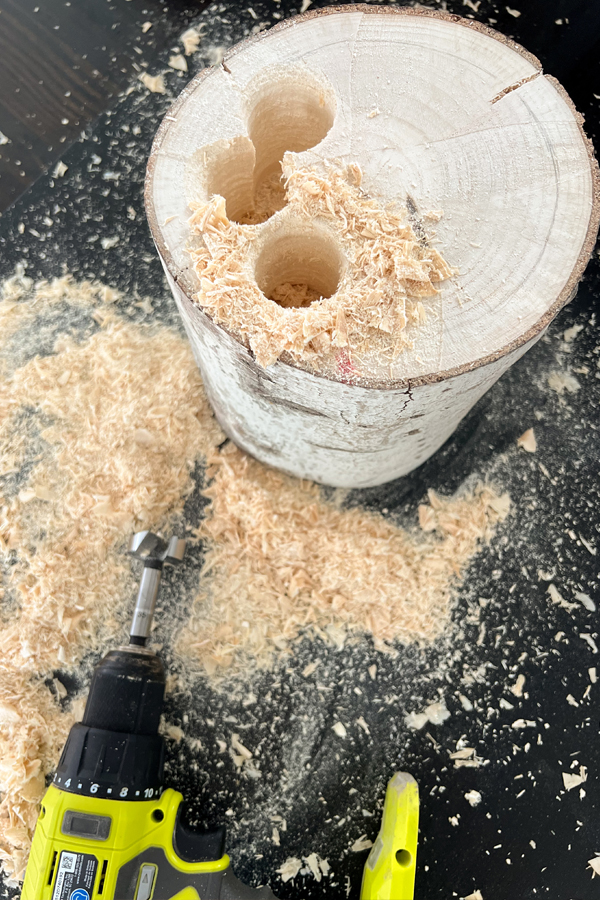
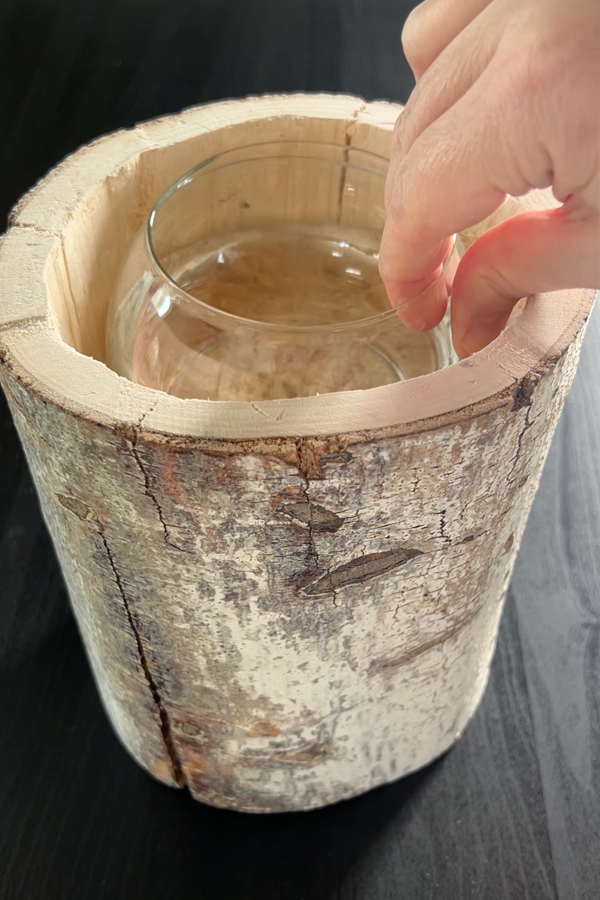
I loved the wood burned candlesticks from last year so much I decided to make a vase! I had this beautiful tree stump in my garage that had been drying out for over a year. It was ready to hollow out. Shane and I used bore bits to drill out the majority of the wood.

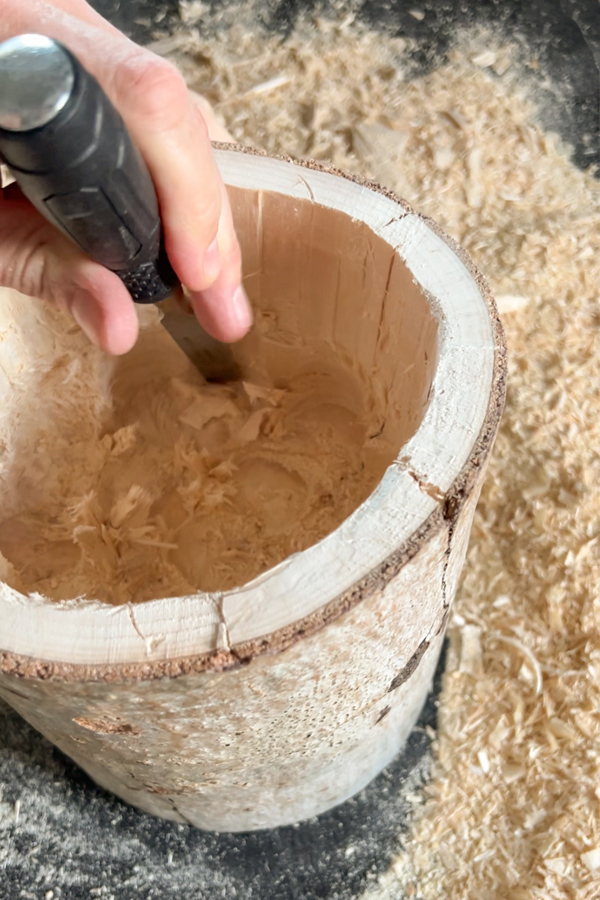
The rest we were able to chisel out.

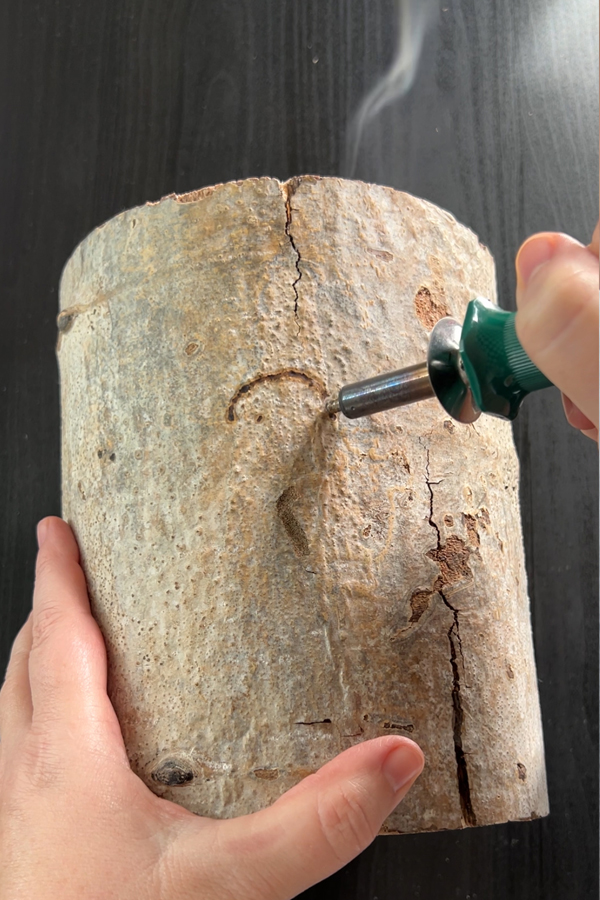
Once it was hollowed out as far as we wanted, I got to wood burning the heart and initials into the side of the stump.

In order to use it as a vase, you will need to add a water tight container. I had a vase that worked perfectly!

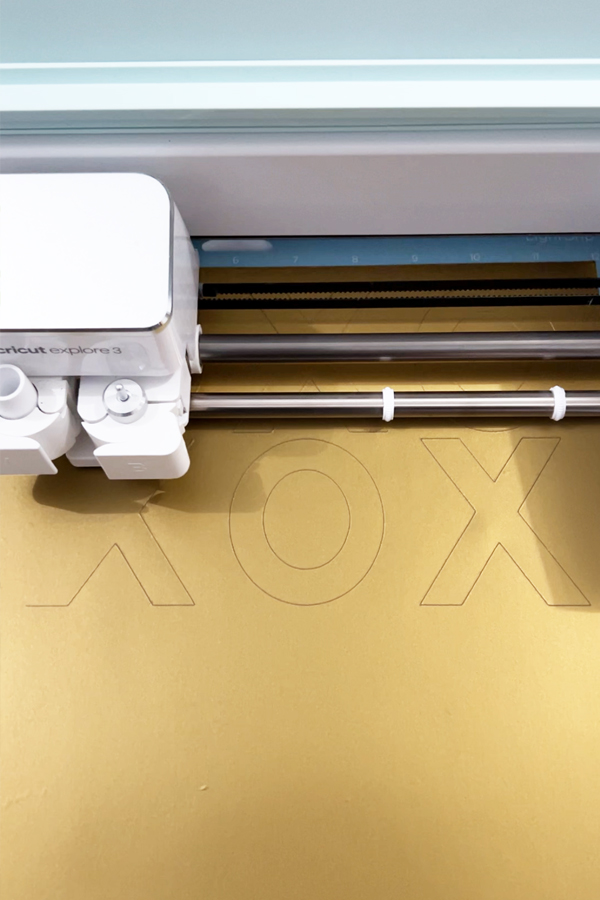
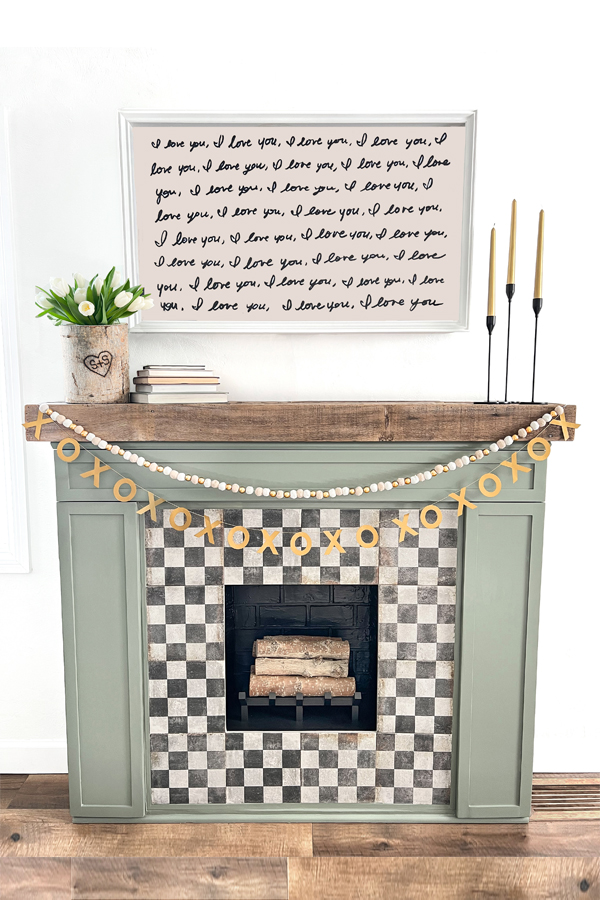
I cut out some Xs and Os out of gold cardstock so that I could make a garland. They were 3 inches tall which ended up being the perfect size! I cut out 16 per sheet (2 sheets) and had some left over.

I glued them to a string about 2 inches apart from each other. The whole thing ended up being about 8 feet long.

I added the X & O garland to the mantel along with a pompom & bead garland I got from Amazon.

Some art and gold candles completed the look! I love how the vase looks with fresh tulips.

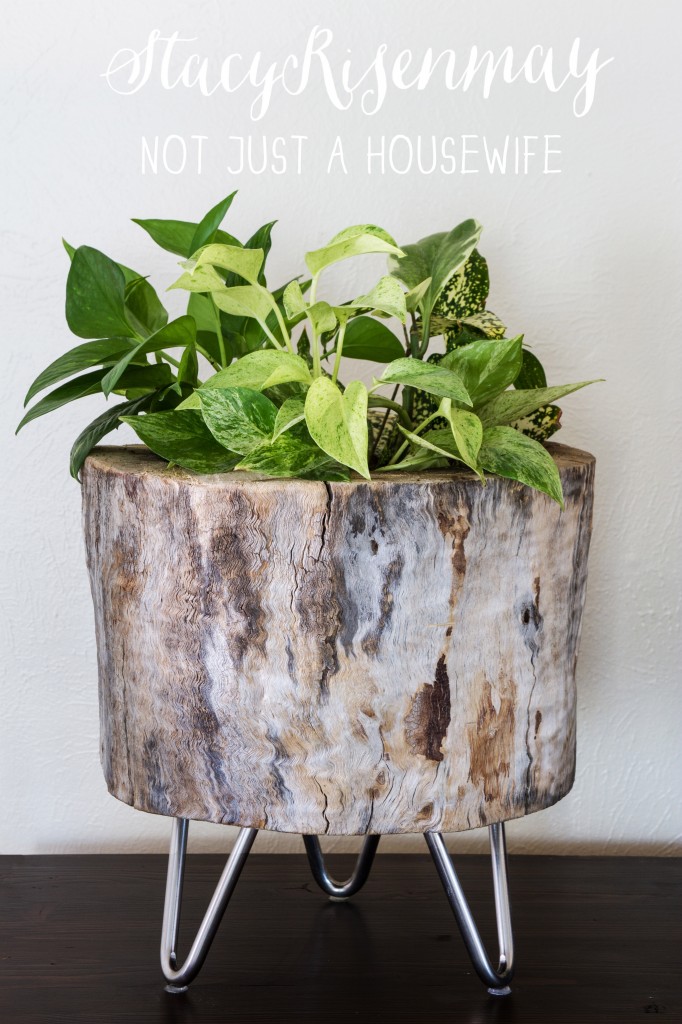
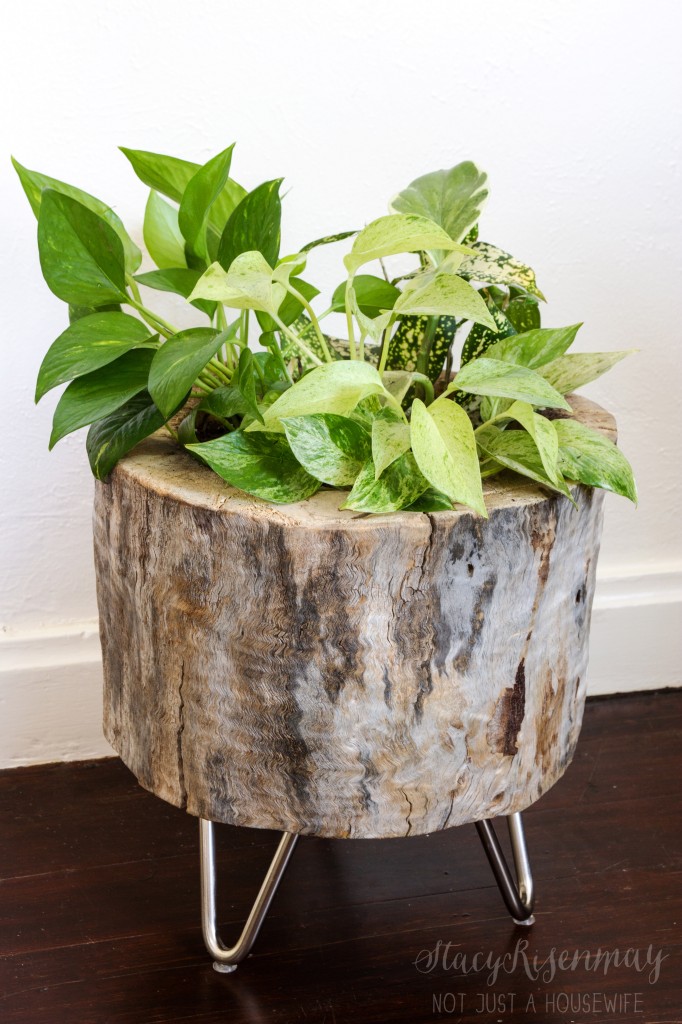
You can also use the stump as a planter. Remember the first time I hollowed out a tree stump? I love that original version too with its hairpin legs.

Do you decorate for Valentines Day? Are you team "Red & Pink" or team "Neutrals"?

Pin For Later:

]]>
https://www.notjustahousewife.net/white-gold-valentine-decor-wood-burned-vase/feed/ 2
Steam Cleaning FAQ: Everything You Need To Know! https://www.notjustahousewife.net/steam-cleaning-faq-everything-you-need-to-know/ https://www.notjustahousewife.net/steam-cleaning-faq-everything-you-need-to-know/#comments Mon, 29 Jan 2024 07:12:20 +0000 https://www.notjustahousewife.net/?p=27014

Read More

]]>
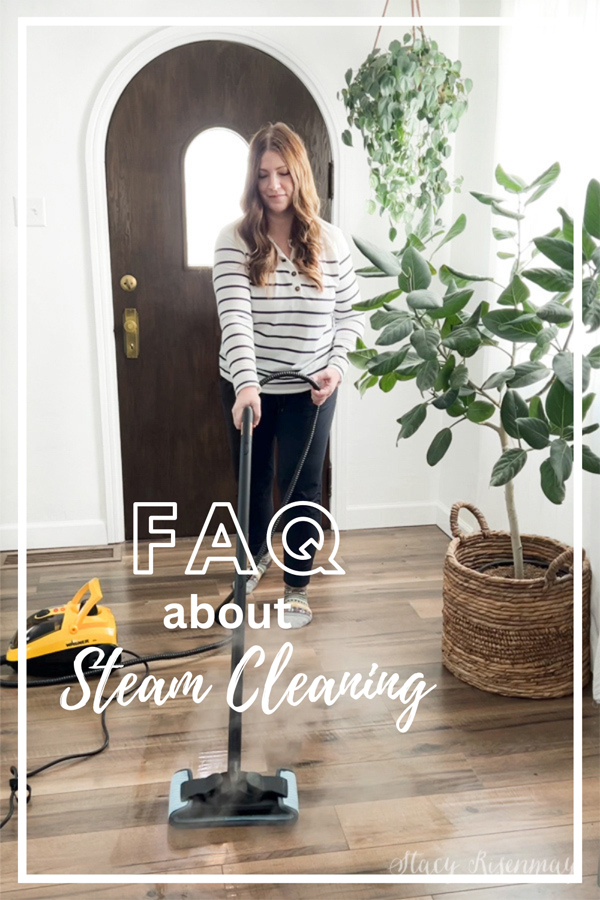
I've been using a steam cleaner for over a decade now and occasionally share posts about it here on the blog. Over the years I have been asked lots of questions about steam cleaning so I thought I would address the most commonly asked ones. Here are the steam cleaning FAQ. Everything you need to know about cleaning your home with steam!

This post is sponsored by Wagner but the thoughts and opinions are 100% my own!

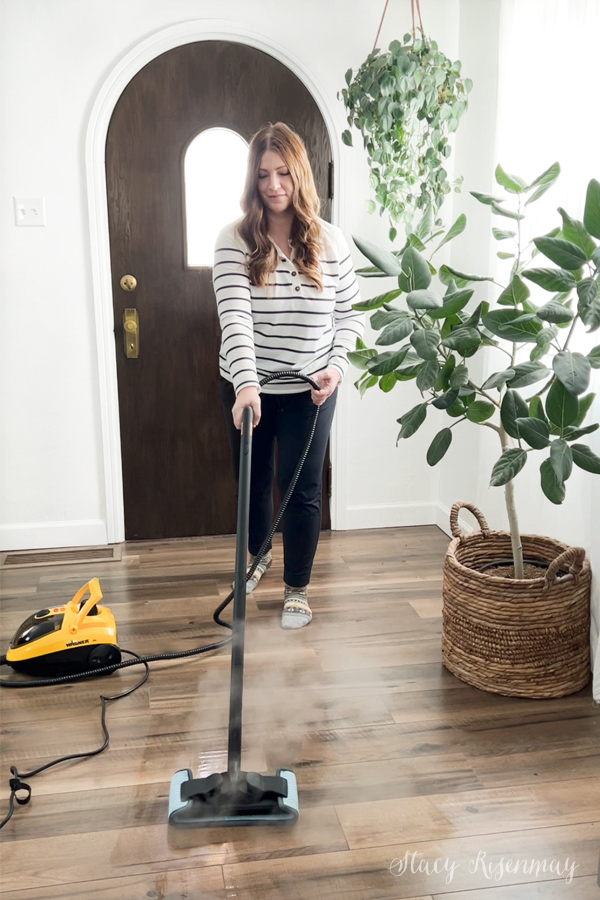
steam mopping floor

Steam Cleaning FAQ

Steam cleaning is a great way to sanitize your home without the use of harsh chemicals. Perfect for those with children, pets, sensitive skin, or allergies. It is an easy way to clean just about everything in your home! Here are the most asked questions I have received over the years.

Q1: Can I Use Tap Water?

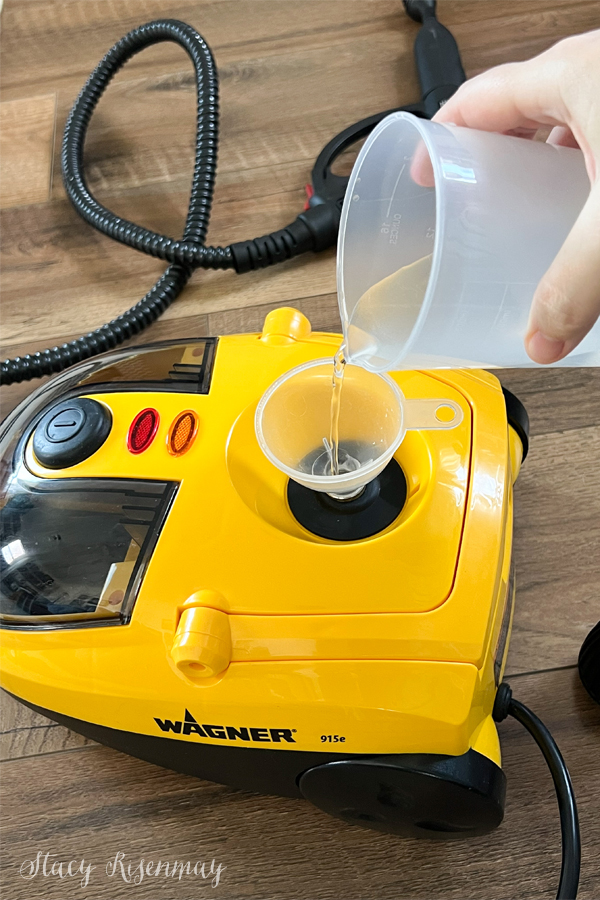
adding water to steam machine

Probably the most asked question is about the water. Is it okay to use tap water, especially if you have hard water? It is recommended to use distilled water. I usually try to have a few gallons in my food storage area in the basement but during covid (and for quite a bit after) there was a shortage of distilled water. People needed it for baby formula, breathing treatments, humidifiers, and cpap machines.

During this time I got into the habit of using water from my PUR water pitcher. If you have a water pitcher with a filter, or one that attaches to your faucet, this would be the second best option. If you do not have access to either the distilled water or filtered water, then use tap water. You will at some point need to clean out the mineral build up in your steamer. That leads us to the the next question!

Q2: How Do You Clean A Steam Machine?

Always make sure that the steam machine is unplugged before cleaning. Mix 8 oz of water and 8 oz of white vinegar. Pour the mixture into the steam machine using the funnel. Allow it to sit for at least 30 minutes and then empty it into the sink. Add clean water into the tank to rinse the vinegar out. Repeat the rinsing process until it no longer smells of vinegar.

Q3: How Much Water Do I add and How Long Will It Last?

Steamer come with a measuring cup with a spout for easy pouring. If you add 400ml you will be able to steam clean for approximately 15 minutes. 800 ml will last 30 minutes and 1200ml will last 40 minutes. Please make sure that the machine has fully cooled down before opening it to add more water if needed.

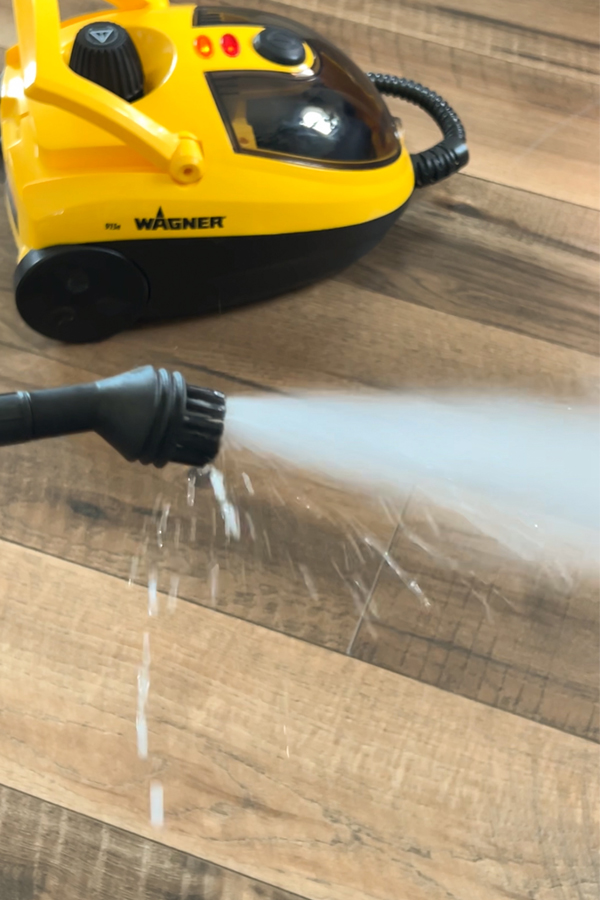
Q4: Why Is My Machine Squirting Water Instead Of Steam?

steam cleaner spurting water
Notice in this photo the orange light is still on

This will happen if you have squeezed the trigger before the machine has fully heated and had enough time to built up pressure.

When you push the power button, both the red and the orange light will light up. You need to wait until the orange light turns off. It can take up to ten minutes to heat and build up pressure. If you do start using the steamer before it is fully ready and water squirts out, it is okay. Steam will follow the initial squirt of water. You can use a rag to clean it up. It doesn't mean anything is wrong with your machine.

Q5: How Is It Possible To Clean With Only Water?

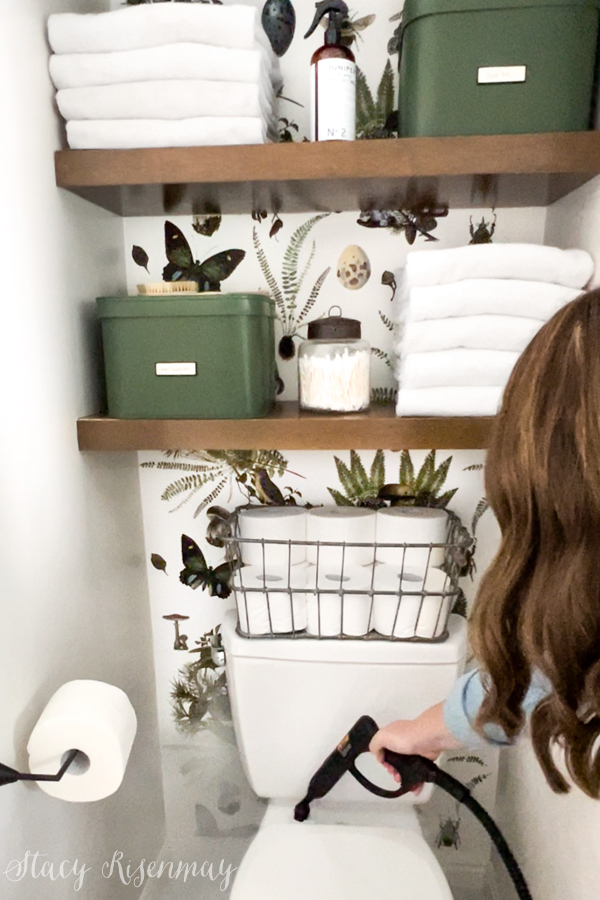
steam cleaning toilet

Steam Machines can exceed 212 degrees. The steam's hot temperature is enough to kill germs, dust mites, mold, and bacteria and all other yucky things. My favorite place to use it is on my toilet. The steam forces all the gunk hiding under the seat hinges out. It is the grossest, most satisfying thing ever.

When using a steamer on soft surfaces like upholstery, it softens and loosens up the dirt so it can be easily removed with a rag. You can see a pretty impressive before and after when we cleaned out Shane's car! I also like to use it on mattresses and rugs to kill dust mites.

Q6: When Steaming Soft Surfaces, How Long Is The Dry Time?

steam cleaning upholstery

Speaking of steaming mattresses.... How long does it take for upholstery, rugs, mattresses and other soft surfaces to dry? That is a hard one to answer because it depends on how long you steamed the item, and the humidity level in your home. But I will say that it will dry much faster than if you had used a wet rag to scrub it.

Q7: What Can I NOT Steam Clean?

One of my most popular posts about steaming is one I wrote years ago called "40 WAYS TO USE A STEAM CLEANER" detailing ways I have used mine around my home. With so many things that you CAN clean, what about the things that you shouldn't clean with a steamer? I'll refer you to the owner's manual of the Wagner 915E On-Demand Steamer.

DO NOT use on leather, wax polished furniture or floors,
synthetic fabrics, velvet, Dralon® or other delicate, steam
sensitive materials.

Also, while the steamer cleans glass like a champ, avoid steam cleaning your windows and other glass when the temperature of the glass is cold (colder than 32 degrees) or you risk it cracking. I avoid cleaning the windows in the winter months all together to be safe.

Q8: Can I Add Anything To The Water Like Essential Oils?

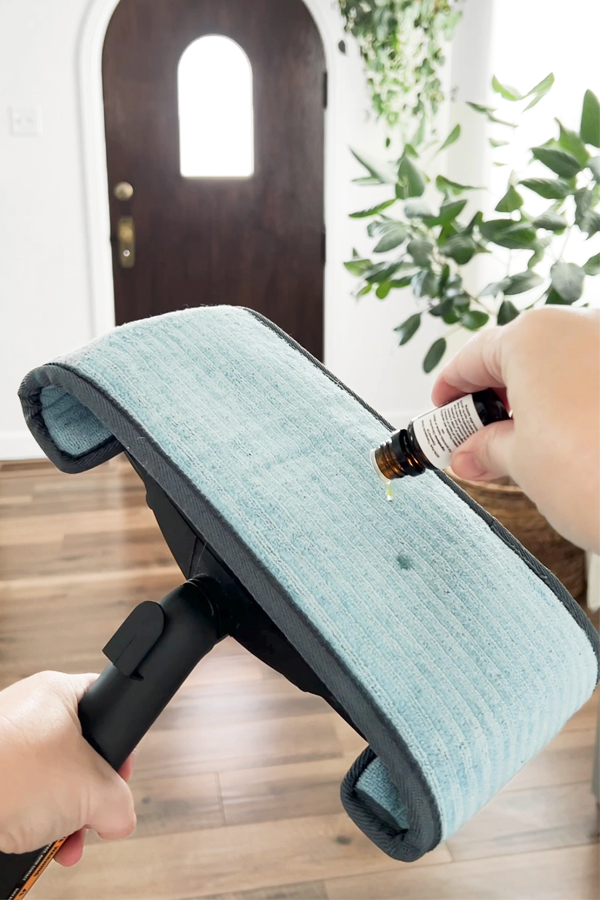
adding essential oils to steam pad only

No. It is not recommended to add anything but distilled or filtered water to a steam cleaner. It could mess up your steamer and it is not necessary. As stated above, the water gets hot enough to disinfect on its own. But if you are wanting to have a lemony fresh smell (or pine, or any other scent) you can add the oil to the mopping pad.

I hope that helped answer any questions you had about steam cleaning. If I missed any questions that you still might have, please leave them in the comments and I will do my best to answer them.

faq steam cleaning

And if you already have a steam cleaner that you use, I am curious what your favorite thing to steam clean is. Spill it in the comments!

]]>
https://www.notjustahousewife.net/steam-cleaning-faq-everything-you-need-to-know/feed/ 5
Top 10 Posts {2023} https://www.notjustahousewife.net/top-10-posts-2023/ https://www.notjustahousewife.net/top-10-posts-2023/#comments Sun, 31 Dec 2023 21:08:28 +0000 https://www.notjustahousewife.net/?p=27001

Read More

]]>
2023 was a busy year. But it was the kind of busy that led to less projects than usual. The stage of life I am currently in pulls me in a lot of directions. When my kids were little, I was home more, which made it easier to get things done. But no matter how crazy life gets, being creative is what keeps me calm. I value the time I get to build, paint, grow things, and decorate. Here are my top projects from this past year!

#1 My Mom's Porch

This porch makeover was my favorite thing I was able to do this year. I love doing makeovers for others and it brought me so much joy to be able to give my mom's home a bit of a facelift.

#2 Plant Propagation

This propagation station was fun to make, plus it was quite the step up from a crusty old mason jar! I like that it is reversible too!

#3 Fireplace Makeover

This was my most recent post. This fireplace makeover was done just in time to get decorated for Christmas. Remind me to never again dive head first into a big project at the beginning of December...

#4 Fairy Garden

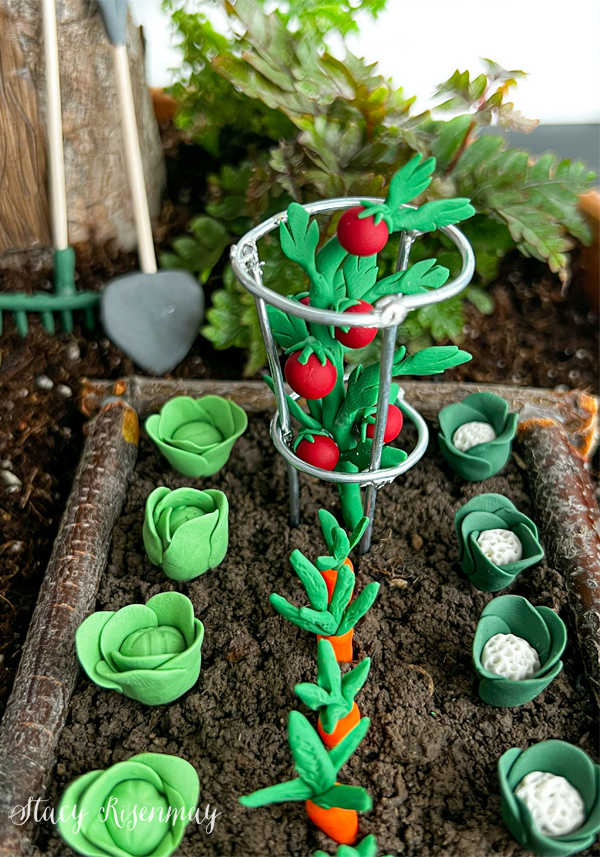
I will admit to not completely getting everyone's fascination with fairy gardens until I actually made one. I think I had more fun making the accessories out of clay than anything else. I also shared the best type of plants to use for fairy gardens. Have you ever made one?

#5 Moss Art

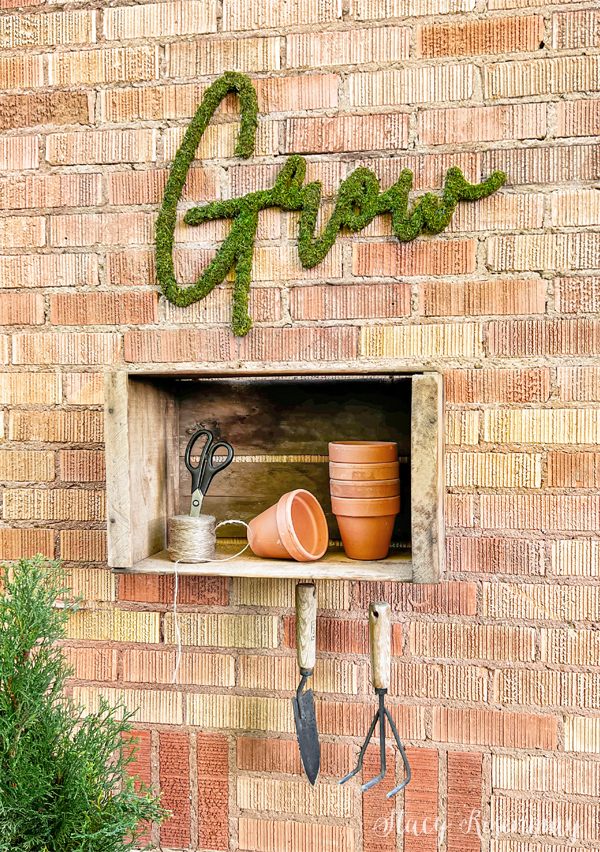
It was fun to make an updated moss art for the secret garden. It turned out even better than I had hoped. Not only does the word "grow" seem fitting for a garden, but it is one of my favorite words since my goal is to grow and be better each day.

#6 Floral Arranging

The best thing about floral arranging is, there is no "right" way. I did share some tips to make it a bit easier to get started. Including my favorite fillers and greenery that can come from your garden and yard!

#7 Valentine Wreath

I'm not sure why I like Valentine's Day so much, but I do! I ended up doing a few different Valentine crafts to get my mantel all gussied up. The heart wreath was my favorite.

#8 Ghost Candle

Unlike Valentine's Day, I do not love Halloween. But my kids do, so I have always at least decorated the mantel for their enjoyment. I made these candle holders and I have to admit, I really thought they turned out cute!

#9 Growing Herbs

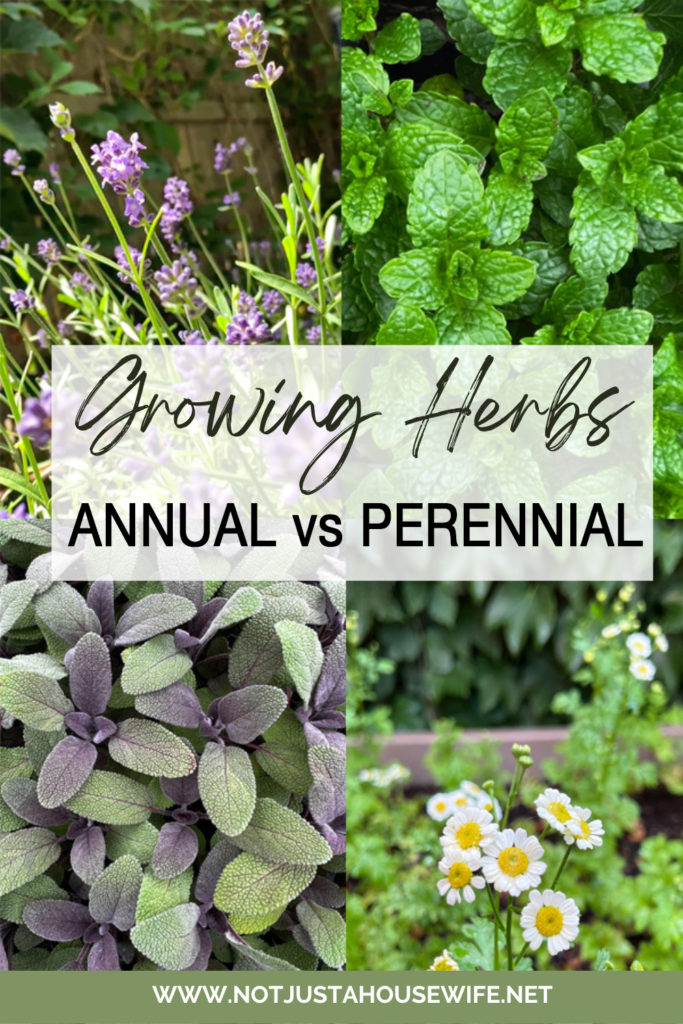
Working at my neighbors garden center and nursery, we got asked a lot of questions about growing herbs. I thought it would be a good idea to write a post all about growing herbs. Annuals VS perennials, how to care for each of them, and how to use them in your home. It was fun to write! I love herbs :)

#10 Gumball Terrarium

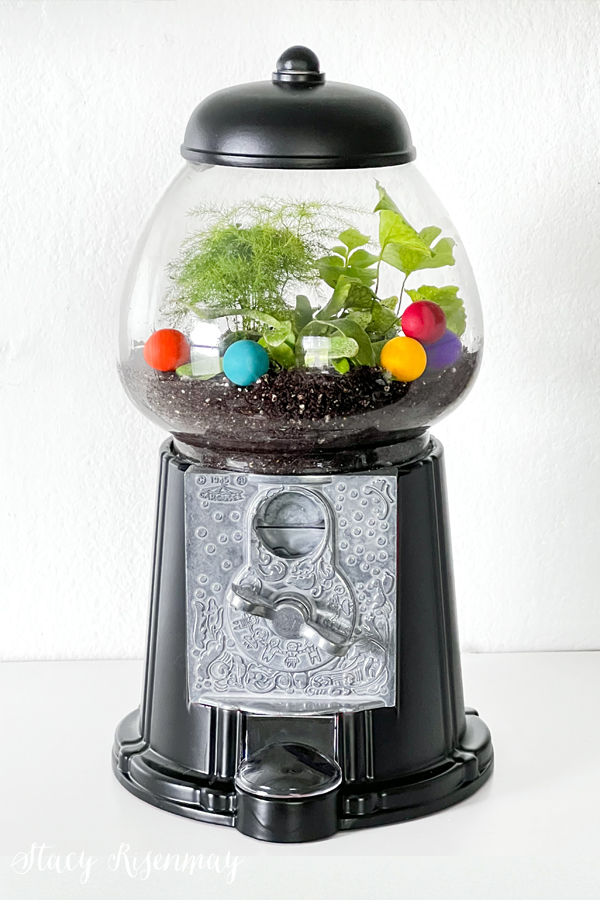
You know when you have had an idea in your head for a LONG time and you finally get around to making it happen? That was this gumball terrarium project! I love how it turned out. It is currently living in my son's dorm at college since he loved it too.

I hope you were also able to find time to create. I'd love to know what some of your favorite projects that you were able to get done this year were! Share in the comments below.

]]>
https://www.notjustahousewife.net/top-10-posts-2023/feed/ 2
My Fireplace Makeover! https://www.notjustahousewife.net/green-fireplace-makeover/ https://www.notjustahousewife.net/green-fireplace-makeover/#comments Tue, 19 Dec 2023 22:11:18 +0000 https://www.notjustahousewife.net/?p=26987

Read More

]]>
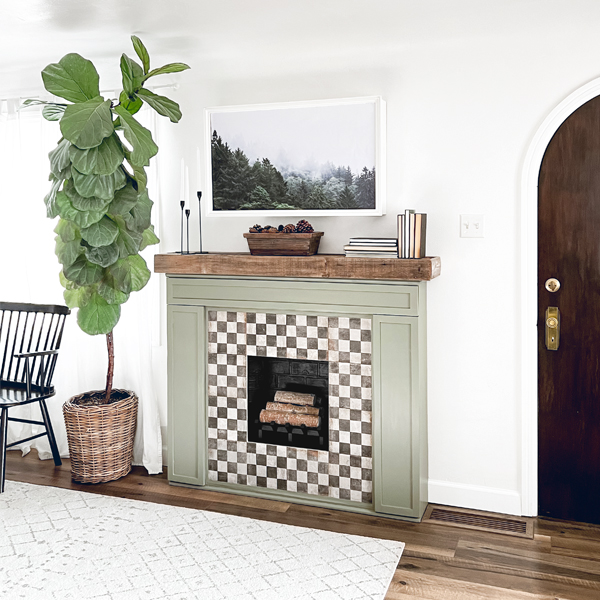
I don't know what possessed me to start a fireplace makeover in December as the totes full of Christmas decor were stacked in the family room, but I did. I also have a severe case of "I think a project will take less time than it really will" syndrome. Call it optimism or over confidence, but I genuinely thought we could knock this project out in a few days. Almost 2 weeks later.... The fireplace makeover is done!

Keep reading to the end to see it decorated for Christmas!

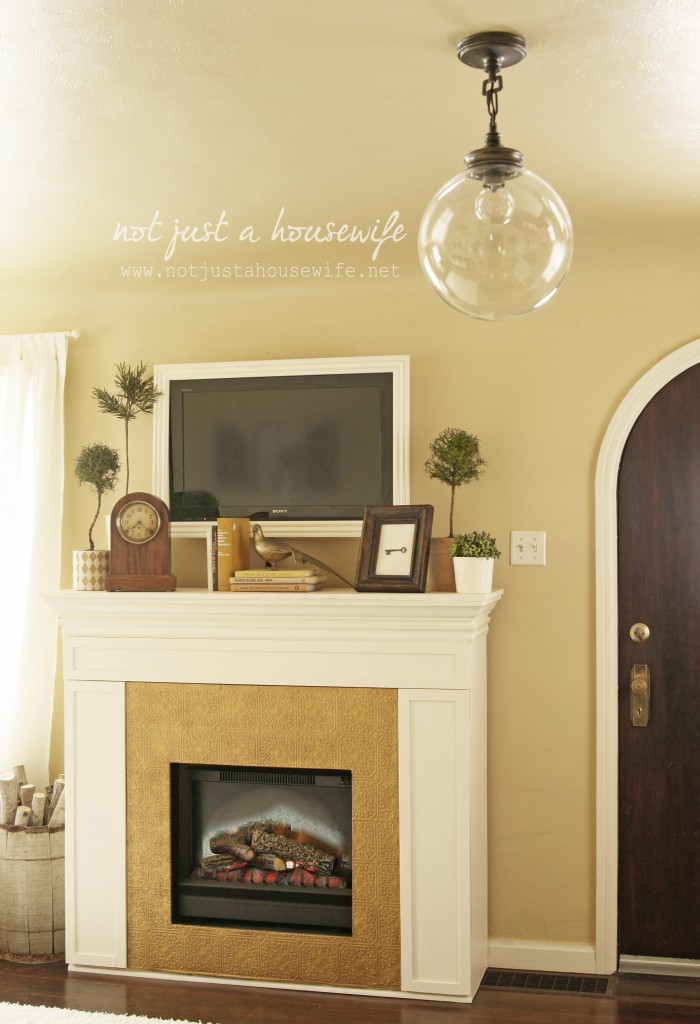
Fireplace Before

Shane and I built this fireplace about 12 years ago. It has worked well for us but there have always been things about it that I didn't love. In order for it to have as much DVD storage as we needed, we built it pretty deep. As a result, it looked more like a piece of furniture than an actual fireplace.

#1 Change: Cut it in half to make it more shallow.

The walls in the family room are white. So is the rug. So the fireplace being mostly white made this section of the room seem too white. It also made the room seem unbalanced since there are shelves filled with books, large indoor trees, and cabinets in the rest of the space.

#2 Change: Paint the fireplace something other than white.

The "tile" on the fireplace was actually wallpaper with a raised pattern that I painted. Remember forever ago when it was painted gold?

#3 Change: Use actual tile for the surround.

The fireplace sits on top of a cold air return vent. In the past, to compensate, we added a wood shim under the other side to keep it more level. But that made it so there was a gap all across the front. It always bothered me.

#4 Change: Create new vent cover.

The old version of our fireplace never had a back. We added an electric fireplace insert at first, but when it broke, it was just an open cavity. We always meant to add a back, but never did. I stuck a board that I painted black behind it so you couldn't see the white wall, but it wasn't even the right size.

#5 Change: Make an actual backing/insert.

Fireplace Makeover Reveal!

We cut 7 inches off the depth of the fireplace making it only 8 inches deep now. I also cut out along the bottom of the side pieces to fit around the baseboard. Now it is right up against the wall!

We painted it green since it is our favorite color and since there are a lot of green tones in this space already. The paint color I chose Conifer Green by Behr. I had it mixed at 75% so it would be slightly lighter. I think it is the perfect sagey green!

The reason I didn't do this project sooner was I was torn on what tile to pick. I was going to stick with black for the surround like the orginal, but I couldn't settle on one I liked well enough to pull the trigger and order. When I was browsing the Home Depot website, I stumbled upon this checkerboard tile and fell in love. It reminded me of my kitchen ceiling.

Since an entire case would have been way too much tile for this little project, I ordered sample tiles. I only needed 12 tiles total.

I decided to set the fireplace in its place and secure it to the wall without the vent cover on. This way it would be level on the floor without having to add a shim and have any gaps. Then I built a new cover that was shorter than the original one to fit over the vent hole.

I haven't sealed it with polyurethane yet, but I am really happy with how close I was able to match the stain to the flooring!

Real fireplaces have a brick background and I wanted mine to look as real as possible. I thought I had some of the brick paneling left over from doing our faux brick wall, but we didn't. I wasn't willing to pay almost $50 for a whole 4x8 sheet when I only needed a little bit, so I created my own!

I cut some scrap pieces of plywood I had in the garage into panels. Then I used washi tape to create a brick pattern. I was worried at first because the tape was not sticking well to the plywood. I slathered some drywall mud (joint compound) onto the boards and used a putty knife to spread it around. When I peeled the tape off, it left depressions which looked like grout lines.

I think it looks pretty convincing!

Since we cut it to be shallower, we could no longer have slide out storage. But I still wanted to have a place for DVDs. We now have those front panels as doors that open like cabinets. The shelves inside hold 98 DVDs. We also put DVDs in the top panel with the DVD player. Since we did lose some storage space, the DVDs of little kids movies or things that are easily streamed, got put away in the attic.

While the timing of this project was probably not ideal, I am happy that we got this project done in time to decorate it for Christmas. Would it have been easier to build a new one from scratch? Probably. But I am a big believer in using what you have already and not wasting materials.

I have plans for more changes in the family room, but I will wait until after the first of the year to start more projects :) So stay tuned for a family room refresh!

UPDATE:

I ended up painting it a darker green and I love it with more contrast!

]]>
https://www.notjustahousewife.net/green-fireplace-makeover/feed/ 4
DIY Ornaments Made With a Heat Gun https://www.notjustahousewife.net/diy-ornaments-made-with-a-heat-gun/ https://www.notjustahousewife.net/diy-ornaments-made-with-a-heat-gun/#comments Tue, 28 Nov 2023 20:01:13 +0000 https://www.notjustahousewife.net/?p=26904

Read More

]]>
I LOVE handmade ornaments! There's no better way to save money and customize your tree than with ornaments you have made. If you make them with found items or things you have already at home, even better. It is not only a beautiful way to decorate your tree, it is a fun activity to get into the Christmas mood! These ideas I am sharing today all use one of my favorite crafting tools, a heat gun!

This post is sponsored by HomeRight but all ideas and opinions are 100% my own :)

collage of ornaments made with a heat gun

Ornaments Made With A Heat Gun

A Heat gun is a handy tool to have if you are a crafter and/or a DIYer. I have shared many projects over the years where I have used them for all sorts of things. These are my favorite ornaments that I have made using a heat gun!

Wood Burning With A Scortch Pen

Last year I made garden markers using this method and ever since I have wanted to try making more things with the scorch pen. Wood slice ornaments seemed like the perfect way!

Supplies:

Wood Scorch Pen

Wood Slices

Heat Gun

Stencils or Vinyl

I cut my own wood slices with the miter saw with branches from my yard, but if you aren't comfortable using power tools, you can easily buy them at craft stores or on Amazon.

Using the scorch pen, add your design. If I am drawing it on, I like to draw it with pencil first. Draw it on lightly and then you can go over it with the wood burning pen.

If you are using a stencil, it is very important to prep your pen properly since they have a tendency to bleed. You will need to push down on the pen tip to get the ink to flow to the tip. At first, it will come out heavily. I use a scrap piece of paper or wood to write on until the ink comes out only a little at a time. Now you are ready to fill in your stencil design.

*If you do experience bleeding, it is easier to wood burn it with the heat gun and then sand it off than it is to try to sand or clean off the wet ink. Once burned, it sands off fairly easily with 120 grit sandpaper. Then you don't waste a wood slice!

collage of steps to make wood burned ornaments

Then the magic happens! Place your heat gun over the wood slice and watch the heat transform and burn the design into the wood! It is so fun to watch! I have a video below so you can watch it happen.

wood burned ornament made with heat gun

What designs or words would you wood burn into your ornaments?

wood burned ornament with heat gun and scorch pen

Heat Embossed Ornaments

Last year I embossed some holiday cards and gift tags. I had done embossing with my mom when I was growing up and had forgotten just how much fun it was to do! Ever since, I have wanted an excuse to to put my embossing powder and these cute snowflake stamps to use again. So I decided to try heat embossing on wood!

Supplies:

Wood Slices

Heat Gun

Embossing Powder (Gold, Silver, White)

Embossing Ink Pad

Stamps

I cut smaller wood slices. I made them tiny because it is good to have a variety of sized ornaments on your tree and also because the snowflake stamps I have are small.

Use an embossing stamp pad to add the ink to the stamp and then press it hard onto the wood slice.

Add your choice of colored embossing powder. I chose silver and gold. Dump the excess powder back into the jar.

collage of steps to make heat embossed ornaments

Use the heat gun to melt the embossing powder. It is so fun to watch it turn shiny! I used the Wagner HT400 heat gun. It is very affordable and small which makes it perfect for crafting.

Drill a small hole in the wood so you can hang it on your tree.

embossed ornaments

Here is a video so you can better see the process of the embossing powder heating up.

Here are some other ornaments I have made in the past using a heat gun.

DIY Icicle Ornaments

I first shared these icicle ornaments back in 2014. I made a bunch more last year since my theme for my tree was winter wonderland. It was oddly satisfying to heat and twist the plexiglass!

diy icicle ornament

Resin Snowflake Ornaments

Resin is so fun to work with! I create two types of resin ornaments several years ago. I accidentally bought resin that turns white. It is a casting resin. But instead of being mad at my mistake, I had the idea to use them to make snowflake ornaments! I had a silicone mold already and they turned out great.

white resin snowflake ornaments

The other kind of resin ornament used snowflake confetti. I added clear resin, then added some confetti, and then another layer of resin. The heat hun is great for removing the air bubbles!

snowflake resin ornaments

Do you enjoy making homemade ornaments? What have been some of your favorites you have made over the years? I would love to hear about them. Please share in the comments below :)

]]> https://www.notjustahousewife.net/diy-ornaments-made-with-a-heat-gun/feed/ 1 DIY Napkin Ring Ideas https://www.notjustahousewife.net/diy-napkin-ring-ideas/ https://www.notjustahousewife.net/diy-napkin-ring-ideas/#comments Sat, 18 Nov 2023 21:24:23 +0000 https://www.notjustahousewife.net/?p=26886

Read More

]]>
It is that time of year when many are hosting dinners for the holidays. I thought it would be fun to share some DIY napkin ring ideas for your next table setting. Customize your place settings with these easy DIY napkin rings. They are the perfect addition to your holiday table decor! 

This post contains affiliate links.

Napkin Ring Ideas

Whether you are hosting just a few, or you have a house full, these napkin rings are simple to make and are a great way to elevate your cloth napkins. They are such easy ideas that anyone can make. With just a few craft supplies, I have created 3 versions with different materials but now my mind is full of other ideas too! 

Wood Burned Napkin Rings

Wood napkin rings are super affordable and since they come stained and sealed already, this is a super simple project. It won't take long to customize these wood ring napkin holders. If you have really nice handwriting, you can freehand it. I decided to write it on the wood napkin ring with a pencil before trying to wood burn it.

I couldn't find my really pointy tip, so I used this rounded tip which ended up working really well. A wood burner is a very inexpensive tool that I think all crafters should have.

Once you are done wood burning, you can erase any pencil marks that are showing to clean it up.

You can also use wood burning letter sets. I have used them for other wood burning crafts in the past. Last year I shared some wood burned plate chargers that went viral on social media. So many of you shared your versions with me and I loved it. Wood burning is a fun DIY project to do. I have also made reusable wood burned gift tags. 

I like the idea of using the names of your guests, but you could also wood burn holiday related words into the napkin rings. These beautiful napkin rings are sure to make your guest smile. 

Clay Stamped Napkin Rings

I love using polymer clay! It is easy to work with, it never dries out, and once you bake it it is hard and paintable. For these napkin rings, I rolled out the clay into an inch thick "snake" and then used a rolling pin to rolled it flat. I made sure it was about ¼" thick. 

Use a ruler or straight edge and a knife to cut the edges. Then cut the clay to be 5 inches long.

It is time to add the letters into the clay with these metal letter stamps! You can choose to do the names of your guests, or you can use seasonal words like "blessings", thankful", "celebrate", or "merry". 

To help the words stand out more, I like to add paint. Once you wipe it off, the paint is removed from everywhere but the impressions of the letters. I used brown this time, but other paint colors like gold and silver are beautiful choices too! It is such a simple napkin ring idea, but a personal touch makes a big impact. 

These metal stamp letter sets are so fun to use for clay. I have made christmas ornaments and  gift tags as well. 

Leather Napkin Rings

Remember when our old couch broke and wore out so we cut all the leather off? We saved it in a tote and have spent the past several years using it for all kinds of projects with it. One of my favorites was this leather woven pillow. We are finally down to the last bits of scraps. This was the perfect project for the small scraps I have left. You can buy pieces of leather (or faux leather) online as well.

You can use scissor to cut the leather but I like to use a rotary cutter and a straight edge. I made these leather strips 6 inches long since the ends would overlap. 

Use a razor blade knife to cut a slit in one end for the button. Test to make sure the button will fit through the hole. You want it to be kind of snug. Once the slit is cut, you will sew on your button to the opposite end of the leather strip.

Then simply button it up and you have a leather napkin ring! These gorgeous napkin rings great with greenery or fresh flowers tucked inside. Fall leaves, cinnamon sticks, or faux flowers from the craft store would work too. 

Whether you use these for your Thanksgiving table, Christmas, Hanukkah, or any other special occasion dinner party, they give your dining table that extra touch to make your guests feel special. This holiday season, consider creating your own napkin rings! Get creative and make your own versions. 

PIN For Later:

]]>
https://www.notjustahousewife.net/diy-napkin-ring-ideas/feed/ 1
This XML file does not appear to have any style information associated with it. The document tree is shown below.
<rss xmlns:content="http://purl.org/rss/1.0/modules/content/" xmlns:wfw="http://wellformedweb.org/CommentAPI/" xmlns:dc="http://purl.org/dc/elements/1.1/" xmlns:atom="http://www.w3.org/2005/Atom" xmlns:sy="http://purl.org/rss/1.0/modules/syndication/" xmlns:slash="http://purl.org/rss/1.0/modules/slash/" version="2.0">
<channel>
<title>Stacy Risenmay</title>
<atom:link href="https://www.notjustahousewife.net/feed/" rel="self" type="application/rss+xml"/>
<link>https://www.notjustahousewife.net/</link>
<description>DIY Projects, Home Decor, & Gardening</description>
<lastBuildDate>Mon, 25 Nov 2024 20:43:24 +0000</lastBuildDate>
<language>en-US</language>
<sy:updatePeriod> hourly </sy:updatePeriod>
<sy:updateFrequency> 1 </sy:updateFrequency>
<image>
<url>https://www.notjustahousewife.net/wp-content/uploads/2021/06/cropped-favicon-32x32.jpg</url>
<title>Stacy Risenmay</title>
<link>https://www.notjustahousewife.net/</link>
<width>32</width>
<height>32</height>
</image>
<item>
<title>Painted Kitchen Cabinets</title>
<link>https://www.notjustahousewife.net/painted-kitchen-cabinets/</link>
<comments>https://www.notjustahousewife.net/painted-kitchen-cabinets/#comments</comments>
<dc:creator>
<![CDATA[ Stacy ]]>
</dc:creator>
<pubDate>Sat, 23 Nov 2024 06:16:49 +0000</pubDate>
<category>
<![CDATA[ DIY Projects & Tutorials ]]>
</category>
<category>
<![CDATA[ Favorites ]]>
</category>
<guid isPermaLink="false">https://www.notjustahousewife.net/?p=27589</guid>
<description>
<![CDATA[ It was about 8 years ago that I painted my kitchen cabinets this light, neutral gray. It helped my kitchen be light and bright. But the paint was starting to wear off in places from being touched and wiped down so often. And I was itching to add more color to my house. So, I...</p><p><a class="more-link" href="https://www.notjustahousewife.net/painted-kitchen-cabinets/">Read More</a></p> ]]>
</description>
<content:encoded>
<![CDATA[ <p>It was about 8 years ago that <a href="https://www.notjustahousewife.net/new-cabinets-doors/">I painted my kitchen cabinets</a> this light, neutral gray. It helped my kitchen be light and bright. But the paint was starting to wear off in places from being touched and wiped down so often. And I was itching to add more color to my house. So, I grabbed my paint sprayer and changed things up! Here is the reveal of my painted kitchen cabinets.</p> <p class="has-text-align-center"><em>This post is sponsored by <a href="https://www.wagnerspraytech.com/product/flexio-series/flexio-3500-sprayer/" target="_blank" rel="noreferrer noopener sponsored nofollow">Wagner</a> but all ideas and opinions are 100% my own.</em></p> <div class="wp-block-image"> <figure class="aligncenter size-full"><a href="https://www.notjustahousewife.net/wp-content/uploads/2024/11/kitchen-cabinets-painted-with-dorian-gray-1.png"><img fetchpriority="high" decoding="async" width="500" height="750" src="https://www.notjustahousewife.net/wp-content/uploads/2024/11/kitchen-cabinets-painted-with-dorian-gray-1.png" alt="" class="wp-image-27608" srcset="https://www.notjustahousewife.net/wp-content/uploads/2024/11/kitchen-cabinets-painted-with-dorian-gray-1.png 500w, https://www.notjustahousewife.net/wp-content/uploads/2024/11/kitchen-cabinets-painted-with-dorian-gray-1-200x300.png 200w, https://www.notjustahousewife.net/wp-content/uploads/2024/11/kitchen-cabinets-painted-with-dorian-gray-1-150x225.png 150w" sizes="(max-width: 500px) 100vw, 500px" /></a></figure></div> <h3 class="wp-block-heading">Picking A Paint Color</h3> <p>I had the HARDEST time picking a shade of green for the cabinets. For months I thought I had already settled on one. When I changed the color of green I painted <a href="https://www.notjustahousewife.net/green-fireplace-makeover/">my fireplace</a> to a darker shade, I was then going to paint my kitchen cabinets the original fireplace color. But when I placed the color chip on the gray cabinets, I realized how light and how gray the green really was. If I was going to add color, I wanted to add COLOR. Not a muted green, but a really vibrant one. </p> <div class="wp-block-image"> <figure class="aligncenter size-large is-resized"><a href="https://www.notjustahousewife.net/wp-content/uploads/2024/11/green-colors-for-kitchen-cabinets-copy.jpg"><img decoding="async" width="683" height="1024" src="https://www.notjustahousewife.net/wp-content/uploads/2024/11/green-colors-for-kitchen-cabinets-copy-683x1024.jpg" alt="green paint chips" class="wp-image-27597" style="width:501px;height:auto" srcset="https://www.notjustahousewife.net/wp-content/uploads/2024/11/green-colors-for-kitchen-cabinets-copy-683x1024.jpg 683w, https://www.notjustahousewife.net/wp-content/uploads/2024/11/green-colors-for-kitchen-cabinets-copy-200x300.jpg 200w, https://www.notjustahousewife.net/wp-content/uploads/2024/11/green-colors-for-kitchen-cabinets-copy-768x1152.jpg 768w, https://www.notjustahousewife.net/wp-content/uploads/2024/11/green-colors-for-kitchen-cabinets-copy-150x225.jpg 150w, https://www.notjustahousewife.net/wp-content/uploads/2024/11/green-colors-for-kitchen-cabinets-copy.jpg 1000w" sizes="(max-width: 683px) 100vw, 683px" /></a></figure></div> <p>These were my top choices. Yes, this is the narrowed down amount! Then I finally narrowed it down to four. Once I had four chosen, we got a sample can mixed in each color. I painted a white poster board in each color so I could see a larger sample. It is crazy how much different a color looks when you change the sheen and when it is larger scale. I ended up choosing one called <em>In The Garden</em> (the square paint chip right above the handle). How perfect is that? </p> <h3 class="wp-block-heading">Prepping To Paint Kitchen Cabinets</h3> <p>The hardest part was cleaning the cabinet doors. Turns out that a light, warm gray is the perfect color for hiding how bad grease residue has built up. Even though I wipe my cabinets down weekly, the cabinets near the oven had a thin layer that wouldn't sand off well. So after scrubbing them really well, I was able to finally sand them lightly with a 220 grit sandpaper. </p> <p>The cabinet bases also got washed and sanded. Then everything had to be washed again to get rid of the fine dust. The sanding not only ensures that everything is off of the cabinets and they are 100% clean, but it also helps the new coats of primer and paint to adhere properly. </p> <figure class="wp-block-gallery has-nested-images columns-2 is-cropped wp-block-gallery-1 is-layout-flex wp-block-gallery-is-layout-flex"> <figure class="wp-block-image size-large"><a href="https://www.notjustahousewife.net/wp-content/uploads/2024/11/sanding-cabinets-before-painting-2.jpg"><img decoding="async" width="683" height="1024" data-id="27601" src="https://www.notjustahousewife.net/wp-content/uploads/2024/11/sanding-cabinets-before-painting-2-683x1024.jpg" alt="" class="wp-image-27601" srcset="https://www.notjustahousewife.net/wp-content/uploads/2024/11/sanding-cabinets-before-painting-2-683x1024.jpg 683w, https://www.notjustahousewife.net/wp-content/uploads/2024/11/sanding-cabinets-before-painting-2-200x300.jpg 200w, https://www.notjustahousewife.net/wp-content/uploads/2024/11/sanding-cabinets-before-painting-2-768x1152.jpg 768w, https://www.notjustahousewife.net/wp-content/uploads/2024/11/sanding-cabinets-before-painting-2-150x225.jpg 150w, https://www.notjustahousewife.net/wp-content/uploads/2024/11/sanding-cabinets-before-painting-2.jpg 1000w" sizes="(max-width: 683px) 100vw, 683px" /></a></figure> <figure class="wp-block-image size-large"><a href="https://www.notjustahousewife.net/wp-content/uploads/2024/11/wiping-dust-off-2.jpg"><img loading="lazy" decoding="async" width="683" height="1024" data-id="27605" src="https://www.notjustahousewife.net/wp-content/uploads/2024/11/wiping-dust-off-2-683x1024.jpg" alt="" class="wp-image-27605" srcset="https://www.notjustahousewife.net/wp-content/uploads/2024/11/wiping-dust-off-2-683x1024.jpg 683w, https://www.notjustahousewife.net/wp-content/uploads/2024/11/wiping-dust-off-2-200x300.jpg 200w, https://www.notjustahousewife.net/wp-content/uploads/2024/11/wiping-dust-off-2-768x1152.jpg 768w, https://www.notjustahousewife.net/wp-content/uploads/2024/11/wiping-dust-off-2-150x225.jpg 150w, https://www.notjustahousewife.net/wp-content/uploads/2024/11/wiping-dust-off-2.jpg 1000w" sizes="(max-width: 683px) 100vw, 683px" /></a></figure> </figure> <p>If I am painting a dark color over top of a lighter color, I like to use a tinted primer. You can buy pre-tinted primers or have your primer tinted at the store. Once I realized my cabinets were basically primer gray, I was more excited to say goodbye to the color. </p> <p>I chose to brush the paint onto the cabinet bases instead of spraying. My kitchen is small enough that I can paint it by hand very quickly. Faster than it would take to tarp and tape everything. But when I paint larger kitchens, I will tarp things off. </p> <figure class="wp-block-gallery has-nested-images columns-default is-cropped wp-block-gallery-2 is-layout-flex wp-block-gallery-is-layout-flex"> <figure class="wp-block-image size-large"><a href="https://www.notjustahousewife.net/wp-content/uploads/2024/11/priming-before-painting-cabinets-2.jpg"><img loading="lazy" decoding="async" width="683" height="1024" data-id="27600" src="https://www.notjustahousewife.net/wp-content/uploads/2024/11/priming-before-painting-cabinets-2-683x1024.jpg" alt="" class="wp-image-27600" srcset="https://www.notjustahousewife.net/wp-content/uploads/2024/11/priming-before-painting-cabinets-2-683x1024.jpg 683w, https://www.notjustahousewife.net/wp-content/uploads/2024/11/priming-before-painting-cabinets-2-200x300.jpg 200w, https://www.notjustahousewife.net/wp-content/uploads/2024/11/priming-before-painting-cabinets-2-768x1152.jpg 768w, https://www.notjustahousewife.net/wp-content/uploads/2024/11/priming-before-painting-cabinets-2-150x225.jpg 150w, https://www.notjustahousewife.net/wp-content/uploads/2024/11/priming-before-painting-cabinets-2.jpg 1000w" sizes="(max-width: 683px) 100vw, 683px" /></a></figure> <figure class="wp-block-image size-large"><a href="https://www.notjustahousewife.net/wp-content/uploads/2024/11/painting-cabinet-green-first-coat-2.jpg"><img loading="lazy" decoding="async" width="683" height="1024" data-id="27599" src="https://www.notjustahousewife.net/wp-content/uploads/2024/11/painting-cabinet-green-first-coat-2-683x1024.jpg" alt="painting cabinet bases" class="wp-image-27599" srcset="https://www.notjustahousewife.net/wp-content/uploads/2024/11/painting-cabinet-green-first-coat-2-683x1024.jpg 683w, https://www.notjustahousewife.net/wp-content/uploads/2024/11/painting-cabinet-green-first-coat-2-200x300.jpg 200w, https://www.notjustahousewife.net/wp-content/uploads/2024/11/painting-cabinet-green-first-coat-2-768x1152.jpg 768w, https://www.notjustahousewife.net/wp-content/uploads/2024/11/painting-cabinet-green-first-coat-2-150x225.jpg 150w, https://www.notjustahousewife.net/wp-content/uploads/2024/11/painting-cabinet-green-first-coat-2.jpg 1000w" sizes="(max-width: 683px) 100vw, 683px" /></a></figure> </figure> <p>Several thin coats is better than one or two thick coats. The first coat will look streaky and that's okay. I like to use a foam brush so there aren't brush marks. You can also use and additive like Floetrol that extends the paint dry time and helps the paint self level.</p> <h3 class="wp-block-heading">Spraying The Kitchen Cabinet Doors</h3> <p>Now it was time for the fun part! I always test the spray on a piece of cardboard before spraying my project. That way I can play around with the spray pattern and output and get it just right. I used the <a href="https://www.wagnerspraytech.com/product/flexio-series/flexio-3500-sprayer/" target="_blank" rel="noreferrer noopener sponsored nofollow">Wagner Flexio 3500</a> with the detail finish nozzle. </p> <figure class="wp-block-gallery has-nested-images columns-default is-cropped wp-block-gallery-3 is-layout-flex wp-block-gallery-is-layout-flex"> <figure class="wp-block-image size-large"><a href="https://www.notjustahousewife.net/wp-content/uploads/2024/11/adjusting-the-dial-on-paint-sprayer-2.jpg"><img loading="lazy" decoding="async" width="683" height="1024" data-id="27606" src="https://www.notjustahousewife.net/wp-content/uploads/2024/11/adjusting-the-dial-on-paint-sprayer-2-683x1024.jpg" alt="" class="wp-image-27606" srcset="https://www.notjustahousewife.net/wp-content/uploads/2024/11/adjusting-the-dial-on-paint-sprayer-2-683x1024.jpg 683w, https://www.notjustahousewife.net/wp-content/uploads/2024/11/adjusting-the-dial-on-paint-sprayer-2-200x300.jpg 200w, https://www.notjustahousewife.net/wp-content/uploads/2024/11/adjusting-the-dial-on-paint-sprayer-2-768x1152.jpg 768w, https://www.notjustahousewife.net/wp-content/uploads/2024/11/adjusting-the-dial-on-paint-sprayer-2-150x225.jpg 150w, https://www.notjustahousewife.net/wp-content/uploads/2024/11/adjusting-the-dial-on-paint-sprayer-2.jpg 1000w" sizes="(max-width: 683px) 100vw, 683px" /></a></figure> <figure class="wp-block-image size-large"><a href="https://www.notjustahousewife.net/wp-content/uploads/2024/11/test-spray-on-cardboard-2.jpg"><img loading="lazy" decoding="async" width="683" height="1024" data-id="27604" src="https://www.notjustahousewife.net/wp-content/uploads/2024/11/test-spray-on-cardboard-2-683x1024.jpg" alt="" class="wp-image-27604" srcset="https://www.notjustahousewife.net/wp-content/uploads/2024/11/test-spray-on-cardboard-2-683x1024.jpg 683w, https://www.notjustahousewife.net/wp-content/uploads/2024/11/test-spray-on-cardboard-2-200x300.jpg 200w, https://www.notjustahousewife.net/wp-content/uploads/2024/11/test-spray-on-cardboard-2-768x1152.jpg 768w, https://www.notjustahousewife.net/wp-content/uploads/2024/11/test-spray-on-cardboard-2-150x225.jpg 150w, https://www.notjustahousewife.net/wp-content/uploads/2024/11/test-spray-on-cardboard-2.jpg 1000w" sizes="(max-width: 683px) 100vw, 683px" /></a></figure> </figure> <p>I always spray the back of cabinet doors first. That way, if they get dinged up when I flip them over to paint the other side, it's the backside and not the pretty front. </p> <p>Once they had completely dried (I like to let them dry overnight), I turned them over and sprayed the front. I ended up painted three coats of paint per side. </p> <p class="has-text-align-center"><em>The color looks really light when the paint is wet, but dries darker.</em></p> <figure class="wp-block-gallery has-nested-images columns-default is-cropped wp-block-gallery-4 is-layout-flex wp-block-gallery-is-layout-flex"> <figure class="wp-block-image size-large"><a href="https://www.notjustahousewife.net/wp-content/uploads/2024/11/spraying-cabinet-doors-copy-2.jpg"><img loading="lazy" decoding="async" width="683" height="1024" data-id="27603" src="https://www.notjustahousewife.net/wp-content/uploads/2024/11/spraying-cabinet-doors-copy-2-683x1024.jpg" alt="painting cabinet doors with paint sprayer" class="wp-image-27603" srcset="https://www.notjustahousewife.net/wp-content/uploads/2024/11/spraying-cabinet-doors-copy-2-683x1024.jpg 683w, https://www.notjustahousewife.net/wp-content/uploads/2024/11/spraying-cabinet-doors-copy-2-200x300.jpg 200w, https://www.notjustahousewife.net/wp-content/uploads/2024/11/spraying-cabinet-doors-copy-2-768x1152.jpg 768w, https://www.notjustahousewife.net/wp-content/uploads/2024/11/spraying-cabinet-doors-copy-2-150x225.jpg 150w, https://www.notjustahousewife.net/wp-content/uploads/2024/11/spraying-cabinet-doors-copy-2.jpg 1000w" sizes="(max-width: 683px) 100vw, 683px" /></a></figure> <figure class="wp-block-image size-large"><a href="https://www.notjustahousewife.net/wp-content/uploads/2024/11/spraying-cabinet-doors-2.jpg"><img loading="lazy" decoding="async" width="683" height="1024" data-id="27602" src="https://www.notjustahousewife.net/wp-content/uploads/2024/11/spraying-cabinet-doors-2-683x1024.jpg" alt="painting kitchen cabinets green" class="wp-image-27602" srcset="https://www.notjustahousewife.net/wp-content/uploads/2024/11/spraying-cabinet-doors-2-683x1024.jpg 683w, https://www.notjustahousewife.net/wp-content/uploads/2024/11/spraying-cabinet-doors-2-200x300.jpg 200w, https://www.notjustahousewife.net/wp-content/uploads/2024/11/spraying-cabinet-doors-2-768x1152.jpg 768w, https://www.notjustahousewife.net/wp-content/uploads/2024/11/spraying-cabinet-doors-2-150x225.jpg 150w, https://www.notjustahousewife.net/wp-content/uploads/2024/11/spraying-cabinet-doors-2.jpg 1000w" sizes="(max-width: 683px) 100vw, 683px" /></a></figure> </figure> <h2 class="wp-block-heading">Painted Kitchen Cabinets Reveal!</h2> <p>I am so happy with how the kitchen cabinets turned out! The finish is so smooth and professional looking. And I am thrilled with how the color looks. It livens up the whole kitchen.</p> <div class="wp-block-image"> <figure class="aligncenter size-large is-resized"><a href="https://www.notjustahousewife.net/wp-content/uploads/2024/11/kitchen-cabinets-green1-3-scaled.jpg"><img loading="lazy" decoding="async" width="576" height="1024" src="https://www.notjustahousewife.net/wp-content/uploads/2024/11/kitchen-cabinets-green1-3-576x1024.jpg" alt="green base cabinets in kitchen" class="wp-image-27607" style="width:501px;height:auto" srcset="https://www.notjustahousewife.net/wp-content/uploads/2024/11/kitchen-cabinets-green1-3-576x1024.jpg 576w, https://www.notjustahousewife.net/wp-content/uploads/2024/11/kitchen-cabinets-green1-3-169x300.jpg 169w, https://www.notjustahousewife.net/wp-content/uploads/2024/11/kitchen-cabinets-green1-3-768x1365.jpg 768w, https://www.notjustahousewife.net/wp-content/uploads/2024/11/kitchen-cabinets-green1-3-864x1536.jpg 864w, https://www.notjustahousewife.net/wp-content/uploads/2024/11/kitchen-cabinets-green1-3-1152x2048.jpg 1152w, https://www.notjustahousewife.net/wp-content/uploads/2024/11/kitchen-cabinets-green1-3-150x267.jpg 150w, https://www.notjustahousewife.net/wp-content/uploads/2024/11/kitchen-cabinets-green1-3-scaled.jpg 1440w" sizes="(max-width: 576px) 100vw, 576px" /></a></figure></div> <p>It is actually really hard to photograph my kitchen because no matter what time of day it is, there is a ton of bright sunlight. There are 3 big windows. One facing south, one east, and one west. It was hard to find a time when the lighting wasn't super harsh. BUT, the natural light is exactly why we felt comfortable doing a darker color on the cabinets. </p> <div class="wp-block-image"> <figure class="aligncenter size-large is-resized"><a href="https://www.notjustahousewife.net/wp-content/uploads/2024/11/sage-green-cabinets-in-kitchen.jpg"><img loading="lazy" decoding="async" width="683" height="1024" src="https://www.notjustahousewife.net/wp-content/uploads/2024/11/sage-green-cabinets-in-kitchen-683x1024.jpg" alt="green painted kitchen cabinets" class="wp-image-27596" style="width:502px;height:auto" srcset="https://www.notjustahousewife.net/wp-content/uploads/2024/11/sage-green-cabinets-in-kitchen-683x1024.jpg 683w, https://www.notjustahousewife.net/wp-content/uploads/2024/11/sage-green-cabinets-in-kitchen-200x300.jpg 200w, https://www.notjustahousewife.net/wp-content/uploads/2024/11/sage-green-cabinets-in-kitchen-768x1152.jpg 768w, https://www.notjustahousewife.net/wp-content/uploads/2024/11/sage-green-cabinets-in-kitchen-150x225.jpg 150w, https://www.notjustahousewife.net/wp-content/uploads/2024/11/sage-green-cabinets-in-kitchen.jpg 1000w" sizes="(max-width: 683px) 100vw, 683px" /></a></figure></div> <p>Like with many colors of paint, it looks different depending on the time of day. In the morning light it comes off having more of a blue undertone and seems darker. In the day time it looks very warm and a bit lighter. </p> <div class="wp-block-image"> <figure class="aligncenter size-large is-resized"><a href="https://www.notjustahousewife.net/wp-content/uploads/2024/11/kitchen-cabinets-painted-green.jpg"><img loading="lazy" decoding="async" width="683" height="1024" src="https://www.notjustahousewife.net/wp-content/uploads/2024/11/kitchen-cabinets-painted-green-683x1024.jpg" alt="painted green kitchen cabinets" class="wp-image-27593" style="width:501px;height:auto" srcset="https://www.notjustahousewife.net/wp-content/uploads/2024/11/kitchen-cabinets-painted-green-683x1024.jpg 683w, https://www.notjustahousewife.net/wp-content/uploads/2024/11/kitchen-cabinets-painted-green-200x300.jpg 200w, https://www.notjustahousewife.net/wp-content/uploads/2024/11/kitchen-cabinets-painted-green-768x1152.jpg 768w, https://www.notjustahousewife.net/wp-content/uploads/2024/11/kitchen-cabinets-painted-green-150x225.jpg 150w, https://www.notjustahousewife.net/wp-content/uploads/2024/11/kitchen-cabinets-painted-green.jpg 1000w" sizes="(max-width: 683px) 100vw, 683px" /></a></figure></div> <p>One of my favorite things about this cabinet upgrade is the contact paper I added to all the drawers and cabinet shelves. </p> <div class="wp-block-image"> <figure class="aligncenter size-large is-resized"><a href="https://www.notjustahousewife.net/wp-content/uploads/2024/11/floral-contact-paper-for-kitchen-drawers.jpg"><img loading="lazy" decoding="async" width="683" height="1024" src="https://www.notjustahousewife.net/wp-content/uploads/2024/11/floral-contact-paper-for-kitchen-drawers-683x1024.jpg" alt="kitchen cabinets and floral botanical contact paper" class="wp-image-27610" style="width:502px;height:auto" srcset="https://www.notjustahousewife.net/wp-content/uploads/2024/11/floral-contact-paper-for-kitchen-drawers-683x1024.jpg 683w, https://www.notjustahousewife.net/wp-content/uploads/2024/11/floral-contact-paper-for-kitchen-drawers-200x300.jpg 200w, https://www.notjustahousewife.net/wp-content/uploads/2024/11/floral-contact-paper-for-kitchen-drawers-768x1152.jpg 768w, https://www.notjustahousewife.net/wp-content/uploads/2024/11/floral-contact-paper-for-kitchen-drawers-150x225.jpg 150w, https://www.notjustahousewife.net/wp-content/uploads/2024/11/floral-contact-paper-for-kitchen-drawers.jpg 1000w" sizes="(max-width: 683px) 100vw, 683px" /></a></figure></div> <p>It had enough various shades of green that I figured at least one would match my paint color. I was pleasantly surprised when it came at just how well it matched! I ordered it from <a href="https://amzn.to/4hZzdjz" target="_blank" rel="noreferrer noopener nofollow">Amazon </a>(affiliate link) and used three rolls.</p> <div class="wp-block-image"> <figure class="aligncenter size-large is-resized"><a href="https://www.notjustahousewife.net/wp-content/uploads/2024/11/Screenshot-2024-11-22-at-9.58.19 PM.png"><img loading="lazy" decoding="async" width="1024" height="984" src="https://www.notjustahousewife.net/wp-content/uploads/2024/11/Screenshot-2024-11-22-at-9.58.19 PM-1024x984.png" alt="" class="wp-image-27612" style="width:551px;height:auto" srcset="https://www.notjustahousewife.net/wp-content/uploads/2024/11/Screenshot-2024-11-22-at-9.58.19 PM-1024x984.png 1024w, https://www.notjustahousewife.net/wp-content/uploads/2024/11/Screenshot-2024-11-22-at-9.58.19 PM-300x288.png 300w, https://www.notjustahousewife.net/wp-content/uploads/2024/11/Screenshot-2024-11-22-at-9.58.19 PM-768x738.png 768w, https://www.notjustahousewife.net/wp-content/uploads/2024/11/Screenshot-2024-11-22-at-9.58.19 PM-150x144.png 150w, https://www.notjustahousewife.net/wp-content/uploads/2024/11/Screenshot-2024-11-22-at-9.58.19 PM.png 1086w" sizes="(max-width: 1024px) 100vw, 1024px" /></a></figure></div> <p>Kevin always sits in front of the camera when I do a shoot thinking it will earn him a treat. I decided to add this one in since he was in <a href="https://www.notjustahousewife.net/new-cabinets-doors/">the last kitchen cabinet post</a>. Plus it gives you all a chance to see him post surgery. His cancerous ear tumor was successfully removed (along with his whole ear).</p> <div class="wp-block-image"> <figure class="aligncenter size-large is-resized"><a href="https://www.notjustahousewife.net/wp-content/uploads/2024/11/painted-green-cabinets-for-kitchen.jpg"><img loading="lazy" decoding="async" width="683" height="1024" src="https://www.notjustahousewife.net/wp-content/uploads/2024/11/painted-green-cabinets-for-kitchen-683x1024.jpg" alt="green painted kitchen base cabinets" class="wp-image-27594" style="width:500px;height:auto" srcset="https://www.notjustahousewife.net/wp-content/uploads/2024/11/painted-green-cabinets-for-kitchen-683x1024.jpg 683w, https://www.notjustahousewife.net/wp-content/uploads/2024/11/painted-green-cabinets-for-kitchen-200x300.jpg 200w, https://www.notjustahousewife.net/wp-content/uploads/2024/11/painted-green-cabinets-for-kitchen-768x1152.jpg 768w, https://www.notjustahousewife.net/wp-content/uploads/2024/11/painted-green-cabinets-for-kitchen-150x225.jpg 150w, https://www.notjustahousewife.net/wp-content/uploads/2024/11/painted-green-cabinets-for-kitchen.jpg 1000w" sizes="(max-width: 683px) 100vw, 683px" /></a></figure></div> <p><strong>Are your cabinets painted? What color are they and do you like it? Let me know in the comments below :) </strong></p> <h2 class="wp-block-heading">PIN For Later:</h2> <div class="wp-block-image"> <figure class="aligncenter size-large is-resized"><a href="https://www.notjustahousewife.net/wp-content/uploads/2024/11/green-kitchen-cabinets.png"><img loading="lazy" decoding="async" width="683" height="1024" src="https://www.notjustahousewife.net/wp-content/uploads/2024/11/green-kitchen-cabinets-683x1024.png" alt="collage of painted green cabinets" class="wp-image-27611" style="width:501px;height:auto" srcset="https://www.notjustahousewife.net/wp-content/uploads/2024/11/green-kitchen-cabinets-683x1024.png 683w, https://www.notjustahousewife.net/wp-content/uploads/2024/11/green-kitchen-cabinets-200x300.png 200w, https://www.notjustahousewife.net/wp-content/uploads/2024/11/green-kitchen-cabinets-768x1152.png 768w, https://www.notjustahousewife.net/wp-content/uploads/2024/11/green-kitchen-cabinets-150x225.png 150w, https://www.notjustahousewife.net/wp-content/uploads/2024/11/green-kitchen-cabinets.png 1000w" sizes="(max-width: 683px) 100vw, 683px" /></a></figure></div><div style="margin-top: 0px; margin-bottom: 0px;" class="sharethis-inline-share-buttons" ></div> ]]>
</content:encoded>
<wfw:commentRss>https://www.notjustahousewife.net/painted-kitchen-cabinets/feed/</wfw:commentRss>
<slash:comments>1</slash:comments>
</item>
<item>
<title>DIY Checkered Vase</title>
<link>https://www.notjustahousewife.net/diy-checkered-vase/</link>
<comments>https://www.notjustahousewife.net/diy-checkered-vase/#comments</comments>
<dc:creator>
<![CDATA[ Stacy ]]>
</dc:creator>
<pubDate>Thu, 26 Sep 2024 19:40:41 +0000</pubDate>
<category>
<![CDATA[ DIY Projects & Tutorials ]]>
</category>
<guid isPermaLink="false">https://www.notjustahousewife.net/?p=27529</guid>
<description>
<![CDATA[ I have a healthy obsession with all things checkered. I also love vases of fresh flowers. And one of my favorite crafts is glass etching. I put them all together for this fun and easy project. The first attempt at making this vase was a complete fail. So here is the right way to make...</p><p><a class="more-link" href="https://www.notjustahousewife.net/diy-checkered-vase/">Read More</a></p> ]]>
</description>
<content:encoded>
<![CDATA[ <p>I have a healthy obsession with all things checkered. I also love vases of fresh flowers. And one of my favorite crafts is glass etching. I put them all together for this fun and easy project. The first attempt at making this vase was a complete fail. So here is the right way to make a DIY checkered vase!</p> <h2 class="wp-block-heading">DIY Checkered Vase - Glass Etched!</h2> <p>My son and his cute new wife both have birthdays in September just a few days apart. They also both loved checkered things (remember <a href="https://www.notjustahousewife.net/how-to-build-a-dance-floor/">their DIY dance floor!</a>) so I actually made this for them as part of their birthday gift. </p> <div class="wp-block-image"> <figure class="aligncenter size-large is-resized"><a href="https://www.notjustahousewife.net/wp-content/uploads/2024/09/checkered-vase-glass-etching-2.png"><img loading="lazy" decoding="async" width="683" height="1024" src="https://www.notjustahousewife.net/wp-content/uploads/2024/09/checkered-vase-glass-etching-2-683x1024.png" alt="glass etched vase with checkerboard pattern" class="wp-image-27546" style="width:550px;height:auto" srcset="https://www.notjustahousewife.net/wp-content/uploads/2024/09/checkered-vase-glass-etching-2-683x1024.png 683w, https://www.notjustahousewife.net/wp-content/uploads/2024/09/checkered-vase-glass-etching-2-200x300.png 200w, https://www.notjustahousewife.net/wp-content/uploads/2024/09/checkered-vase-glass-etching-2-768x1152.png 768w, https://www.notjustahousewife.net/wp-content/uploads/2024/09/checkered-vase-glass-etching-2-150x225.png 150w, https://www.notjustahousewife.net/wp-content/uploads/2024/09/checkered-vase-glass-etching-2.png 1000w" sizes="(max-width: 683px) 100vw, 683px" /></a></figure></div> <h3 class="wp-block-heading">Step 1: Cut The Vinyl</h3> <p>The first round of this project (that ended in failure) I used electrical tape to make the squares. I have used electrical tape to glass etch in the past, but this tape was 1.5" thick and was harder to work with than thinner tape. It stretched out and made slightly wonky lines. So I scrapped that one and started again. This time I used vinyl. I had some gold leftover from the wedding. I could have used my Cricut machine but since it was just strips cut into squares, I used this paper cutter. </p> <p>There was a bit of math involved to figure out the size of the squares. I measured around the vase and then divided that by how many squares I wanted each row to have. You need to have an even number in order for the checkered pattern to work out. </p> <h3 class="wp-block-heading">Step 2: Placing the Vinyl</h3> <p>The first row is the trickiest in the sense that it has to be perfectly spaced in order for all the others to line up. I used the backing of one of the square as a spacer so I knew where the next one needed to go. After the top row was done, the rest was easy peasy. I just lined up corners to corners. </p> <figure class="wp-block-gallery has-nested-images columns-default is-cropped wp-block-gallery-5 is-layout-flex wp-block-gallery-is-layout-flex"> <figure class="wp-block-image size-large"><a href="https://www.notjustahousewife.net/wp-content/uploads/2024/09/cutting-vinly-for-checkered-vase-2.jpg"><img loading="lazy" decoding="async" width="600" height="900" data-id="27535" src="https://www.notjustahousewife.net/wp-content/uploads/2024/09/cutting-vinly-for-checkered-vase-2.jpg" alt="" class="wp-image-27535" srcset="https://www.notjustahousewife.net/wp-content/uploads/2024/09/cutting-vinly-for-checkered-vase-2.jpg 600w, https://www.notjustahousewife.net/wp-content/uploads/2024/09/cutting-vinly-for-checkered-vase-2-200x300.jpg 200w, https://www.notjustahousewife.net/wp-content/uploads/2024/09/cutting-vinly-for-checkered-vase-2-150x225.jpg 150w" sizes="(max-width: 600px) 100vw, 600px" /></a></figure> <figure class="wp-block-image size-large"><a href="https://www.notjustahousewife.net/wp-content/uploads/2024/09/adding-vinyl-squares-to-vase-in-checkerboard-pattern-2.jpg"><img loading="lazy" decoding="async" width="600" height="900" data-id="27531" src="https://www.notjustahousewife.net/wp-content/uploads/2024/09/adding-vinyl-squares-to-vase-in-checkerboard-pattern-2.jpg" alt="" class="wp-image-27531" srcset="https://www.notjustahousewife.net/wp-content/uploads/2024/09/adding-vinyl-squares-to-vase-in-checkerboard-pattern-2.jpg 600w, https://www.notjustahousewife.net/wp-content/uploads/2024/09/adding-vinyl-squares-to-vase-in-checkerboard-pattern-2-200x300.jpg 200w, https://www.notjustahousewife.net/wp-content/uploads/2024/09/adding-vinyl-squares-to-vase-in-checkerboard-pattern-2-150x225.jpg 150w" sizes="(max-width: 600px) 100vw, 600px" /></a></figure> <figure class="wp-block-image size-large"><a href="https://www.notjustahousewife.net/wp-content/uploads/2024/09/adding-vinyl-to-vase-before-glass-etching-cream-2.jpg"><img loading="lazy" decoding="async" width="600" height="900" data-id="27532" src="https://www.notjustahousewife.net/wp-content/uploads/2024/09/adding-vinyl-to-vase-before-glass-etching-cream-2.jpg" alt="" class="wp-image-27532" srcset="https://www.notjustahousewife.net/wp-content/uploads/2024/09/adding-vinyl-to-vase-before-glass-etching-cream-2.jpg 600w, https://www.notjustahousewife.net/wp-content/uploads/2024/09/adding-vinyl-to-vase-before-glass-etching-cream-2-200x300.jpg 200w, https://www.notjustahousewife.net/wp-content/uploads/2024/09/adding-vinyl-to-vase-before-glass-etching-cream-2-150x225.jpg 150w" sizes="(max-width: 600px) 100vw, 600px" /></a></figure> </figure> <h3 class="wp-block-heading">Step 3: Add Glass Etching Cream</h3> <p>Glass etching cream is so fun to use! I apply it with a small craft brush. I dab it on pretty thick to ensure even coverage. Once all the squares without vinyl were covered in the cream, I let it sit a few minutes before rinsing it off. I used the same paint brush to help remove the the glass etching cream. You want to avoid getting it on your skin. </p> <figure class="wp-block-gallery has-nested-images columns-default is-cropped wp-block-gallery-6 is-layout-flex wp-block-gallery-is-layout-flex"> <figure class="wp-block-image size-large"><a href="https://www.notjustahousewife.net/wp-content/uploads/2024/09/adding-glass-etching-cream-2.jpg"><img loading="lazy" decoding="async" width="600" height="900" data-id="27530" src="https://www.notjustahousewife.net/wp-content/uploads/2024/09/adding-glass-etching-cream-2.jpg" alt="" class="wp-image-27530" srcset="https://www.notjustahousewife.net/wp-content/uploads/2024/09/adding-glass-etching-cream-2.jpg 600w, https://www.notjustahousewife.net/wp-content/uploads/2024/09/adding-glass-etching-cream-2-200x300.jpg 200w, https://www.notjustahousewife.net/wp-content/uploads/2024/09/adding-glass-etching-cream-2-150x225.jpg 150w" sizes="(max-width: 600px) 100vw, 600px" /></a></figure> <figure class="wp-block-image size-large"><a href="https://www.notjustahousewife.net/wp-content/uploads/2024/09/glass-etching-cream-on-vase-2.jpg"><img loading="lazy" decoding="async" width="600" height="900" data-id="27537" src="https://www.notjustahousewife.net/wp-content/uploads/2024/09/glass-etching-cream-on-vase-2.jpg" alt="" class="wp-image-27537" srcset="https://www.notjustahousewife.net/wp-content/uploads/2024/09/glass-etching-cream-on-vase-2.jpg 600w, https://www.notjustahousewife.net/wp-content/uploads/2024/09/glass-etching-cream-on-vase-2-200x300.jpg 200w, https://www.notjustahousewife.net/wp-content/uploads/2024/09/glass-etching-cream-on-vase-2-150x225.jpg 150w" sizes="(max-width: 600px) 100vw, 600px" /></a></figure> <figure class="wp-block-image size-large"><a href="https://www.notjustahousewife.net/wp-content/uploads/2024/09/rinsing-off-glass-etching-cream-2.jpg"><img loading="lazy" decoding="async" width="600" height="900" data-id="27539" src="https://www.notjustahousewife.net/wp-content/uploads/2024/09/rinsing-off-glass-etching-cream-2.jpg" alt="" class="wp-image-27539" srcset="https://www.notjustahousewife.net/wp-content/uploads/2024/09/rinsing-off-glass-etching-cream-2.jpg 600w, https://www.notjustahousewife.net/wp-content/uploads/2024/09/rinsing-off-glass-etching-cream-2-200x300.jpg 200w, https://www.notjustahousewife.net/wp-content/uploads/2024/09/rinsing-off-glass-etching-cream-2-150x225.jpg 150w" sizes="(max-width: 600px) 100vw, 600px" /></a></figure> </figure> <p>When it is wet, it doesn't look super opaque, but once it dries, you can really see it. Peeling off the vinyl was the most satisfying part! </p> <div class="wp-block-image"> <figure class="aligncenter size-full is-resized"><a href="https://www.notjustahousewife.net/wp-content/uploads/2024/09/removing-vinyl-from-vase-after-glass-etching-2.jpg"><img loading="lazy" decoding="async" width="600" height="900" src="https://www.notjustahousewife.net/wp-content/uploads/2024/09/removing-vinyl-from-vase-after-glass-etching-2.jpg" alt="peeling vinyl off of glass etched vase" class="wp-image-27538" style="width:550px;height:auto" srcset="https://www.notjustahousewife.net/wp-content/uploads/2024/09/removing-vinyl-from-vase-after-glass-etching-2.jpg 600w, https://www.notjustahousewife.net/wp-content/uploads/2024/09/removing-vinyl-from-vase-after-glass-etching-2-200x300.jpg 200w, https://www.notjustahousewife.net/wp-content/uploads/2024/09/removing-vinyl-from-vase-after-glass-etching-2-150x225.jpg 150w" sizes="(max-width: 600px) 100vw, 600px" /></a></figure></div> <p>I love this method because it is subtle but still adds a fun touch to your decor. I have also <a href="https://www.notjustahousewife.net/glass-etched-vase/">glass etched a vase with stripes</a>, one <a href="https://www.notjustahousewife.net/easy-diy-valentines-day-vase/">with hearts</a>, and even <a href="https://www.notjustahousewife.net/diy-ghost-candle/">one with ghosts for Halloween!</a></p> <div class="wp-block-image"> <figure class="aligncenter size-large is-resized"><a href="https://www.notjustahousewife.net/wp-content/uploads/2024/09/checkered-vase-glass-etching-DIY-2.png"><img loading="lazy" decoding="async" width="683" height="1024" src="https://www.notjustahousewife.net/wp-content/uploads/2024/09/checkered-vase-glass-etching-DIY-2-683x1024.png" alt="glass etched checkered pattern on vase" class="wp-image-27547" style="width:551px;height:auto" srcset="https://www.notjustahousewife.net/wp-content/uploads/2024/09/checkered-vase-glass-etching-DIY-2-683x1024.png 683w, https://www.notjustahousewife.net/wp-content/uploads/2024/09/checkered-vase-glass-etching-DIY-2-200x300.png 200w, https://www.notjustahousewife.net/wp-content/uploads/2024/09/checkered-vase-glass-etching-DIY-2-768x1152.png 768w, https://www.notjustahousewife.net/wp-content/uploads/2024/09/checkered-vase-glass-etching-DIY-2-150x225.png 150w, https://www.notjustahousewife.net/wp-content/uploads/2024/09/checkered-vase-glass-etching-DIY-2.png 1000w" sizes="(max-width: 683px) 100vw, 683px" /></a></figure></div> <p><strong>What pattern would you glass etch on a vase?</strong></p> <p></p> <h3 class="wp-block-heading">PIN For Later:</h3> <div class="wp-block-image"> <figure class="aligncenter size-large is-resized"><a href="https://www.notjustahousewife.net/wp-content/uploads/2024/09/glass-etched-vase-.png"><img loading="lazy" decoding="async" width="683" height="1024" src="https://www.notjustahousewife.net/wp-content/uploads/2024/09/glass-etched-vase--683x1024.png" alt="checkered pattern glass etched onto vase with flowers" class="wp-image-27548" style="width:550px;height:auto" srcset="https://www.notjustahousewife.net/wp-content/uploads/2024/09/glass-etched-vase--683x1024.png 683w, https://www.notjustahousewife.net/wp-content/uploads/2024/09/glass-etched-vase--200x300.png 200w, https://www.notjustahousewife.net/wp-content/uploads/2024/09/glass-etched-vase--768x1152.png 768w, https://www.notjustahousewife.net/wp-content/uploads/2024/09/glass-etched-vase--150x225.png 150w, https://www.notjustahousewife.net/wp-content/uploads/2024/09/glass-etched-vase-.png 1000w" sizes="(max-width: 683px) 100vw, 683px" /></a></figure></div><div style="margin-top: 0px; margin-bottom: 0px;" class="sharethis-inline-share-buttons" ></div> ]]>
</content:encoded>
<wfw:commentRss>https://www.notjustahousewife.net/diy-checkered-vase/feed/</wfw:commentRss>
<slash:comments>3</slash:comments>
</item>
<item>
<title>DIY Vegetable Garden Fence</title>
<link>https://www.notjustahousewife.net/diy-vegetable-garden-fence/</link>
<comments>https://www.notjustahousewife.net/diy-vegetable-garden-fence/#comments</comments>
<dc:creator>
<![CDATA[ Stacy ]]>
</dc:creator>
<pubDate>Tue, 10 Sep 2024 14:41:40 +0000</pubDate>
<category>
<![CDATA[ Outdoor Projects & Gardening ]]>
</category>
<category>
<![CDATA[ diy ]]>
</category>
<category>
<![CDATA[ diy project ]]>
</category>
<category>
<![CDATA[ garden ]]>
</category>
<category>
<![CDATA[ outdoor ]]>
</category>
<guid isPermaLink="false">https://www.notjustahousewife.net/?p=27473</guid>
<description>
<![CDATA[ My toxic trait is that I always think I can get a project done faster than I really can. Call me optimistic, but I really thought I could get this garden fence done in a week. It turns out it was way more technical than I thought it would be. The perfectionist in me reared...</p><p><a class="more-link" href="https://www.notjustahousewife.net/diy-vegetable-garden-fence/">Read More</a></p> ]]>
</description>
<content:encoded>
<![CDATA[ <p>My toxic trait is that I always think I can get a project done faster than I really can. Call me optimistic, but I really thought I could get this garden fence done in a week. It turns out it was way more technical than I thought it would be. The perfectionist in me reared its ugly head and slowed things down a bit too. Maybe it is because this project challenged me, but I am so PROUD of how it turned out and it is one of my favorite recent projects. This DIY vegetable garden fence took 3 weeks to complete but was worth every (extra) minute!&nbsp;</p> <p class="has-text-align-center"><em>This post is sponsored by <a href="https://www.wagnerspraytech.com/" target="_blank" rel="noreferrer noopener sponsored nofollow">Wagner</a> but all ideas and opinions are 100% my own.</em></p> <div class="wp-block-image"> <figure class="aligncenter size-large is-resized"><a href="https://www.notjustahousewife.net/wp-content/uploads/2024/09/X-panel-fence-for-garden.jpg"><img loading="lazy" decoding="async" width="683" height="1024" src="https://www.notjustahousewife.net/wp-content/uploads/2024/09/X-panel-fence-for-garden-683x1024.jpg" alt="" class="wp-image-27510" style="width:551px;height:auto" srcset="https://www.notjustahousewife.net/wp-content/uploads/2024/09/X-panel-fence-for-garden-683x1024.jpg 683w, https://www.notjustahousewife.net/wp-content/uploads/2024/09/X-panel-fence-for-garden-200x300.jpg 200w, https://www.notjustahousewife.net/wp-content/uploads/2024/09/X-panel-fence-for-garden-768x1152.jpg 768w, https://www.notjustahousewife.net/wp-content/uploads/2024/09/X-panel-fence-for-garden-150x225.jpg 150w, https://www.notjustahousewife.net/wp-content/uploads/2024/09/X-panel-fence-for-garden.jpg 1000w" sizes="(max-width: 683px) 100vw, 683px" /></a></figure></div> <h3 class="wp-block-heading">My Fence Is Hiding A Secret!</h3> <p>Not only is this wood fence pretty, it has a fun secret! Truth be told, I didn't really need a fence for the garden. I don't need to keep animals out and my kids are old enough to be careful when stepping in the garden to get a stray ball. But I WANTED a cute, decorative fence. I wanted a way to define the space like you would with a rug in a room. </p> <p>The MAIN reason I wanted a fence though, was to hide the sprinklers. The way we water our large garden is with sprinklers on 3 foot long stems. The sprinklers along the front of the garden are just poking out for all to see. They have always bugged me. I came up with an idea and how to execute it and luckily Shane was willing to help me see if it would actually work. </p> <div class="wp-block-image"> <figure class="aligncenter size-full"><a href="https://www.notjustahousewife.net/wp-content/uploads/2024/09/sprinklers-before-copy.jpg"><img loading="lazy" decoding="async" width="569" height="500" src="https://www.notjustahousewife.net/wp-content/uploads/2024/09/sprinklers-before-copy.jpg" alt="" class="wp-image-27495" srcset="https://www.notjustahousewife.net/wp-content/uploads/2024/09/sprinklers-before-copy.jpg 569w, https://www.notjustahousewife.net/wp-content/uploads/2024/09/sprinklers-before-copy-300x264.jpg 300w, https://www.notjustahousewife.net/wp-content/uploads/2024/09/sprinklers-before-copy-150x132.jpg 150w" sizes="(max-width: 569px) 100vw, 569px" /></a></figure></div> <h3 class="wp-block-heading">Fence Posts</h3> <p>This fence is made up of 2 different types of wooden posts. We had 8 solid 4x4 posts and 5 "sprinkler hiding" posts. </p> <p>I didn't want to cement the posts into place for several reasons. In my research I came across a type of fence post where you pound it into the ground and then screw the 4x4 post into the base. We have such heavy clay soil that I knew these would be very secure. </p> <div class="wp-block-image"> <figure class="aligncenter size-full is-resized"><a href="https://www.notjustahousewife.net/wp-content/uploads/2024/09/pounding-in-fence-posts.jpg"><img loading="lazy" decoding="async" width="600" height="900" src="https://www.notjustahousewife.net/wp-content/uploads/2024/09/pounding-in-fence-posts.jpg" alt="" class="wp-image-27492" style="width:550px;height:auto" srcset="https://www.notjustahousewife.net/wp-content/uploads/2024/09/pounding-in-fence-posts.jpg 600w, https://www.notjustahousewife.net/wp-content/uploads/2024/09/pounding-in-fence-posts-200x300.jpg 200w, https://www.notjustahousewife.net/wp-content/uploads/2024/09/pounding-in-fence-posts-150x225.jpg 150w" sizes="(max-width: 600px) 100vw, 600px" /></a></figure></div> <p>For the sprinkler fence posts, I needed a hollow 4x4. I am sure there are a bunch of ways to go about this, but given the tools we had available, this is what I came up with.</p> <p>We cut a 2x4 down a bit so instead of being 1.5" thick, it was 1" thick. Using the table saw, we scored lines on the side so it would be easier to chisel out.</p> <div class="wp-block-image"> <figure class="aligncenter size-full is-resized"><a href="https://www.notjustahousewife.net/wp-content/uploads/2024/09/chisel-2x4-1.jpg"><img loading="lazy" decoding="async" width="600" height="900" src="https://www.notjustahousewife.net/wp-content/uploads/2024/09/chisel-2x4-1.jpg" alt="" class="wp-image-27476" style="width:549px;height:auto" srcset="https://www.notjustahousewife.net/wp-content/uploads/2024/09/chisel-2x4-1.jpg 600w, https://www.notjustahousewife.net/wp-content/uploads/2024/09/chisel-2x4-1-200x300.jpg 200w, https://www.notjustahousewife.net/wp-content/uploads/2024/09/chisel-2x4-1-150x225.jpg 150w" sizes="(max-width: 600px) 100vw, 600px" /></a></figure></div> <p>We then cut another 2x4 in half lengthwise to create sides. We cut them to be thinner at the top. This way there would be a bigger space for the sprinkler head at the top, and the rest of the post opening would be narrow for the stem. We needed the walls to be thicker at the bottom so we could screw the fence panels into them later. </p> <div class="wp-block-image"> <figure class="aligncenter size-full is-resized"><a href="https://www.notjustahousewife.net/wp-content/uploads/2024/09/sprinkler-post-diy.jpg"><img loading="lazy" decoding="async" width="600" height="900" src="https://www.notjustahousewife.net/wp-content/uploads/2024/09/sprinkler-post-diy.jpg" alt="" class="wp-image-27494" style="width:548px;height:auto" srcset="https://www.notjustahousewife.net/wp-content/uploads/2024/09/sprinkler-post-diy.jpg 600w, https://www.notjustahousewife.net/wp-content/uploads/2024/09/sprinkler-post-diy-200x300.jpg 200w, https://www.notjustahousewife.net/wp-content/uploads/2024/09/sprinkler-post-diy-150x225.jpg 150w" sizes="(max-width: 600px) 100vw, 600px" /></a></figure></div> <p>Once assembled, I coated the bottoms with liquid rubber. This will hopefully slow down the rotting process. It seemed like the best option since we were not using cement. And as an added bonus, it will help these posts match the solid posts that have the black metal base! Win, win.</p> <div class="wp-block-image"> <figure class="aligncenter size-full is-resized"><a href="https://www.notjustahousewife.net/wp-content/uploads/2024/09/liquid-rubber-to-fence-posts.jpg"><img loading="lazy" decoding="async" width="600" height="900" src="https://www.notjustahousewife.net/wp-content/uploads/2024/09/liquid-rubber-to-fence-posts.jpg" alt="" class="wp-image-27488" style="width:551px;height:auto" srcset="https://www.notjustahousewife.net/wp-content/uploads/2024/09/liquid-rubber-to-fence-posts.jpg 600w, https://www.notjustahousewife.net/wp-content/uploads/2024/09/liquid-rubber-to-fence-posts-200x300.jpg 200w, https://www.notjustahousewife.net/wp-content/uploads/2024/09/liquid-rubber-to-fence-posts-150x225.jpg 150w" sizes="(max-width: 600px) 100vw, 600px" /></a></figure></div> <h3 class="wp-block-heading">X Fence Panels</h3> <p>I love anything with an X detail! I have several fences pinned that have this fun pattern. There are multiple ways to create an X for a fence panel but I like the look of one specific way the best. And of course it is the hardest one to execute! Instead of having one board go behind the other, I decided to notch out the boards so they fit inside each other. For the fencing material we went with 2x4s since they are strong and inexpensive.&nbsp;</p> <div class="wp-block-image"> <figure class="aligncenter size-full is-resized"><a href="https://www.notjustahousewife.net/wp-content/uploads/2024/09/cutting-2x4-on-tablesaw.jpg"><img loading="lazy" decoding="async" width="600" height="900" src="https://www.notjustahousewife.net/wp-content/uploads/2024/09/cutting-2x4-on-tablesaw.jpg" alt="" class="wp-image-27477" style="width:546px;height:auto" srcset="https://www.notjustahousewife.net/wp-content/uploads/2024/09/cutting-2x4-on-tablesaw.jpg 600w, https://www.notjustahousewife.net/wp-content/uploads/2024/09/cutting-2x4-on-tablesaw-200x300.jpg 200w, https://www.notjustahousewife.net/wp-content/uploads/2024/09/cutting-2x4-on-tablesaw-150x225.jpg 150w" sizes="(max-width: 600px) 100vw, 600px" /></a></figure></div> <p>I hate math so I let Shane take the lead on this part. He figure out the angle for the blade on the table saw and then cut two lines in the center of each 2x4 (cross board). Then I used a cutting tool to finish cutting out the piece. I had tested out a couple other ways but this cutting tool was a great way to get the job done fast. Or at least faster...</p> <figure class="wp-block-gallery has-nested-images columns-default is-cropped wp-block-gallery-7 is-layout-flex wp-block-gallery-is-layout-flex"> <figure class="wp-block-image size-large"><a href="https://www.notjustahousewife.net/wp-content/uploads/2024/09/cutting-out-notches-for-x-fence.jpg"><img loading="lazy" decoding="async" width="600" height="900" data-id="27478" src="https://www.notjustahousewife.net/wp-content/uploads/2024/09/cutting-out-notches-for-x-fence.jpg" alt="" class="wp-image-27478" srcset="https://www.notjustahousewife.net/wp-content/uploads/2024/09/cutting-out-notches-for-x-fence.jpg 600w, https://www.notjustahousewife.net/wp-content/uploads/2024/09/cutting-out-notches-for-x-fence-200x300.jpg 200w, https://www.notjustahousewife.net/wp-content/uploads/2024/09/cutting-out-notches-for-x-fence-150x225.jpg 150w" sizes="(max-width: 600px) 100vw, 600px" /></a></figure> <figure class="wp-block-image size-large"><a href="https://www.notjustahousewife.net/wp-content/uploads/2024/09/notching-2x4-for-x-fence-detail.jpg"><img loading="lazy" decoding="async" width="600" height="900" data-id="27489" src="https://www.notjustahousewife.net/wp-content/uploads/2024/09/notching-2x4-for-x-fence-detail.jpg" alt="" class="wp-image-27489" srcset="https://www.notjustahousewife.net/wp-content/uploads/2024/09/notching-2x4-for-x-fence-detail.jpg 600w, https://www.notjustahousewife.net/wp-content/uploads/2024/09/notching-2x4-for-x-fence-detail-200x300.jpg 200w, https://www.notjustahousewife.net/wp-content/uploads/2024/09/notching-2x4-for-x-fence-detail-150x225.jpg 150w" sizes="(max-width: 600px) 100vw, 600px" /></a></figure> <figure class="wp-block-image size-large"><a href="https://www.notjustahousewife.net/wp-content/uploads/2024/09/notches-fit-together-to-make-x.jpg"><img loading="lazy" decoding="async" width="600" height="900" data-id="27517" src="https://www.notjustahousewife.net/wp-content/uploads/2024/09/notches-fit-together-to-make-x.jpg" alt="" class="wp-image-27517" srcset="https://www.notjustahousewife.net/wp-content/uploads/2024/09/notches-fit-together-to-make-x.jpg 600w, https://www.notjustahousewife.net/wp-content/uploads/2024/09/notches-fit-together-to-make-x-200x300.jpg 200w, https://www.notjustahousewife.net/wp-content/uploads/2024/09/notches-fit-together-to-make-x-150x225.jpg 150w" sizes="(max-width: 600px) 100vw, 600px" /></a></figure> </figure> <p>I cut the sides, top, and bottom of each panel out of 2x4s. When all the pieces were cut, I sanded each and every one with my sander. I knew that this wooden fence would get touched a lot and probably climbed on and I didn't want anyone getting slivers. It was very time consuming, but worth it.</p> <p>I screwed them together to create a rectangle box. Then I added the cross pieces in the center to form the X. I had to use a rubber mallet to fit most of the cross pieces together where the notches were. It was a nice snug fit! </p> <figure class="wp-block-gallery has-nested-images columns-default is-cropped wp-block-gallery-8 is-layout-flex wp-block-gallery-is-layout-flex"> <figure class="wp-block-image size-large"><a href="https://www.notjustahousewife.net/wp-content/uploads/2024/09/screwing-together-fence-panels.jpg"><img loading="lazy" decoding="async" width="600" height="900" data-id="27493" src="https://www.notjustahousewife.net/wp-content/uploads/2024/09/screwing-together-fence-panels.jpg" alt="" class="wp-image-27493" srcset="https://www.notjustahousewife.net/wp-content/uploads/2024/09/screwing-together-fence-panels.jpg 600w, https://www.notjustahousewife.net/wp-content/uploads/2024/09/screwing-together-fence-panels-200x300.jpg 200w, https://www.notjustahousewife.net/wp-content/uploads/2024/09/screwing-together-fence-panels-150x225.jpg 150w" sizes="(max-width: 600px) 100vw, 600px" /></a></figure> <figure class="wp-block-image size-large"><a href="https://www.notjustahousewife.net/wp-content/uploads/2024/09/x-panels-for-fence.jpg"><img loading="lazy" decoding="async" width="600" height="900" data-id="27500" src="https://www.notjustahousewife.net/wp-content/uploads/2024/09/x-panels-for-fence.jpg" alt="" class="wp-image-27500" srcset="https://www.notjustahousewife.net/wp-content/uploads/2024/09/x-panels-for-fence.jpg 600w, https://www.notjustahousewife.net/wp-content/uploads/2024/09/x-panels-for-fence-200x300.jpg 200w, https://www.notjustahousewife.net/wp-content/uploads/2024/09/x-panels-for-fence-150x225.jpg 150w" sizes="(max-width: 600px) 100vw, 600px" /></a></figure> </figure> <p>The the Xs got screwed into the frames. They were nice and solid without being too heavy. I made 12 panels total. They were each 76.5 inches long and 31 tall. I wanted a 5 inch gap at the bottom of the fence which made the total height of the fence 36 inches. </p> <h3 class="wp-block-heading">Assembling The DIY Vegetable Garden Fence</h3> <p>Once the solid 4x4 posts were set, we dug down 18" and  placed the hollow posts in the hole. We unscrewed the short side and placed the sprinkler inside. Our garden sprinklers are on a flex line so it was easy to move them into place. We packed the dirt down around the line and then screwed the short side back on.  </p> <figure class="wp-block-gallery has-nested-images columns-default is-cropped wp-block-gallery-9 is-layout-flex wp-block-gallery-is-layout-flex"> <figure class="wp-block-image size-large"><a href="https://www.notjustahousewife.net/wp-content/uploads/2024/09/hollow-fence-post-for-sprinkler.jpg"><img loading="lazy" decoding="async" width="600" height="900" data-id="27486" src="https://www.notjustahousewife.net/wp-content/uploads/2024/09/hollow-fence-post-for-sprinkler.jpg" alt="" class="wp-image-27486" srcset="https://www.notjustahousewife.net/wp-content/uploads/2024/09/hollow-fence-post-for-sprinkler.jpg 600w, https://www.notjustahousewife.net/wp-content/uploads/2024/09/hollow-fence-post-for-sprinkler-200x300.jpg 200w, https://www.notjustahousewife.net/wp-content/uploads/2024/09/hollow-fence-post-for-sprinkler-150x225.jpg 150w" sizes="(max-width: 600px) 100vw, 600px" /></a></figure> <figure class="wp-block-image size-large"><a href="https://www.notjustahousewife.net/wp-content/uploads/2024/09/hollow-post-for-sprinklers.jpg"><img loading="lazy" decoding="async" width="600" height="900" data-id="27487" src="https://www.notjustahousewife.net/wp-content/uploads/2024/09/hollow-post-for-sprinklers.jpg" alt="" class="wp-image-27487" srcset="https://www.notjustahousewife.net/wp-content/uploads/2024/09/hollow-post-for-sprinklers.jpg 600w, https://www.notjustahousewife.net/wp-content/uploads/2024/09/hollow-post-for-sprinklers-200x300.jpg 200w, https://www.notjustahousewife.net/wp-content/uploads/2024/09/hollow-post-for-sprinklers-150x225.jpg 150w" sizes="(max-width: 600px) 100vw, 600px" /></a></figure> </figure> <p>With all of the posts now set, the next step was to hang the fence panels! We simply screwed the side of the panel directly into the side of the post. For the hollow pickets, we had to put the first screw farther down to where the wall was thicker. We also used screws that were slightly shorter than the ones we used on the solid posts.&nbsp;</p> <div class="wp-block-image"> <figure class="aligncenter size-full is-resized"><a href="https://www.notjustahousewife.net/wp-content/uploads/2024/09/attaching-x-fence-panels.jpg"><img loading="lazy" decoding="async" width="600" height="900" src="https://www.notjustahousewife.net/wp-content/uploads/2024/09/attaching-x-fence-panels.jpg" alt="" class="wp-image-27475" style="width:551px;height:auto" srcset="https://www.notjustahousewife.net/wp-content/uploads/2024/09/attaching-x-fence-panels.jpg 600w, https://www.notjustahousewife.net/wp-content/uploads/2024/09/attaching-x-fence-panels-200x300.jpg 200w, https://www.notjustahousewife.net/wp-content/uploads/2024/09/attaching-x-fence-panels-150x225.jpg 150w" sizes="(max-width: 600px) 100vw, 600px" /></a></figure></div> <h3 class="wp-block-heading">Staining The Fence</h3> <p>Our privacy fences are stained a light gray. I have loved the look of the greenery from the yard against the gray so I chose to also stain this vegetable garden fence the same color. Or so I thought.... When I started spraying the stain I realized it was a lot darker than the stain I had used in the past. One look at the label on the can verified that it was indeed a darker gray. So I quickly grabbed some paper towels and wiped off as much as would come off. I actually really liked the look once I did that so I kept up the routine. Spray, spray, wipe, wipe.&nbsp;</p> <div class="wp-block-image"> <figure class="aligncenter size-full is-resized"><a href="https://www.notjustahousewife.net/wp-content/uploads/2024/09/staining-the-fence-with-sprayer.jpg"><img loading="lazy" decoding="async" width="600" height="900" src="https://www.notjustahousewife.net/wp-content/uploads/2024/09/staining-the-fence-with-sprayer.jpg" alt="" class="wp-image-27496" style="width:551px;height:auto" srcset="https://www.notjustahousewife.net/wp-content/uploads/2024/09/staining-the-fence-with-sprayer.jpg 600w, https://www.notjustahousewife.net/wp-content/uploads/2024/09/staining-the-fence-with-sprayer-200x300.jpg 200w, https://www.notjustahousewife.net/wp-content/uploads/2024/09/staining-the-fence-with-sprayer-150x225.jpg 150w" sizes="(max-width: 600px) 100vw, 600px" /></a></figure></div> <p>I used my <a href="https://www.wagnerspraytech.com/product/flexio-series/flexio-3500-sprayer/" target="_blank" rel="noreferrer noopener sponsored nofollow">Wagner Flexio 3500</a> with the detail nozzle. The staining was my absolute favorite part of this whole process! Probably because it was the easiest and fastest part of the project. Can you imagine how long it would have taken to stain this 80 foot fence with a brush?! It got in the little nooks of the Xs so nicely too. I put down a plastic tarp but luckily there isn't a lot of overspray with this sprayer.</p> <div class="wp-block-image"> <figure class="aligncenter size-large is-resized"><a href="https://www.notjustahousewife.net/wp-content/uploads/2024/09/DIY-vegetable-garden-fence-with-x-detail.jpg"><img loading="lazy" decoding="async" width="723" height="1024" src="https://www.notjustahousewife.net/wp-content/uploads/2024/09/DIY-vegetable-garden-fence-with-x-detail-723x1024.jpg" alt="" class="wp-image-27507" style="width:551px;height:auto" srcset="https://www.notjustahousewife.net/wp-content/uploads/2024/09/DIY-vegetable-garden-fence-with-x-detail-723x1024.jpg 723w, https://www.notjustahousewife.net/wp-content/uploads/2024/09/DIY-vegetable-garden-fence-with-x-detail-212x300.jpg 212w, https://www.notjustahousewife.net/wp-content/uploads/2024/09/DIY-vegetable-garden-fence-with-x-detail-768x1088.jpg 768w, https://www.notjustahousewife.net/wp-content/uploads/2024/09/DIY-vegetable-garden-fence-with-x-detail-150x213.jpg 150w, https://www.notjustahousewife.net/wp-content/uploads/2024/09/DIY-vegetable-garden-fence-with-x-detail.jpg 1000w" sizes="(max-width: 723px) 100vw, 723px" /></a></figure></div> <p>It is SO HARD to try and photograph an 80 foot fence! The photos don't really do the whole thing justice, but I am so in love with this fence. It completes my garden area.&nbsp;</p> <div class="wp-block-image"> <figure class="aligncenter size-large is-resized"><a href="https://www.notjustahousewife.net/wp-content/uploads/2024/09/DIY-vegetable-garden-fence.jpg"><img loading="lazy" decoding="async" width="683" height="1024" src="https://www.notjustahousewife.net/wp-content/uploads/2024/09/DIY-vegetable-garden-fence-683x1024.jpg" alt="" class="wp-image-27508" style="width:551px;height:auto" srcset="https://www.notjustahousewife.net/wp-content/uploads/2024/09/DIY-vegetable-garden-fence-683x1024.jpg 683w, https://www.notjustahousewife.net/wp-content/uploads/2024/09/DIY-vegetable-garden-fence-200x300.jpg 200w, https://www.notjustahousewife.net/wp-content/uploads/2024/09/DIY-vegetable-garden-fence-768x1152.jpg 768w, https://www.notjustahousewife.net/wp-content/uploads/2024/09/DIY-vegetable-garden-fence-150x225.jpg 150w, https://www.notjustahousewife.net/wp-content/uploads/2024/09/DIY-vegetable-garden-fence.jpg 1000w" sizes="(max-width: 683px) 100vw, 683px" /></a></figure></div> <p>And not only are the sprinklers perfectly hidden, they pop up and work beautifully!&nbsp;</p> <figure class="wp-block-gallery has-nested-images columns-default is-cropped wp-block-gallery-10 is-layout-flex wp-block-gallery-is-layout-flex"> <figure class="wp-block-image size-large"><a href="https://www.notjustahousewife.net/wp-content/uploads/2024/09/fence-with-sprinklers.jpg"><img loading="lazy" decoding="async" width="683" height="1024" data-id="27515" src="https://www.notjustahousewife.net/wp-content/uploads/2024/09/fence-with-sprinklers-683x1024.jpg" alt="" class="wp-image-27515" srcset="https://www.notjustahousewife.net/wp-content/uploads/2024/09/fence-with-sprinklers-683x1024.jpg 683w, https://www.notjustahousewife.net/wp-content/uploads/2024/09/fence-with-sprinklers-200x300.jpg 200w, https://www.notjustahousewife.net/wp-content/uploads/2024/09/fence-with-sprinklers-768x1152.jpg 768w, https://www.notjustahousewife.net/wp-content/uploads/2024/09/fence-with-sprinklers-150x225.jpg 150w, https://www.notjustahousewife.net/wp-content/uploads/2024/09/fence-with-sprinklers.jpg 1000w" sizes="(max-width: 683px) 100vw, 683px" /></a></figure> <figure class="wp-block-image size-large"><a href="https://www.notjustahousewife.net/wp-content/uploads/2024/09/Sprinkler-fence-2.jpg"><img loading="lazy" decoding="async" width="691" height="1024" data-id="27514" src="https://www.notjustahousewife.net/wp-content/uploads/2024/09/Sprinkler-fence-2-691x1024.jpg" alt="" class="wp-image-27514" srcset="https://www.notjustahousewife.net/wp-content/uploads/2024/09/Sprinkler-fence-2-691x1024.jpg 691w, https://www.notjustahousewife.net/wp-content/uploads/2024/09/Sprinkler-fence-2-202x300.jpg 202w, https://www.notjustahousewife.net/wp-content/uploads/2024/09/Sprinkler-fence-2-768x1138.jpg 768w, https://www.notjustahousewife.net/wp-content/uploads/2024/09/Sprinkler-fence-2-150x222.jpg 150w, https://www.notjustahousewife.net/wp-content/uploads/2024/09/Sprinkler-fence-2.jpg 1022w" sizes="(max-width: 691px) 100vw, 691px" /></a></figure> </figure> <p>This seemingly simple fence gave me a run for my money but will hopefully last years and years. It's not perfect, but I am glad I took the extra time to make sure it was as straight as possible and that everything fit well.</p> <div class="wp-block-image"> <figure class="aligncenter size-large is-resized"><a href="https://www.notjustahousewife.net/wp-content/uploads/2024/09/DIY-garden-fence-with-X-detail.jpg"><img loading="lazy" decoding="async" width="683" height="1024" src="https://www.notjustahousewife.net/wp-content/uploads/2024/09/DIY-garden-fence-with-X-detail-683x1024.jpg" alt="" class="wp-image-27503" style="width:552px;height:auto" srcset="https://www.notjustahousewife.net/wp-content/uploads/2024/09/DIY-garden-fence-with-X-detail-683x1024.jpg 683w, https://www.notjustahousewife.net/wp-content/uploads/2024/09/DIY-garden-fence-with-X-detail-200x300.jpg 200w, https://www.notjustahousewife.net/wp-content/uploads/2024/09/DIY-garden-fence-with-X-detail-768x1152.jpg 768w, https://www.notjustahousewife.net/wp-content/uploads/2024/09/DIY-garden-fence-with-X-detail-150x225.jpg 150w, https://www.notjustahousewife.net/wp-content/uploads/2024/09/DIY-garden-fence-with-X-detail.jpg 1000w" sizes="(max-width: 683px) 100vw, 683px" /></a></figure></div> <h3 class="wp-block-heading">Q&amp;A</h3> <p><strong>Why Don't You Have A Gate?</strong></p> <p>For now we do not have a garden gate on this fence since it doesn't run the full length of the garden space. &nbsp;We kept both ends open because of the shape and how both ends curve. We can access the garden from both ends and walk around in the garden. If we decide we want a gate opening in the future, all we have to do is take down one panel and convert it into a two little gates.&nbsp;</p> <div class="wp-block-image"> <figure class="aligncenter size-full is-resized"><a href="https://www.notjustahousewife.net/wp-content/uploads/2024/09/garden-fence-X.jpg"><img loading="lazy" decoding="async" width="600" height="900" src="https://www.notjustahousewife.net/wp-content/uploads/2024/09/garden-fence-X.jpg" alt="" class="wp-image-27483" style="width:549px;height:auto" srcset="https://www.notjustahousewife.net/wp-content/uploads/2024/09/garden-fence-X.jpg 600w, https://www.notjustahousewife.net/wp-content/uploads/2024/09/garden-fence-X-200x300.jpg 200w, https://www.notjustahousewife.net/wp-content/uploads/2024/09/garden-fence-X-150x225.jpg 150w" sizes="(max-width: 600px) 100vw, 600px" /></a></figure></div> <p><strong>What If I Need To Keep Animals Out?</strong></p> <p>This fence would still be super cute with chicken wire, hardware cloth, wire mesh, or some other type of wire fencing attached to the backside with a staple gun. This would allow you to still have the X design and have your garden or garden beds be animal proof. It would keep out even small animals. You could even dig down and have some of the wire fencing buried in the ground to prevent animals from digging. </p> <figure class="wp-block-gallery has-nested-images columns-2 is-cropped wp-block-gallery-11 is-layout-flex wp-block-gallery-is-layout-flex"> <figure class="wp-block-image size-large"><a href="https://www.notjustahousewife.net/wp-content/uploads/2024/09/DIY-garden-wood-fence.jpg"><img loading="lazy" decoding="async" width="683" height="1024" data-id="27506" src="https://www.notjustahousewife.net/wp-content/uploads/2024/09/DIY-garden-wood-fence-683x1024.jpg" alt="" class="wp-image-27506" srcset="https://www.notjustahousewife.net/wp-content/uploads/2024/09/DIY-garden-wood-fence-683x1024.jpg 683w, https://www.notjustahousewife.net/wp-content/uploads/2024/09/DIY-garden-wood-fence-200x300.jpg 200w, https://www.notjustahousewife.net/wp-content/uploads/2024/09/DIY-garden-wood-fence-768x1152.jpg 768w, https://www.notjustahousewife.net/wp-content/uploads/2024/09/DIY-garden-wood-fence-150x225.jpg 150w, https://www.notjustahousewife.net/wp-content/uploads/2024/09/DIY-garden-wood-fence.jpg 1000w" sizes="(max-width: 683px) 100vw, 683px" /></a></figure> <figure class="wp-block-image size-large"><a href="https://www.notjustahousewife.net/wp-content/uploads/2024/09/DIY-garden-fence.jpg"><img loading="lazy" decoding="async" width="683" height="1024" data-id="27505" src="https://www.notjustahousewife.net/wp-content/uploads/2024/09/DIY-garden-fence-683x1024.jpg" alt="" class="wp-image-27505" srcset="https://www.notjustahousewife.net/wp-content/uploads/2024/09/DIY-garden-fence-683x1024.jpg 683w, https://www.notjustahousewife.net/wp-content/uploads/2024/09/DIY-garden-fence-200x300.jpg 200w, https://www.notjustahousewife.net/wp-content/uploads/2024/09/DIY-garden-fence-768x1152.jpg 768w, https://www.notjustahousewife.net/wp-content/uploads/2024/09/DIY-garden-fence-150x225.jpg 150w, https://www.notjustahousewife.net/wp-content/uploads/2024/09/DIY-garden-fence.jpg 1000w" sizes="(max-width: 683px) 100vw, 683px" /></a></figure> <figure class="wp-block-image size-large"><a href="https://www.notjustahousewife.net/wp-content/uploads/2024/09/x-fence-joint.jpg"><img loading="lazy" decoding="async" width="600" height="900" data-id="27499" src="https://www.notjustahousewife.net/wp-content/uploads/2024/09/x-fence-joint.jpg" alt="" class="wp-image-27499" srcset="https://www.notjustahousewife.net/wp-content/uploads/2024/09/x-fence-joint.jpg 600w, https://www.notjustahousewife.net/wp-content/uploads/2024/09/x-fence-joint-200x300.jpg 200w, https://www.notjustahousewife.net/wp-content/uploads/2024/09/x-fence-joint-150x225.jpg 150w" sizes="(max-width: 600px) 100vw, 600px" /></a></figure> <figure class="wp-block-image size-full"><a href="https://www.notjustahousewife.net/wp-content/uploads/2024/09/garden-fence-stacy.jpg"><img loading="lazy" decoding="async" width="600" height="900" data-id="27480" src="https://www.notjustahousewife.net/wp-content/uploads/2024/09/garden-fence-stacy.jpg" alt="" class="wp-image-27480" srcset="https://www.notjustahousewife.net/wp-content/uploads/2024/09/garden-fence-stacy.jpg 600w, https://www.notjustahousewife.net/wp-content/uploads/2024/09/garden-fence-stacy-200x300.jpg 200w, https://www.notjustahousewife.net/wp-content/uploads/2024/09/garden-fence-stacy-150x225.jpg 150w" sizes="(max-width: 600px) 100vw, 600px" /></a></figure> </figure> <p><strong>What other vegetable garden fence ideas do you have? What styles do you like? </strong>I<strong>n your opinion, what would make good fences? Are you team white picket fence? Or would you rather a wire fence? I'd love to hear what you think in the comments below :) </strong></p> <div style="margin-top: 0px; margin-bottom: 0px;" class="sharethis-inline-share-buttons" ></div> ]]>
</content:encoded>
<wfw:commentRss>https://www.notjustahousewife.net/diy-vegetable-garden-fence/feed/</wfw:commentRss>
<slash:comments>9</slash:comments>
</item>
<item>
<title>How To Create A DIY Wedding Bouquet</title>
<link>https://www.notjustahousewife.net/how-to-create-a-diy-wedding-bouquet/</link>
<comments>https://www.notjustahousewife.net/how-to-create-a-diy-wedding-bouquet/#comments</comments>
<dc:creator>
<![CDATA[ Stacy ]]>
</dc:creator>
<pubDate>Fri, 06 Sep 2024 09:00:00 +0000</pubDate>
<category>
<![CDATA[ Uncategorized ]]>
</category>
<guid isPermaLink="false">https://www.notjustahousewife.net/?p=27278</guid>
<description>
<![CDATA[ This year will go down as the year of the weddings for our family. We had two wedding receptions in our yard this summer. One of which was for my oldest son. I DIYed everything for the wedding, including the flowers. I do have a couple of years experience working in a floral shop, but...</p><p><a class="more-link" href="https://www.notjustahousewife.net/how-to-create-a-diy-wedding-bouquet/">Read More</a></p> ]]>
</description>
<content:encoded>
<![CDATA[ <p>This year will go down as the year of the weddings for our family. We had two wedding receptions in our yard this summer. One of which was for my oldest son. I DIYed everything for the wedding, including the flowers. I do have a couple of years experience working in a floral shop, but I still consider myself a complete novice. But even if you have zero experience, with a few tips, you can create a DIY wedding bouquet!</p> <p class="has-text-align-center"><em>This post is sponsored by Digz but all opinions and ideas are 100% my own.</em></p> <div class="wp-block-image"> <figure class="aligncenter size-full is-resized"><a href="https://www.notjustahousewife.net/wp-content/uploads/2024/08/DIY-wedding-bouquet.jpg"><img loading="lazy" decoding="async" width="600" height="900" src="https://www.notjustahousewife.net/wp-content/uploads/2024/08/DIY-wedding-bouquet.jpg" alt="diy wedding bouquet" class="wp-image-27281" style="width:500px;height:auto" srcset="https://www.notjustahousewife.net/wp-content/uploads/2024/08/DIY-wedding-bouquet.jpg 600w, https://www.notjustahousewife.net/wp-content/uploads/2024/08/DIY-wedding-bouquet-200x300.jpg 200w, https://www.notjustahousewife.net/wp-content/uploads/2024/08/DIY-wedding-bouquet-150x225.jpg 150w" sizes="(max-width: 600px) 100vw, 600px" /></a></figure></div> <p>Growing the flowers for both weddings and creating DIY wedding bouquets, centerpieces and arrangements, saved HUNDREDS if not thousands of dollars. Flowers are a huge part of the wedding budget. So if you have a wedding coming up and want to save money, learning to throw together some simple bouquets is a good place to start. </p> <h3 class="wp-block-heading">Elements Of A Bouquet</h3> <p>Before we start into the tutorial, you need a basic understanding of the different elements that go into a bouquet. You have you greenery, focal flowers, filler flowers, and line flowers. I have a post that goes into greater detail about these elements if you are interested.</p> <p>Greenery are things like ferns, eucalyptus, or clipping from bushes. It's the base that you build off from. Focal flowers are the main flowers that steal the show like roses, peonies, or dahlias. Filler flowers are smaller and support the main flowers. Line flowers are tall skinny flowers that give the bouquet dimension. They are things like delphinium, veronica, or snapdragons. </p> <div class="wp-block-image"> <figure class="aligncenter size-full"><a href="https://www.notjustahousewife.net/wp-content/uploads/2024/08/elements-of-a-bouquet2.jpg"><img loading="lazy" decoding="async" width="700" height="500" src="https://www.notjustahousewife.net/wp-content/uploads/2024/08/elements-of-a-bouquet2.jpg" alt="examples of different elements of a bouquets" class="wp-image-27285" srcset="https://www.notjustahousewife.net/wp-content/uploads/2024/08/elements-of-a-bouquet2.jpg 700w, https://www.notjustahousewife.net/wp-content/uploads/2024/08/elements-of-a-bouquet2-300x214.jpg 300w, https://www.notjustahousewife.net/wp-content/uploads/2024/08/elements-of-a-bouquet2-150x107.jpg 150w" sizes="(max-width: 700px) 100vw, 700px" /></a></figure></div> <p>Think about your color scheme and look up online different examples of flowers from each of these categories. This will give you an ideas of what to grow, or what to ask for when reaching out to local growers or even neighbors. If you find that you didn't grow enough of a certain flower, or need to supplement for another reason, going to places like Trader Joe's, other grocery stores, and markets are other great places to get flowers on a budget.</p> <p>All that being said, you don't have to include all the elements into your bouquet. Some of the most beautiful bouquets I have seen have only had focal flowers. Or maybe focal flowers and some greenery. Play around with it and have fun!</p> <h2 class="wp-block-heading">How To Create A DIY Wedding Bouquet</h2> <p>I have grown cut flowers for 3 years and love how they brighten up my vegetable garden. You can read all about the benefits of growing cut flowers HERE. Since I knew my son was getting married well before it was time to plant seeds, I was able to choose what I was going to grow based on the color theme of the wedding. Once you have you flowers all growing happily, here's how to create a DIY wedding bouquet from flowers in your yard!</p> <h3 class="wp-block-heading">Cut &amp; Collect The Flowers</h3> <p>The best time to cut and collect the flowers is in the morning. The moisture content in the plants will be the highest then and it will cause less stress on the flowers. Cut the stems long enough to create a bouquet. Skip the flowers with shorter stems. You can use those in centerpieces, but you will need long stems for bouquets. </p> <div class="wp-block-image"> <figure class="aligncenter size-full is-resized"><a href="https://www.notjustahousewife.net/wp-content/uploads/2024/08/cutting-flowers-in-the-garden.jpg"><img loading="lazy" decoding="async" width="600" height="900" src="https://www.notjustahousewife.net/wp-content/uploads/2024/08/cutting-flowers-in-the-garden.jpg" alt="cutting flowers in the garden" class="wp-image-27293" style="width:501px;height:auto" srcset="https://www.notjustahousewife.net/wp-content/uploads/2024/08/cutting-flowers-in-the-garden.jpg 600w, https://www.notjustahousewife.net/wp-content/uploads/2024/08/cutting-flowers-in-the-garden-200x300.jpg 200w, https://www.notjustahousewife.net/wp-content/uploads/2024/08/cutting-flowers-in-the-garden-150x225.jpg 150w" sizes="(max-width: 600px) 100vw, 600px" /></a></figure></div> <p>Only use sharp tools to cut the flowers. Whether you use snips or scissors, ensure they are clean and sharpened. </p> <div class="wp-block-image"> <figure class="aligncenter size-full is-resized"><a href="https://www.notjustahousewife.net/wp-content/uploads/2024/08/cutting-zinnias-for-bouquet.jpg"><img loading="lazy" decoding="async" width="600" height="900" src="https://www.notjustahousewife.net/wp-content/uploads/2024/08/cutting-zinnias-for-bouquet.jpg" alt="cutting zinnias in the garden" class="wp-image-27282" style="width:503px;height:auto" srcset="https://www.notjustahousewife.net/wp-content/uploads/2024/08/cutting-zinnias-for-bouquet.jpg 600w, https://www.notjustahousewife.net/wp-content/uploads/2024/08/cutting-zinnias-for-bouquet-200x300.jpg 200w, https://www.notjustahousewife.net/wp-content/uploads/2024/08/cutting-zinnias-for-bouquet-150x225.jpg 150w" sizes="(max-width: 600px) 100vw, 600px" /></a></figure></div> <p>Make sure to have a bucket, vase, or something else filled with water. As soon as you cut the stem, place it in the water. And when you have all your flowers cut, take them inside. Don't leave them in the sun for longer than necessary. </p> <div class="wp-block-image"> <figure class="aligncenter size-full is-resized"><a href="https://www.notjustahousewife.net/wp-content/uploads/2024/08/bucket-of-cut-flowers.jpg"><img loading="lazy" decoding="async" width="600" height="900" src="https://www.notjustahousewife.net/wp-content/uploads/2024/08/bucket-of-cut-flowers.jpg" alt="bucket of flowers" class="wp-image-27288" style="width:500px;height:auto" srcset="https://www.notjustahousewife.net/wp-content/uploads/2024/08/bucket-of-cut-flowers.jpg 600w, https://www.notjustahousewife.net/wp-content/uploads/2024/08/bucket-of-cut-flowers-200x300.jpg 200w, https://www.notjustahousewife.net/wp-content/uploads/2024/08/bucket-of-cut-flowers-150x225.jpg 150w" sizes="(max-width: 600px) 100vw, 600px" /></a></figure></div> <h3 class="wp-block-heading">Clean The Flowers</h3> <p>Now it is time to prep the flowers by removing all or at least most of the leaves. If you leave the leaves on, the flowers will wilt faster since there is more per stem you are trying to keep hydrated. </p> <div class="wp-block-image"> <figure class="aligncenter size-full is-resized"><a href="https://www.notjustahousewife.net/wp-content/uploads/2024/08/cleaning-cut-flowers.jpg"><img loading="lazy" decoding="async" width="600" height="900" src="https://www.notjustahousewife.net/wp-content/uploads/2024/08/cleaning-cut-flowers.jpg" alt="preparing flowers for making a bouquet" class="wp-image-27289" style="width:501px;height:auto" srcset="https://www.notjustahousewife.net/wp-content/uploads/2024/08/cleaning-cut-flowers.jpg 600w, https://www.notjustahousewife.net/wp-content/uploads/2024/08/cleaning-cut-flowers-200x300.jpg 200w, https://www.notjustahousewife.net/wp-content/uploads/2024/08/cleaning-cut-flowers-150x225.jpg 150w" sizes="(max-width: 600px) 100vw, 600px" /></a></figure></div> <p>Any time you pull a flower out of the water for any amount of time, you will need to create a fresh cut on the stem before placing it back in the water. </p> <h3 class="wp-block-heading">Making The Bouquet</h3> <p>Now it is time to create the bouquet! You can do this one of two ways. It will depend what you are comfortable with. </p> <p>You can either create the bouquet in a vase like you would for any vase floral arrangement. This will free up both your hands and will keep the flowers hydrated while you work. Then when you are done, you can grab the stems and pull them out of the vase. You still may need to adjust a few things before securing them together.</p> <div class="wp-block-image"> <figure class="aligncenter size-full is-resized"><a href="https://www.notjustahousewife.net/wp-content/uploads/2024/08/Zinnia-DIY-wedding-bouquet-1.jpg"><img loading="lazy" decoding="async" width="600" height="900" src="https://www.notjustahousewife.net/wp-content/uploads/2024/08/Zinnia-DIY-wedding-bouquet-1.jpg" alt="creating a diy wedding bouquet out of zinnias" class="wp-image-27299" style="width:500px;height:auto" srcset="https://www.notjustahousewife.net/wp-content/uploads/2024/08/Zinnia-DIY-wedding-bouquet-1.jpg 600w, https://www.notjustahousewife.net/wp-content/uploads/2024/08/Zinnia-DIY-wedding-bouquet-1-200x300.jpg 200w, https://www.notjustahousewife.net/wp-content/uploads/2024/08/Zinnia-DIY-wedding-bouquet-1-150x225.jpg 150w" sizes="(max-width: 600px) 100vw, 600px" /></a></figure></div> <p>Or you can create the bouquet while holding the stems in one hand. This is my preferred method. It can get hard towards the end when you have a huge handful of blooms, but for me this just feels easier to play around with the design for some reason. </p> <div class="wp-block-image"> <figure class="aligncenter size-full is-resized"><a href="https://www.notjustahousewife.net/wp-content/uploads/2024/08/making-a-diy-wedding-bouquet.jpg"><img loading="lazy" decoding="async" width="600" height="900" src="https://www.notjustahousewife.net/wp-content/uploads/2024/08/making-a-diy-wedding-bouquet.jpg" alt="creating a wedding bouquet" class="wp-image-27297" style="width:501px;height:auto" srcset="https://www.notjustahousewife.net/wp-content/uploads/2024/08/making-a-diy-wedding-bouquet.jpg 600w, https://www.notjustahousewife.net/wp-content/uploads/2024/08/making-a-diy-wedding-bouquet-200x300.jpg 200w, https://www.notjustahousewife.net/wp-content/uploads/2024/08/making-a-diy-wedding-bouquet-150x225.jpg 150w" sizes="(max-width: 600px) 100vw, 600px" /></a></figure></div> <h3 class="wp-block-heading">Securing The Bouquet</h3> <p>Once you have the bouquet the way you want it, you will need to secure it. You have a few options. You can use a rubber band, a zip tie, or clear floral tape. I prefer to use a rubber band because it is easy to add and easy to hide when you add the ribbon. If you use a ziptie, make sure the nubbon is in the back of the bouquet and add enough ribbon to hide it well. </p> <div class="wp-block-image"> <figure class="aligncenter size-full is-resized"><a href="https://www.notjustahousewife.net/wp-content/uploads/2024/08/wrap-the-stems-with-ribbon-copy.jpg"><img loading="lazy" decoding="async" width="600" height="900" src="https://www.notjustahousewife.net/wp-content/uploads/2024/08/wrap-the-stems-with-ribbon-copy.jpg" alt="making a wedding bouquet" class="wp-image-27287" style="width:500px;height:auto" srcset="https://www.notjustahousewife.net/wp-content/uploads/2024/08/wrap-the-stems-with-ribbon-copy.jpg 600w, https://www.notjustahousewife.net/wp-content/uploads/2024/08/wrap-the-stems-with-ribbon-copy-200x300.jpg 200w, https://www.notjustahousewife.net/wp-content/uploads/2024/08/wrap-the-stems-with-ribbon-copy-150x225.jpg 150w" sizes="(max-width: 600px) 100vw, 600px" /></a></figure></div> <h3 class="wp-block-heading">Keep it Hydrated &amp; Cool</h3> <p>I make the bouquets the day before the wedding and then keep it in a vase of water in the fridge until it is needed. If you can, in between the ceremony and the reception, place it in water to keep it looking fresh all day. </p> <p>There is also a floral spray called Crowning Glory that will help your blooms from losing moisture and prevents them from browning.</p> <div class="wp-block-image"> <figure class="aligncenter size-full is-resized"><a href="https://www.notjustahousewife.net/wp-content/uploads/2024/08/DIY-wedding-bouquets.jpg"><img loading="lazy" decoding="async" width="600" height="900" src="https://www.notjustahousewife.net/wp-content/uploads/2024/08/DIY-wedding-bouquets.jpg" alt="collage of DIY wedding bouquets" class="wp-image-27300" style="width:509px;height:auto" srcset="https://www.notjustahousewife.net/wp-content/uploads/2024/08/DIY-wedding-bouquets.jpg 600w, https://www.notjustahousewife.net/wp-content/uploads/2024/08/DIY-wedding-bouquets-200x300.jpg 200w, https://www.notjustahousewife.net/wp-content/uploads/2024/08/DIY-wedding-bouquets-150x225.jpg 150w" sizes="(max-width: 600px) 100vw, 600px" /></a></figure></div> <p><strong>What are your favorite flowers to be used in a bouquet? I'd love to hear what your wedding flowers were like!</strong></p> <p>Happy Gardening :) </p> <h3 class="wp-block-heading">Some Of My Favorite Gardening Accessories:</h3> <p class="has-text-align-center"><em>All Digz gardening gloves and accessories are available at Home Depot.</em></p> <figure class="wp-block-gallery has-nested-images columns-default is-cropped wp-block-gallery-12 is-layout-flex wp-block-gallery-is-layout-flex"> <figure class="wp-block-image size-large"><a href="https://www.digzgardening.com/products/leather-palm-w-knit-wrist-gloves"><img loading="lazy" decoding="async" width="1024" height="921" data-id="27303" src="https://www.notjustahousewife.net/wp-content/uploads/2024/08/Screenshot-2024-08-21-at-2.16.37 PM-1024x921.png" alt="" class="wp-image-27303" srcset="https://www.notjustahousewife.net/wp-content/uploads/2024/08/Screenshot-2024-08-21-at-2.16.37 PM-1024x921.png 1024w, https://www.notjustahousewife.net/wp-content/uploads/2024/08/Screenshot-2024-08-21-at-2.16.37 PM-300x270.png 300w, https://www.notjustahousewife.net/wp-content/uploads/2024/08/Screenshot-2024-08-21-at-2.16.37 PM-768x691.png 768w, https://www.notjustahousewife.net/wp-content/uploads/2024/08/Screenshot-2024-08-21-at-2.16.37 PM-150x135.png 150w, https://www.notjustahousewife.net/wp-content/uploads/2024/08/Screenshot-2024-08-21-at-2.16.37 PM.png 1036w" sizes="(max-width: 1024px) 100vw, 1024px" /></a><figcaption class="wp-element-caption">Leather Palm Gloves</figcaption></figure> <figure class="wp-block-image size-full"><a href="https://www.digzgardening.com/products/full-bib-apron"><img loading="lazy" decoding="async" width="928" height="1014" data-id="27309" src="https://www.notjustahousewife.net/wp-content/uploads/2024/08/Screenshot-2024-08-21-.png" alt="" class="wp-image-27309" srcset="https://www.notjustahousewife.net/wp-content/uploads/2024/08/Screenshot-2024-08-21-.png 928w, https://www.notjustahousewife.net/wp-content/uploads/2024/08/Screenshot-2024-08-21--275x300.png 275w, https://www.notjustahousewife.net/wp-content/uploads/2024/08/Screenshot-2024-08-21--768x839.png 768w, https://www.notjustahousewife.net/wp-content/uploads/2024/08/Screenshot-2024-08-21--150x164.png 150w" sizes="(max-width: 928px) 100vw, 928px" /></a><figcaption class="wp-element-caption">Full Bib Apron</figcaption></figure> <figure class="wp-block-image size-large"><a href="https://www.digzgardening.com/products/gardening-straw-sun-hat"><img loading="lazy" decoding="async" width="970" height="840" data-id="27305" src="https://www.notjustahousewife.net/wp-content/uploads/2024/08/Screenshot-2024-08-21-at-2.18.26 PM.png" alt="" class="wp-image-27305" srcset="https://www.notjustahousewife.net/wp-content/uploads/2024/08/Screenshot-2024-08-21-at-2.18.26 PM.png 970w, https://www.notjustahousewife.net/wp-content/uploads/2024/08/Screenshot-2024-08-21-at-2.18.26 PM-300x260.png 300w, https://www.notjustahousewife.net/wp-content/uploads/2024/08/Screenshot-2024-08-21-at-2.18.26 PM-768x665.png 768w, https://www.notjustahousewife.net/wp-content/uploads/2024/08/Screenshot-2024-08-21-at-2.18.26 PM-150x130.png 150w" sizes="(max-width: 970px) 100vw, 970px" /></a><figcaption class="wp-element-caption">Gardening Straw Sun Hat</figcaption></figure> <figure class="wp-block-image size-large"><a href="https://www.digzgardening.com/products/comfort-grip-gloves"><img loading="lazy" decoding="async" width="974" height="878" data-id="27308" src="https://www.notjustahousewife.net/wp-content/uploads/2024/08/Screenshot-2024-08-21-at-2.17.30 PM.png" alt="" class="wp-image-27308" srcset="https://www.notjustahousewife.net/wp-content/uploads/2024/08/Screenshot-2024-08-21-at-2.17.30 PM.png 974w, https://www.notjustahousewife.net/wp-content/uploads/2024/08/Screenshot-2024-08-21-at-2.17.30 PM-300x270.png 300w, https://www.notjustahousewife.net/wp-content/uploads/2024/08/Screenshot-2024-08-21-at-2.17.30 PM-768x692.png 768w, https://www.notjustahousewife.net/wp-content/uploads/2024/08/Screenshot-2024-08-21-at-2.17.30 PM-150x135.png 150w" sizes="(max-width: 974px) 100vw, 974px" /></a><figcaption class="wp-element-caption">Comfort Grip Gloves</figcaption></figure> <figure class="wp-block-image size-large"><a href="https://www.digzgardening.com/products/kneeling-pad-country-blue"><img loading="lazy" decoding="async" width="812" height="712" data-id="27306" src="https://www.notjustahousewife.net/wp-content/uploads/2024/08/Screenshot-2024-08-21-at-2.18.57 PM.png" alt="" class="wp-image-27306" srcset="https://www.notjustahousewife.net/wp-content/uploads/2024/08/Screenshot-2024-08-21-at-2.18.57 PM.png 812w, https://www.notjustahousewife.net/wp-content/uploads/2024/08/Screenshot-2024-08-21-at-2.18.57 PM-300x263.png 300w, https://www.notjustahousewife.net/wp-content/uploads/2024/08/Screenshot-2024-08-21-at-2.18.57 PM-768x673.png 768w, https://www.notjustahousewife.net/wp-content/uploads/2024/08/Screenshot-2024-08-21-at-2.18.57 PM-150x132.png 150w" sizes="(max-width: 812px) 100vw, 812px" /></a><figcaption class="wp-element-caption">Kneeling Pad</figcaption></figure> <figure class="wp-block-image size-large"><a href="https://www.notjustahousewife.net/wp-content/uploads/2024/08/Screenshot-2024-08-21-at-2.17.53 PM.png"><img loading="lazy" decoding="async" width="990" height="918" data-id="27307" src="https://www.notjustahousewife.net/wp-content/uploads/2024/08/Screenshot-2024-08-21-at-2.17.53 PM.png" alt="" class="wp-image-27307" srcset="https://www.notjustahousewife.net/wp-content/uploads/2024/08/Screenshot-2024-08-21-at-2.17.53 PM.png 990w, https://www.notjustahousewife.net/wp-content/uploads/2024/08/Screenshot-2024-08-21-at-2.17.53 PM-300x278.png 300w, https://www.notjustahousewife.net/wp-content/uploads/2024/08/Screenshot-2024-08-21-at-2.17.53 PM-768x712.png 768w, https://www.notjustahousewife.net/wp-content/uploads/2024/08/Screenshot-2024-08-21-at-2.17.53 PM-150x139.png 150w" sizes="(max-width: 990px) 100vw, 990px" /></a><figcaption class="wp-element-caption">Signature Solid Gloves</figcaption></figure> </figure> <div style="margin-top: 0px; margin-bottom: 0px;" class="sharethis-inline-share-buttons" ></div> ]]>
</content:encoded>
<wfw:commentRss>https://www.notjustahousewife.net/how-to-create-a-diy-wedding-bouquet/feed/</wfw:commentRss>
<slash:comments>2</slash:comments>
</item>
<item>
<title>Best Way To Paint A Door</title>
<link>https://www.notjustahousewife.net/best-way-to-paint-a-door/</link>
<comments>https://www.notjustahousewife.net/best-way-to-paint-a-door/#comments</comments>
<dc:creator>
<![CDATA[ Stacy ]]>
</dc:creator>
<pubDate>Thu, 05 Sep 2024 21:57:52 +0000</pubDate>
<category>
<![CDATA[ DIY Projects & Tutorials ]]>
</category>
<category>
<![CDATA[ diy ]]>
</category>
<category>
<![CDATA[ diy project ]]>
</category>
<category>
<![CDATA[ paint ]]>
</category>
<guid isPermaLink="false">https://www.notjustahousewife.net/?p=27457</guid>
<description>
<![CDATA[ We have lived in our home for 17 years and in that time we have either had a painted brown door or a stained brown door. I recently have been feeling that I want more color in my life and got the itch to paint my kitchen door. Sometimes you just need a fresh coat...</p><p><a class="more-link" href="https://www.notjustahousewife.net/best-way-to-paint-a-door/">Read More</a></p> ]]>
</description>
<content:encoded>
<![CDATA[ <p>We have lived in our home for 17 years and in that time we have either had a painted brown door or a stained brown door. I recently have been feeling that I want more color in my life and got the itch to paint my kitchen door. Sometimes you just need a fresh coat of paint. Here is the best way to paint a door to get a smooth, professional finish.</p> <div class="wp-block-image"> <figure class="aligncenter size-full is-resized"><a href="https://www.notjustahousewife.net/wp-content/uploads/2024/09/navy-blue-door.jpg"><img loading="lazy" decoding="async" width="600" height="900" src="https://www.notjustahousewife.net/wp-content/uploads/2024/09/navy-blue-door.jpg" alt="" class="wp-image-27462" style="width:547px;height:auto" srcset="https://www.notjustahousewife.net/wp-content/uploads/2024/09/navy-blue-door.jpg 600w, https://www.notjustahousewife.net/wp-content/uploads/2024/09/navy-blue-door-200x300.jpg 200w, https://www.notjustahousewife.net/wp-content/uploads/2024/09/navy-blue-door-150x225.jpg 150w" sizes="(max-width: 600px) 100vw, 600px" /></a></figure></div> <h2 class="wp-block-heading" id="isPasted">The Best Way To Paint A Door</h2> <p>Our dutch door was previously stained a walnut color. It faces south which means it gets sun exposure ALL day, everyday. Over the years, the sealer on the door has faded to look milky white and splotchy. I could have resealed it like I did with my front door, but like I stated above, I was in the mood for some more color in my life. So here is the best way to paint a door!</p> <h3 class="wp-block-heading">Take The Door Down</h3> <p>The first thing you need to do is take the door off. It is tempting to paint the door while it is still on the hinges in the door frame. But if you do, you have to do more prep. You have to tape around the hinges and door knobs and if you are going to spray, you have to tarp and tape everything in the room around your door. Even though it seems like a pain to take it off the hinges, and remove the door hardware, it is worth it. This goes for interior doors as well as exterior doors.&nbsp;</p> <h3 class="wp-block-heading">Sand</h3> <p>Once the door is off the hinges and the hardware has been removed, I like to lay it on a table with a blanket, drop cloths, tack cloth, or old towels under it to protect the other side from dings or getting scratched. Then I start lightly sanding the surface of the door with a fine grit sandpaper. 220 grit is my go to for painting prep.&nbsp;</p> <p>If there are any dents or scratches, putty them with wood filler before sanding.</p> <div class="wp-block-image"> <figure class="aligncenter size-full is-resized"><a href="https://www.notjustahousewife.net/wp-content/uploads/2024/09/sanding-door.jpg"><img loading="lazy" decoding="async" width="600" height="900" src="https://www.notjustahousewife.net/wp-content/uploads/2024/09/sanding-door.jpg" alt="" class="wp-image-27465" style="width:551px;height:auto" srcset="https://www.notjustahousewife.net/wp-content/uploads/2024/09/sanding-door.jpg 600w, https://www.notjustahousewife.net/wp-content/uploads/2024/09/sanding-door-200x300.jpg 200w, https://www.notjustahousewife.net/wp-content/uploads/2024/09/sanding-door-150x225.jpg 150w" sizes="(max-width: 600px) 100vw, 600px" /></a></figure></div> <h3 class="wp-block-heading" id="isPasted">Tape</h3> <p>When there is a large area to cover, I like to add contact paper to the largest part of the area and then just tape around the edges. If you don't have contact paper on hand, regular paper works well too. Just make sure to use painter's tape along any seams where multiple papers overlap.&nbsp;</p> <div class="wp-block-image"> <figure class="aligncenter size-full is-resized"><a href="https://www.notjustahousewife.net/wp-content/uploads/2024/09/taping-door-before-painting.jpg"><img loading="lazy" decoding="async" width="600" height="900" src="https://www.notjustahousewife.net/wp-content/uploads/2024/09/taping-door-before-painting.jpg" alt="" class="wp-image-27466" style="width:549px;height:auto" srcset="https://www.notjustahousewife.net/wp-content/uploads/2024/09/taping-door-before-painting.jpg 600w, https://www.notjustahousewife.net/wp-content/uploads/2024/09/taping-door-before-painting-200x300.jpg 200w, https://www.notjustahousewife.net/wp-content/uploads/2024/09/taping-door-before-painting-150x225.jpg 150w" sizes="(max-width: 600px) 100vw, 600px" /></a></figure></div> <h3 class="wp-block-heading" id="isPasted">Paint The Door</h3> <p>Make sure to choose the right paint for your project. If you are painting an exterior door, the side that faces the outside will need exterior paint. Either choose a paint that has a built in primer, or add a coat of primer before painting. A paint job is only as good as the quality of the paint used.</p> <p>I have painted many doors with brushes and even a foam roller and there are tricks to getting a smooth finish with a brush, but even if you know the tips and tricks, it still takes a long time and you may still end up with brush strokes showing. Once you start painting with a sprayer, you will never go back to a paint brush.&nbsp;</p> <div class="wp-block-image"> <figure class="aligncenter size-full is-resized"><a href="https://www.notjustahousewife.net/wp-content/uploads/2024/09/painting-door-blue.jpg"><img loading="lazy" decoding="async" width="600" height="900" src="https://www.notjustahousewife.net/wp-content/uploads/2024/09/painting-door-blue.jpg" alt="" class="wp-image-27463" style="width:551px;height:auto" srcset="https://www.notjustahousewife.net/wp-content/uploads/2024/09/painting-door-blue.jpg 600w, https://www.notjustahousewife.net/wp-content/uploads/2024/09/painting-door-blue-200x300.jpg 200w, https://www.notjustahousewife.net/wp-content/uploads/2024/09/painting-door-blue-150x225.jpg 150w" sizes="(max-width: 600px) 100vw, 600px" /></a></figure></div> <p>Sprayers work great with any type of paint. So whether you use an oil-based paint or water-based paint, a paint sprayer is the way to go. Not only is it faster, it gives you the best results with the most beautiful finish. No more brush marks!</p> <p>I always turn the sprayer down to a fine spray to apply thin coats. A few thin coats are better than one or two thick coats. You have less of a chance for drips if you do light coats.&nbsp;</p> <p>Once I'm done with the second coat of paint, I remove the tape before the paint has fully dried. If you wait until the paint has dried, you run the risk of it peeling paint off your project along with the tape.</p> <div class="wp-block-image"> <figure class="aligncenter size-full is-resized"><a href="https://www.notjustahousewife.net/wp-content/uploads/2024/09/removing-painters-tape.jpg"><img loading="lazy" decoding="async" width="600" height="900" src="https://www.notjustahousewife.net/wp-content/uploads/2024/09/removing-painters-tape.jpg" alt="" class="wp-image-27464" style="width:551px;height:auto" srcset="https://www.notjustahousewife.net/wp-content/uploads/2024/09/removing-painters-tape.jpg 600w, https://www.notjustahousewife.net/wp-content/uploads/2024/09/removing-painters-tape-200x300.jpg 200w, https://www.notjustahousewife.net/wp-content/uploads/2024/09/removing-painters-tape-150x225.jpg 150w" sizes="(max-width: 600px) 100vw, 600px" /></a></figure></div> <p>Allow the paint to fully cure before you put the door back on the door frame. Drying time will depend on the brand of paint, the kind of paint you used, as well as the humidity and temperature.&nbsp;</p> <p>I've seen the cutest photos online of big doodle dogs peering out of a dutch door while the top was open. I tried to recreate that look with Kevin our Frenchie, but he obviously needed help. He wasn't amused. Hahaha! Don't worry, he got plenty of treats for his "efforts". </p> <figure class="wp-block-gallery has-nested-images columns-default is-cropped wp-block-gallery-13 is-layout-flex wp-block-gallery-is-layout-flex"> <figure class="wp-block-image size-large"><a href="https://www.notjustahousewife.net/wp-content/uploads/2024/09/blue-dutch-door-with-dog.jpg"><img loading="lazy" decoding="async" width="600" height="900" data-id="27460" src="https://www.notjustahousewife.net/wp-content/uploads/2024/09/blue-dutch-door-with-dog.jpg" alt="" class="wp-image-27460" srcset="https://www.notjustahousewife.net/wp-content/uploads/2024/09/blue-dutch-door-with-dog.jpg 600w, https://www.notjustahousewife.net/wp-content/uploads/2024/09/blue-dutch-door-with-dog-200x300.jpg 200w, https://www.notjustahousewife.net/wp-content/uploads/2024/09/blue-dutch-door-with-dog-150x225.jpg 150w" sizes="(max-width: 600px) 100vw, 600px" /></a></figure> <figure class="wp-block-image size-large"><a href="https://www.notjustahousewife.net/wp-content/uploads/2024/09/dutch-door-and-dog.jpg"><img loading="lazy" decoding="async" width="600" height="900" data-id="27461" src="https://www.notjustahousewife.net/wp-content/uploads/2024/09/dutch-door-and-dog.jpg" alt="" class="wp-image-27461" srcset="https://www.notjustahousewife.net/wp-content/uploads/2024/09/dutch-door-and-dog.jpg 600w, https://www.notjustahousewife.net/wp-content/uploads/2024/09/dutch-door-and-dog-200x300.jpg 200w, https://www.notjustahousewife.net/wp-content/uploads/2024/09/dutch-door-and-dog-150x225.jpg 150w" sizes="(max-width: 600px) 100vw, 600px" /></a></figure> </figure> <p>He would much rather be hanging out on the kitchen porch watching us do project on the driveway. </p> <div class="wp-block-image"> <figure class="aligncenter size-full is-resized"><a href="https://www.notjustahousewife.net/wp-content/uploads/2024/09/blue-door-and-dog.jpg"><img loading="lazy" decoding="async" width="600" height="900" src="https://www.notjustahousewife.net/wp-content/uploads/2024/09/blue-door-and-dog.jpg" alt="" class="wp-image-27459" style="width:545px;height:auto" srcset="https://www.notjustahousewife.net/wp-content/uploads/2024/09/blue-door-and-dog.jpg 600w, https://www.notjustahousewife.net/wp-content/uploads/2024/09/blue-door-and-dog-200x300.jpg 200w, https://www.notjustahousewife.net/wp-content/uploads/2024/09/blue-door-and-dog-150x225.jpg 150w" sizes="(max-width: 600px) 100vw, 600px" /></a></figure></div> <p>I considered painting my kitchen exterior door green and even thought I might go for yellow. But ultimately I decided to go for navy blue since y window boxes and other planters are already navy blue. Plus, the cool thing about paint is, I can always change it to green or yellow in the future if I change my mind. But for now I am loving the blue! New paint makes the whole door feel new!&nbsp;</p> <h3 class="wp-block-heading">PIN For Later:</h3> <div class="wp-block-image"> <figure class="aligncenter size-large is-resized"><a href="https://www.notjustahousewife.net/wp-content/uploads/2024/09/how-to-paint-a-door.png"><img loading="lazy" decoding="async" width="683" height="1024" src="https://www.notjustahousewife.net/wp-content/uploads/2024/09/how-to-paint-a-door-683x1024.png" alt="" class="wp-image-27525" style="width:549px;height:auto" srcset="https://www.notjustahousewife.net/wp-content/uploads/2024/09/how-to-paint-a-door-683x1024.png 683w, https://www.notjustahousewife.net/wp-content/uploads/2024/09/how-to-paint-a-door-200x300.png 200w, https://www.notjustahousewife.net/wp-content/uploads/2024/09/how-to-paint-a-door-768x1152.png 768w, https://www.notjustahousewife.net/wp-content/uploads/2024/09/how-to-paint-a-door-150x225.png 150w, https://www.notjustahousewife.net/wp-content/uploads/2024/09/how-to-paint-a-door.png 1000w" sizes="(max-width: 683px) 100vw, 683px" /></a></figure></div><div style="margin-top: 0px; margin-bottom: 0px;" class="sharethis-inline-share-buttons" ></div> ]]>
</content:encoded>
<wfw:commentRss>https://www.notjustahousewife.net/best-way-to-paint-a-door/feed/</wfw:commentRss>
<slash:comments>4</slash:comments>
</item>
<item>
<title>How To Build A Dance Floor</title>
<link>https://www.notjustahousewife.net/how-to-build-a-dance-floor/</link>
<comments>https://www.notjustahousewife.net/how-to-build-a-dance-floor/#comments</comments>
<dc:creator>
<![CDATA[ Stacy ]]>
</dc:creator>
<pubDate>Mon, 26 Aug 2024 19:05:38 +0000</pubDate>
<category>
<![CDATA[ DIY Projects & Tutorials ]]>
</category>
<guid isPermaLink="false">https://www.notjustahousewife.net/?p=27311</guid>
<description>
<![CDATA[ My oldest son recently got married and we DIYed pretty much everything, including the dance floor. When we priced how much it would be to rent a dance floor for one day, I was shocked at how much it was for even a small one. It was $700-$900 to rent a small dance floor. I...</p><p><a class="more-link" href="https://www.notjustahousewife.net/how-to-build-a-dance-floor/">Read More</a></p> ]]>
</description>
<content:encoded>
<![CDATA[ <p>My oldest son recently got married and we DIYed pretty much everything, including the dance floor. When we priced how much it would be to rent a dance floor for one day, I was shocked at how much it was for even a small one. It was $700-$900 to rent a small dance floor. I was confident we could build one for much less that we could then reuse for future events. Here is how to build a dance floor! Or at least how we decided to do it :)</p> <div class="wp-block-image"> <figure class="aligncenter size-full is-resized"><a href="https://www.notjustahousewife.net/wp-content/uploads/2024/08/how-to-make-a-dance-floor.jpg"><img loading="lazy" decoding="async" width="600" height="900" src="https://www.notjustahousewife.net/wp-content/uploads/2024/08/how-to-make-a-dance-floor.jpg" alt="DIY dance floor at wedding" class="wp-image-27315" style="width:550px;height:auto" srcset="https://www.notjustahousewife.net/wp-content/uploads/2024/08/how-to-make-a-dance-floor.jpg 600w, https://www.notjustahousewife.net/wp-content/uploads/2024/08/how-to-make-a-dance-floor-200x300.jpg 200w, https://www.notjustahousewife.net/wp-content/uploads/2024/08/how-to-make-a-dance-floor-150x225.jpg 150w" sizes="(max-width: 600px) 100vw, 600px" /></a></figure></div> <h2 class="wp-block-heading">How To Build A Dance Floor</h2> <p>Out of everything, or sweet daughter-in-law was the most excited about having a dance floor. She wanted a fun reception with lots of dancing! So we made figuring out a DIY dance floor a top priority!</p> <div class="wp-block-image"> <figure class="aligncenter size-full is-resized"><a href="https://www.notjustahousewife.net/wp-content/uploads/2024/08/DIY-dance-floor-copy-2.jpg"><img loading="lazy" decoding="async" width="600" height="900" src="https://www.notjustahousewife.net/wp-content/uploads/2024/08/DIY-dance-floor-copy-2.jpg" alt="diy dance floor with couple dancing" class="wp-image-27322" style="width:551px;height:auto" srcset="https://www.notjustahousewife.net/wp-content/uploads/2024/08/DIY-dance-floor-copy-2.jpg 600w, https://www.notjustahousewife.net/wp-content/uploads/2024/08/DIY-dance-floor-copy-2-200x300.jpg 200w, https://www.notjustahousewife.net/wp-content/uploads/2024/08/DIY-dance-floor-copy-2-150x225.jpg 150w" sizes="(max-width: 600px) 100vw, 600px" /></a></figure></div> <h3 class="wp-block-heading">Create The Panels</h3> <p>We chose to make our dance floor 16 feet by 16 feet. It took 8 pieces of plywood. We built a base for the plywood and then attached the plywood to the base, creating 8 panels. The 8 panels were then connected to make the dance floor. </p> <p>I wanted to make sure that it was very solid and that while lots of people were dancing on it, the plywood wouldn't bow. To ensure that wouldn't happen, we created the frame for each piece of plywood and added 5 braces. The braces were each 16 inches apart. </p> <div class="wp-block-image"> <figure class="aligncenter size-full"><a href="https://www.notjustahousewife.net/wp-content/uploads/2024/08/building-the-DIY-dance-floor.jpg"><img loading="lazy" decoding="async" width="670" height="498" src="https://www.notjustahousewife.net/wp-content/uploads/2024/08/building-the-DIY-dance-floor.jpg" alt="building a dance floor" class="wp-image-27316" srcset="https://www.notjustahousewife.net/wp-content/uploads/2024/08/building-the-DIY-dance-floor.jpg 670w, https://www.notjustahousewife.net/wp-content/uploads/2024/08/building-the-DIY-dance-floor-300x223.jpg 300w, https://www.notjustahousewife.net/wp-content/uploads/2024/08/building-the-DIY-dance-floor-150x111.jpg 150w" sizes="(max-width: 670px) 100vw, 670px" /></a></figure></div> <h3 class="wp-block-heading">Putty &amp; Sand</h3> <p>Once the panels were all assembled, we used wood putty to fill in small cracks and holes and bondo for any larger areas that needed to be filled. </p> <p>Once that dried, we used sanders to smooth everything. No one wants to get a sliver while dancing!</p> <div class="wp-block-image"> <figure class="aligncenter size-full is-resized"><a href="https://www.notjustahousewife.net/wp-content/uploads/2024/08/sanding-the-dance-floor.jpg"><img loading="lazy" decoding="async" width="600" height="900" src="https://www.notjustahousewife.net/wp-content/uploads/2024/08/sanding-the-dance-floor.jpg" alt="sanding diy dance floor" class="wp-image-27323" style="width:551px;height:auto" srcset="https://www.notjustahousewife.net/wp-content/uploads/2024/08/sanding-the-dance-floor.jpg 600w, https://www.notjustahousewife.net/wp-content/uploads/2024/08/sanding-the-dance-floor-200x300.jpg 200w, https://www.notjustahousewife.net/wp-content/uploads/2024/08/sanding-the-dance-floor-150x225.jpg 150w" sizes="(max-width: 600px) 100vw, 600px" /></a></figure></div> <h3 class="wp-block-heading">Marking The Checkerboard Pattern</h3> <p>We could have made things easy and just stained or painted the whole thing one color and been done. But we wanted to have a checkerboard pattern. We used a chalk line to snap the lines for the 2 feet by 2 feet squares. Then we went back over the chalk lines using straight edges to draw on pencil lines. Originally we were going to use a laser level but it was so sunny it was hard to see. Snapping chalk lines was super fast and worked well.</p> <p>I then taped off every other square. Instead of running painters tape in long lines across the whole floor, I chose to tape each square individually because if I had run long lines of tape, the tape would have gone inside the lines of ¼ of the squares and I would have had to of taped twice for each color instead of just once for each color. </p> <div class="wp-block-image"> <figure class="aligncenter size-full is-resized"><a href="https://www.notjustahousewife.net/wp-content/uploads/2024/08/marking-and-taping-off-dance-floor.jpg"><img loading="lazy" decoding="async" width="600" height="900" src="https://www.notjustahousewife.net/wp-content/uploads/2024/08/marking-and-taping-off-dance-floor.jpg" alt="marking lines for checkerboard pattern on dance floor" class="wp-image-27317" style="width:549px;height:auto" srcset="https://www.notjustahousewife.net/wp-content/uploads/2024/08/marking-and-taping-off-dance-floor.jpg 600w, https://www.notjustahousewife.net/wp-content/uploads/2024/08/marking-and-taping-off-dance-floor-200x300.jpg 200w, https://www.notjustahousewife.net/wp-content/uploads/2024/08/marking-and-taping-off-dance-floor-150x225.jpg 150w" sizes="(max-width: 600px) 100vw, 600px" /></a></figure></div> <h3 class="wp-block-heading">Staining &amp; Painting The Floor</h3> <p>All of the furniture we were using for the reception was a darker stain color so we stained the dance floor a walnut color. I did the stain first because I knew the stain would more than likely bleed under the painters tape. This way, I could paint over the bleeding. If I had done it the other way around, it would have bled onto the white paint and would have been a mess.</p> <div class="wp-block-image"> <figure class="aligncenter size-full is-resized"><a href="https://www.notjustahousewife.net/wp-content/uploads/2024/08/stained-dance-floor.jpg"><img loading="lazy" decoding="async" width="600" height="900" src="https://www.notjustahousewife.net/wp-content/uploads/2024/08/stained-dance-floor.jpg" alt="staining checkerboard pattern on dance floor" class="wp-image-27321" style="width:550px;height:auto" srcset="https://www.notjustahousewife.net/wp-content/uploads/2024/08/stained-dance-floor.jpg 600w, https://www.notjustahousewife.net/wp-content/uploads/2024/08/stained-dance-floor-200x300.jpg 200w, https://www.notjustahousewife.net/wp-content/uploads/2024/08/stained-dance-floor-150x225.jpg 150w" sizes="(max-width: 600px) 100vw, 600px" /></a></figure></div> <p>Once the stain was dry, I removed the tape and taped it again in preparation for the paint. Before I started painting the squares white, we painted dark brown paint along the tape to seal it. That is my secret weapon to getting the crispest lines ever. If any of the dark brown paint bled through, it would match the stain enough that you wouldn't be able to tell.</p> <p>Once the dark brown paint was dry, we painted the off white paint. It took three coats. Plywood sure sucks up paint! </p> <div class="wp-block-image"> <figure class="aligncenter size-full is-resized"><a href="https://www.notjustahousewife.net/wp-content/uploads/2024/08/Painting-a-diy-dance-floor.jpg"><img loading="lazy" decoding="async" width="600" height="900" src="https://www.notjustahousewife.net/wp-content/uploads/2024/08/Painting-a-diy-dance-floor.jpg" alt="checkerboard pattern painted on dance floor" class="wp-image-27319" style="width:551px;height:auto" srcset="https://www.notjustahousewife.net/wp-content/uploads/2024/08/Painting-a-diy-dance-floor.jpg 600w, https://www.notjustahousewife.net/wp-content/uploads/2024/08/Painting-a-diy-dance-floor-200x300.jpg 200w, https://www.notjustahousewife.net/wp-content/uploads/2024/08/Painting-a-diy-dance-floor-150x225.jpg 150w" sizes="(max-width: 600px) 100vw, 600px" /></a></figure></div> <p>Finally taking the tape off was so satisfying! I always take the tape off right after the last coat of paint is applied before it has a chance to completely dry. If you wait for it to dry, you risk it peeling paint off your project. </p> <div class="wp-block-image"> <figure class="aligncenter size-full is-resized"><a href="https://www.notjustahousewife.net/wp-content/uploads/2024/08/crisp-painters-tape-lines.jpg"><img loading="lazy" decoding="async" width="600" height="900" src="https://www.notjustahousewife.net/wp-content/uploads/2024/08/crisp-painters-tape-lines.jpg" alt="taking painters tape off" class="wp-image-27318" style="width:551px;height:auto" srcset="https://www.notjustahousewife.net/wp-content/uploads/2024/08/crisp-painters-tape-lines.jpg 600w, https://www.notjustahousewife.net/wp-content/uploads/2024/08/crisp-painters-tape-lines-200x300.jpg 200w, https://www.notjustahousewife.net/wp-content/uploads/2024/08/crisp-painters-tape-lines-150x225.jpg 150w" sizes="(max-width: 600px) 100vw, 600px" /></a></figure></div> <h3 class="wp-block-heading">Sealing The Dance Floor</h3> <p>I chose to use a water based sealer since we had painted half of it white. I didn't want the sealer to yellow the white paint and oild bases sealers so just that. We applied 3 coats of polycrylic with a sprayer. </p> <div class="wp-block-image"> <figure class="aligncenter size-full is-resized"><a href="https://www.notjustahousewife.net/wp-content/uploads/2024/08/sealing-the-dance-floor.jpg"><img loading="lazy" decoding="async" width="600" height="900" src="https://www.notjustahousewife.net/wp-content/uploads/2024/08/sealing-the-dance-floor.jpg" alt="sealing diy dance floor" class="wp-image-27320" style="width:549px;height:auto" srcset="https://www.notjustahousewife.net/wp-content/uploads/2024/08/sealing-the-dance-floor.jpg 600w, https://www.notjustahousewife.net/wp-content/uploads/2024/08/sealing-the-dance-floor-200x300.jpg 200w, https://www.notjustahousewife.net/wp-content/uploads/2024/08/sealing-the-dance-floor-150x225.jpg 150w" sizes="(max-width: 600px) 100vw, 600px" /></a></figure></div> <h3 class="wp-block-heading">Assembling The Dance Floor</h3> <p>I don't have photos of us assembling the dance floor because the day of the wedding was insane. A huge storm came through and we didn't know until the last minute if it was even going to happen. But this is how we did it:</p> <p>We took the plywood off of the bases. Everything was labeled so we could put them back on in the right order. We then screwed all the bases together so it was one giant base. Then we reattached the plywood to the base. It was so sturdy! There were not any gaps, cracks, or bowing. I danced barefoot all night and never felt anything but a smooth surface. </p> <h3 class="wp-block-heading">The Cost Of The Dance Floor</h3> <p>The cost of the lumber was about $350. The cost of the paint, stain, sealer and tape was another $100. So for HALF of what it would have cost to rent, we had a prettier dance floor that we can use again and again for future events. </p> <p>My favorite thing about the dance floor was that we ALL worked on it. Shane &amp; I plus all our boys and our new daughter-in-law. The groomsmen even came the night before and helped my son paint the edges gold. It was actually a lot of fun working on this together and it was my favorite DIY of the whole wedding.</p> <div class="wp-block-image"> <figure class="aligncenter size-full is-resized"><a href="https://www.notjustahousewife.net/wp-content/uploads/2024/08/how-to-build-a-dance-floor.jpg"><img loading="lazy" decoding="async" width="600" height="900" src="https://www.notjustahousewife.net/wp-content/uploads/2024/08/how-to-build-a-dance-floor.jpg" alt="diy dance floor with checkerboard pattern" class="wp-image-27314" style="width:549px;height:auto" srcset="https://www.notjustahousewife.net/wp-content/uploads/2024/08/how-to-build-a-dance-floor.jpg 600w, https://www.notjustahousewife.net/wp-content/uploads/2024/08/how-to-build-a-dance-floor-200x300.jpg 200w, https://www.notjustahousewife.net/wp-content/uploads/2024/08/how-to-build-a-dance-floor-150x225.jpg 150w" sizes="(max-width: 600px) 100vw, 600px" /></a></figure></div><div style="margin-top: 0px; margin-bottom: 0px;" class="sharethis-inline-share-buttons" ></div> ]]>
</content:encoded>
<wfw:commentRss>https://www.notjustahousewife.net/how-to-build-a-dance-floor/feed/</wfw:commentRss>
<slash:comments>6</slash:comments>
</item>
<item>
<title>Life Lately {Big Family Update!}</title>
<link>https://www.notjustahousewife.net/life-lately-big-family-update/</link>
<comments>https://www.notjustahousewife.net/life-lately-big-family-update/#comments</comments>
<dc:creator>
<![CDATA[ Stacy ]]>
</dc:creator>
<pubDate>Sat, 29 Jun 2024 01:07:25 +0000</pubDate>
<category>
<![CDATA[ Favorites ]]>
</category>
<guid isPermaLink="false">https://www.notjustahousewife.net/?p=27264</guid>
<description>
<![CDATA[ Holy cow! If you would have told "toddler mom" me back in the early to mid 2000s that life only got busier, I would not have believed you. How is it that when your kids get older, time not only speeds up, but you have even less free time? I have been struggling to find...</p><p><a class="more-link" href="https://www.notjustahousewife.net/life-lately-big-family-update/">Read More</a></p> ]]>
</description>
<content:encoded>
<![CDATA[ <p>Holy cow! If you would have told "toddler mom" me back in the early to mid 2000s that life only got busier, I would not have believed you. How is it that when your kids get older, time not only speeds up, but you have even less free time? I have been struggling to find a way to get everything done. </p> <p>It has been a while since I have given a family update. We have had some changes and some fun things happen so I thought it was time to share. </p> <p>Our oldest son proposed to his girlfriend a while back and she said YES! That means we have an upcoming wedding! We have been planning since early this year and are looking forward to an end of summer wedding with the reception in our backyard. Yep! Another backyard wedding! At least we have a few months in between. <em>*In case you missed it, our friends' daughter had her <a href="https://www.notjustahousewife.net/diy-wedding-arch/">reception in our yard in</a> June.</em></p> <figure class="wp-block-gallery has-nested-images columns-2 is-cropped wp-block-gallery-14 is-layout-flex wp-block-gallery-is-layout-flex"> <figure class="wp-block-image size-large"><a href="https://www.notjustahousewife.net/wp-content/uploads/2024/06/D170080D-E6B2-4A89-96CF-D284C28454AE.jpg"><img loading="lazy" decoding="async" width="819" height="1024" data-id="27268" src="https://www.notjustahousewife.net/wp-content/uploads/2024/06/D170080D-E6B2-4A89-96CF-D284C28454AE-819x1024.jpg" alt="" class="wp-image-27268" srcset="https://www.notjustahousewife.net/wp-content/uploads/2024/06/D170080D-E6B2-4A89-96CF-D284C28454AE-819x1024.jpg 819w, https://www.notjustahousewife.net/wp-content/uploads/2024/06/D170080D-E6B2-4A89-96CF-D284C28454AE-240x300.jpg 240w, https://www.notjustahousewife.net/wp-content/uploads/2024/06/D170080D-E6B2-4A89-96CF-D284C28454AE-768x960.jpg 768w, https://www.notjustahousewife.net/wp-content/uploads/2024/06/D170080D-E6B2-4A89-96CF-D284C28454AE-1229x1536.jpg 1229w, https://www.notjustahousewife.net/wp-content/uploads/2024/06/D170080D-E6B2-4A89-96CF-D284C28454AE-720x900.jpg 720w, https://www.notjustahousewife.net/wp-content/uploads/2024/06/D170080D-E6B2-4A89-96CF-D284C28454AE-360x450.jpg 360w, https://www.notjustahousewife.net/wp-content/uploads/2024/06/D170080D-E6B2-4A89-96CF-D284C28454AE-150x188.jpg 150w, https://www.notjustahousewife.net/wp-content/uploads/2024/06/D170080D-E6B2-4A89-96CF-D284C28454AE.jpg 1440w" sizes="(max-width: 819px) 100vw, 819px" /></a></figure> <figure class="wp-block-image size-large"><a href="https://www.notjustahousewife.net/wp-content/uploads/2024/06/4348F68E-C9CA-4E71-A345-00961372DA75.jpg"><img loading="lazy" decoding="async" width="819" height="1024" data-id="27269" src="https://www.notjustahousewife.net/wp-content/uploads/2024/06/4348F68E-C9CA-4E71-A345-00961372DA75-819x1024.jpg" alt="" class="wp-image-27269" srcset="https://www.notjustahousewife.net/wp-content/uploads/2024/06/4348F68E-C9CA-4E71-A345-00961372DA75-819x1024.jpg 819w, https://www.notjustahousewife.net/wp-content/uploads/2024/06/4348F68E-C9CA-4E71-A345-00961372DA75-240x300.jpg 240w, https://www.notjustahousewife.net/wp-content/uploads/2024/06/4348F68E-C9CA-4E71-A345-00961372DA75-768x960.jpg 768w, https://www.notjustahousewife.net/wp-content/uploads/2024/06/4348F68E-C9CA-4E71-A345-00961372DA75-1229x1536.jpg 1229w, https://www.notjustahousewife.net/wp-content/uploads/2024/06/4348F68E-C9CA-4E71-A345-00961372DA75-720x900.jpg 720w, https://www.notjustahousewife.net/wp-content/uploads/2024/06/4348F68E-C9CA-4E71-A345-00961372DA75-360x450.jpg 360w, https://www.notjustahousewife.net/wp-content/uploads/2024/06/4348F68E-C9CA-4E71-A345-00961372DA75-150x188.jpg 150w, https://www.notjustahousewife.net/wp-content/uploads/2024/06/4348F68E-C9CA-4E71-A345-00961372DA75.jpg 1440w" sizes="(max-width: 819px) 100vw, 819px" /></a></figure> <figure class="wp-block-image size-large"><a href="https://www.notjustahousewife.net/wp-content/uploads/2024/06/1804B635-BC4C-4F01-A457-6EE4AFBF5D02.jpg"><img loading="lazy" decoding="async" width="819" height="1024" data-id="27270" src="https://www.notjustahousewife.net/wp-content/uploads/2024/06/1804B635-BC4C-4F01-A457-6EE4AFBF5D02-819x1024.jpg" alt="" class="wp-image-27270" srcset="https://www.notjustahousewife.net/wp-content/uploads/2024/06/1804B635-BC4C-4F01-A457-6EE4AFBF5D02-819x1024.jpg 819w, https://www.notjustahousewife.net/wp-content/uploads/2024/06/1804B635-BC4C-4F01-A457-6EE4AFBF5D02-240x300.jpg 240w, https://www.notjustahousewife.net/wp-content/uploads/2024/06/1804B635-BC4C-4F01-A457-6EE4AFBF5D02-768x960.jpg 768w, https://www.notjustahousewife.net/wp-content/uploads/2024/06/1804B635-BC4C-4F01-A457-6EE4AFBF5D02-1229x1536.jpg 1229w, https://www.notjustahousewife.net/wp-content/uploads/2024/06/1804B635-BC4C-4F01-A457-6EE4AFBF5D02-720x900.jpg 720w, https://www.notjustahousewife.net/wp-content/uploads/2024/06/1804B635-BC4C-4F01-A457-6EE4AFBF5D02-360x450.jpg 360w, https://www.notjustahousewife.net/wp-content/uploads/2024/06/1804B635-BC4C-4F01-A457-6EE4AFBF5D02-150x188.jpg 150w, https://www.notjustahousewife.net/wp-content/uploads/2024/06/1804B635-BC4C-4F01-A457-6EE4AFBF5D02.jpg 1440w" sizes="(max-width: 819px) 100vw, 819px" /></a></figure> <figure class="wp-block-image size-large"><a href="https://www.notjustahousewife.net/wp-content/uploads/2024/06/IMG_3023_jpg-scaled.jpg"><img loading="lazy" decoding="async" width="768" height="1024" data-id="27271" src="https://www.notjustahousewife.net/wp-content/uploads/2024/06/IMG_3023_jpg-768x1024.jpg" alt="" class="wp-image-27271" srcset="https://www.notjustahousewife.net/wp-content/uploads/2024/06/IMG_3023_jpg-768x1024.jpg 768w, https://www.notjustahousewife.net/wp-content/uploads/2024/06/IMG_3023_jpg-225x300.jpg 225w, https://www.notjustahousewife.net/wp-content/uploads/2024/06/IMG_3023_jpg-1152x1536.jpg 1152w, https://www.notjustahousewife.net/wp-content/uploads/2024/06/IMG_3023_jpg-1536x2048.jpg 1536w, https://www.notjustahousewife.net/wp-content/uploads/2024/06/IMG_3023_jpg-640x853.jpg 640w, https://www.notjustahousewife.net/wp-content/uploads/2024/06/IMG_3023_jpg-150x200.jpg 150w, https://www.notjustahousewife.net/wp-content/uploads/2024/06/IMG_3023_jpg-scaled.jpg 1920w" sizes="(max-width: 768px) 100vw, 768px" /></a></figure> </figure> <p>I have been doing a TON of work in the yard as well as DIY projects but haven't shared since I am kind of waiting for the wedding to reveal them. I am also growing all the flowers for the wedding. So the pressure is on for the garden and cut flowers to succeed. </p> <div class="wp-block-image"> <figure class="aligncenter size-large is-resized"><a href="https://www.notjustahousewife.net/wp-content/uploads/2024/06/pincushion-flowers.jpg"><img loading="lazy" decoding="async" width="590" height="1024" src="https://www.notjustahousewife.net/wp-content/uploads/2024/06/pincushion-flowers-590x1024.jpg" alt="" class="wp-image-27272" style="width:506px;height:auto" srcset="https://www.notjustahousewife.net/wp-content/uploads/2024/06/pincushion-flowers-590x1024.jpg 590w, https://www.notjustahousewife.net/wp-content/uploads/2024/06/pincushion-flowers-173x300.jpg 173w, https://www.notjustahousewife.net/wp-content/uploads/2024/06/pincushion-flowers-768x1333.jpg 768w, https://www.notjustahousewife.net/wp-content/uploads/2024/06/pincushion-flowers-885x1536.jpg 885w, https://www.notjustahousewife.net/wp-content/uploads/2024/06/pincushion-flowers-150x260.jpg 150w, https://www.notjustahousewife.net/wp-content/uploads/2024/06/pincushion-flowers.jpg 1170w" sizes="(max-width: 590px) 100vw, 590px" /></a><figcaption class="wp-element-caption">Pincushion Flowers</figcaption></figure></div> <p>Since most of my time is going towards wedding prep, it makes it a bit hard to keep up with the blog and social media. But I do have a few things to share soon, including a <strong>family room refresh and a big kitchen project!</strong></p> <p>Another fun thing that happened earlier this year was I became a service missionary for our church. Once a week I work at our temple. You can serve inside the temple, but I opted to serve outside helping with the grounds. Since I am a gardening introvert that prefers plants to lots of people, it's the perfect way for me to help. </p> <p>Our second son is still serving a mission for our church in the north east and will miss the wedding. But his 2 year mission will be done in 6 months so we are getting close! I am looking forward to having him home.</p> <div class="wp-block-image"> <figure class="aligncenter size-large is-resized"><a href="https://www.notjustahousewife.net/wp-content/uploads/2024/06/IMG_3556.jpg"><img loading="lazy" decoding="async" width="1016" height="1024" src="https://www.notjustahousewife.net/wp-content/uploads/2024/06/IMG_3556-1016x1024.jpg" alt="" class="wp-image-27267" style="width:601px;height:auto" srcset="https://www.notjustahousewife.net/wp-content/uploads/2024/06/IMG_3556-1016x1024.jpg 1016w, https://www.notjustahousewife.net/wp-content/uploads/2024/06/IMG_3556-298x300.jpg 298w, https://www.notjustahousewife.net/wp-content/uploads/2024/06/IMG_3556-150x151.jpg 150w, https://www.notjustahousewife.net/wp-content/uploads/2024/06/IMG_3556-768x774.jpg 768w, https://www.notjustahousewife.net/wp-content/uploads/2024/06/IMG_3556-180x180.jpg 180w, https://www.notjustahousewife.net/wp-content/uploads/2024/06/IMG_3556-40x40.jpg 40w, https://www.notjustahousewife.net/wp-content/uploads/2024/06/IMG_3556-96x96.jpg 96w, https://www.notjustahousewife.net/wp-content/uploads/2024/06/IMG_3556.jpg 1198w" sizes="(max-width: 1016px) 100vw, 1016px" /></a></figure></div> <p>The summer has been full of family reunions, church youth camps, driving kids around, BBQs, and trying to spend time up the canyon as often as we can.</p> <p><strong>I hope your summer is full of projects, family, and free time to enjoy the things you love. If you have a minute, I'd love to hear about any projects you have going on! Comment below :) </strong></p> <div style="margin-top: 0px; margin-bottom: 0px;" class="sharethis-inline-share-buttons" ></div> ]]>
</content:encoded>
<wfw:commentRss>https://www.notjustahousewife.net/life-lately-big-family-update/feed/</wfw:commentRss>
<slash:comments>8</slash:comments>
</item>
<item>
<title>DIY Wedding Arch</title>
<link>https://www.notjustahousewife.net/diy-wedding-arch/</link>
<comments>https://www.notjustahousewife.net/diy-wedding-arch/#comments</comments>
<dc:creator>
<![CDATA[ Stacy ]]>
</dc:creator>
<pubDate>Tue, 11 Jun 2024 04:43:57 +0000</pubDate>
<category>
<![CDATA[ DIY Projects & Tutorials ]]>
</category>
<guid isPermaLink="false">https://www.notjustahousewife.net/?p=27235</guid>
<description>
<![CDATA[ I recently had the opportunity to host a wedding reception on our backyard. Our dear friends from Las Vegas had a daughter getting married and she chose to get married here in Utah. She asked if she could have the wedding reception in our yard and I was so happy to be able to help...</p><p><a class="more-link" href="https://www.notjustahousewife.net/diy-wedding-arch/">Read More</a></p> ]]>
</description>
<content:encoded>
<![CDATA[ <p>I recently had the opportunity to host a wedding reception on our backyard. Our dear friends from Las Vegas had a daughter getting married and she chose to get married here in Utah. She asked if she could have the wedding reception in our yard and I was so happy to be able to help out.</p> <p class="has-text-align-center"><em>This post is sponsored by <a href="https://www.wagnerspraytech.com/" target="_blank" rel="noreferrer noopener sponsored nofollow">Wagner</a> but all ideas, projects and opinions are 100% my own. </em></p> <div class="wp-block-image"> <figure class="aligncenter size-full is-resized"><a href="https://www.notjustahousewife.net/wp-content/uploads/2024/06/DIY-wedding-hexagon-arch.jpg"><img loading="lazy" decoding="async" width="600" height="900" src="https://www.notjustahousewife.net/wp-content/uploads/2024/06/DIY-wedding-hexagon-arch.jpg" alt="wood hexagon arch for wedding" class="wp-image-27241" style="width:500px;height:auto" srcset="https://www.notjustahousewife.net/wp-content/uploads/2024/06/DIY-wedding-hexagon-arch.jpg 600w, https://www.notjustahousewife.net/wp-content/uploads/2024/06/DIY-wedding-hexagon-arch-200x300.jpg 200w, https://www.notjustahousewife.net/wp-content/uploads/2024/06/DIY-wedding-hexagon-arch-150x225.jpg 150w" sizes="(max-width: 600px) 100vw, 600px" /></a></figure></div> <p>As part of the wedding preparations, we discussed the fact that we needed an arch of some kind for the happy couple to stand by. The bride's father is also into DIY and woodworking, so he wanted to build it. He did not want to bother with the staining, so I offered to tackle that part. I love staining! </p> <div class="wp-block-image"> <figure class="aligncenter size-large is-resized"><a href="https://www.notjustahousewife.net/wp-content/uploads/2024/06/arch-scaled.jpg"><img loading="lazy" decoding="async" width="1024" height="1024" src="https://www.notjustahousewife.net/wp-content/uploads/2024/06/arch-1024x1024.jpg" alt="" class="wp-image-27252" style="width:503px;height:auto" srcset="https://www.notjustahousewife.net/wp-content/uploads/2024/06/arch-1024x1024.jpg 1024w, https://www.notjustahousewife.net/wp-content/uploads/2024/06/arch-300x300.jpg 300w, https://www.notjustahousewife.net/wp-content/uploads/2024/06/arch-150x150.jpg 150w, https://www.notjustahousewife.net/wp-content/uploads/2024/06/arch-768x768.jpg 768w, https://www.notjustahousewife.net/wp-content/uploads/2024/06/arch-1536x1536.jpg 1536w, https://www.notjustahousewife.net/wp-content/uploads/2024/06/arch-2048x2048.jpg 2048w, https://www.notjustahousewife.net/wp-content/uploads/2024/06/arch-360x360.jpg 360w, https://www.notjustahousewife.net/wp-content/uploads/2024/06/arch-720x720.jpg 720w, https://www.notjustahousewife.net/wp-content/uploads/2024/06/arch-180x180.jpg 180w, https://www.notjustahousewife.net/wp-content/uploads/2024/06/arch-1200x1200.jpg 1200w, https://www.notjustahousewife.net/wp-content/uploads/2024/06/arch-250x250.jpg 250w, https://www.notjustahousewife.net/wp-content/uploads/2024/06/arch-40x40.jpg 40w, https://www.notjustahousewife.net/wp-content/uploads/2024/06/arch-96x96.jpg 96w" sizes="(max-width: 1024px) 100vw, 1024px" /></a><figcaption class="wp-element-caption"><em>Our friend in his garage/shop after building the arch</em></figcaption></figure></div> <p>He had it all labeled and bundled together nicely so that it was easy to reassemble it here in Utah when they got here.</p> <figure class="wp-block-gallery has-nested-images columns-default is-cropped wp-block-gallery-15 is-layout-flex wp-block-gallery-is-layout-flex"> <figure class="wp-block-image size-large"><a href="https://www.notjustahousewife.net/wp-content/uploads/2024/06/assembling-the-arch.jpg"><img loading="lazy" decoding="async" width="600" height="900" data-id="27238" src="https://www.notjustahousewife.net/wp-content/uploads/2024/06/assembling-the-arch.jpg" alt="assembling wedding arch" class="wp-image-27238" srcset="https://www.notjustahousewife.net/wp-content/uploads/2024/06/assembling-the-arch.jpg 600w, https://www.notjustahousewife.net/wp-content/uploads/2024/06/assembling-the-arch-200x300.jpg 200w, https://www.notjustahousewife.net/wp-content/uploads/2024/06/assembling-the-arch-150x225.jpg 150w" sizes="(max-width: 600px) 100vw, 600px" /></a></figure> <figure class="wp-block-image size-large"><a href="https://www.notjustahousewife.net/wp-content/uploads/2024/06/assembling-the-DIY-wedding-arch.jpg"><img loading="lazy" decoding="async" width="600" height="900" data-id="27239" src="https://www.notjustahousewife.net/wp-content/uploads/2024/06/assembling-the-DIY-wedding-arch.jpg" alt="assembling hexagon arch" class="wp-image-27239" srcset="https://www.notjustahousewife.net/wp-content/uploads/2024/06/assembling-the-DIY-wedding-arch.jpg 600w, https://www.notjustahousewife.net/wp-content/uploads/2024/06/assembling-the-DIY-wedding-arch-200x300.jpg 200w, https://www.notjustahousewife.net/wp-content/uploads/2024/06/assembling-the-DIY-wedding-arch-150x225.jpg 150w" sizes="(max-width: 600px) 100vw, 600px" /></a></figure> </figure> <p>Once it was assembled, it was so easy to stain it using my Wagner Flexio 3500 sprayer. </p> <figure class="wp-block-gallery has-nested-images columns-default is-cropped wp-block-gallery-16 is-layout-flex wp-block-gallery-is-layout-flex"> <figure class="wp-block-image size-large"><a href="https://www.notjustahousewife.net/wp-content/uploads/2024/06/staining-DIY-wedding-arch-copy.jpg"><img loading="lazy" decoding="async" width="600" height="900" data-id="27245" src="https://www.notjustahousewife.net/wp-content/uploads/2024/06/staining-DIY-wedding-arch-copy.jpg" alt="staining wedding arch with sprayer" class="wp-image-27245" srcset="https://www.notjustahousewife.net/wp-content/uploads/2024/06/staining-DIY-wedding-arch-copy.jpg 600w, https://www.notjustahousewife.net/wp-content/uploads/2024/06/staining-DIY-wedding-arch-copy-200x300.jpg 200w, https://www.notjustahousewife.net/wp-content/uploads/2024/06/staining-DIY-wedding-arch-copy-150x225.jpg 150w" sizes="(max-width: 600px) 100vw, 600px" /></a></figure> <figure class="wp-block-image size-large"><a href="https://www.notjustahousewife.net/wp-content/uploads/2024/06/wiping-off-access-stain.jpg"><img loading="lazy" decoding="async" width="600" height="900" data-id="27249" src="https://www.notjustahousewife.net/wp-content/uploads/2024/06/wiping-off-access-stain.jpg" alt="staining wedding arch" class="wp-image-27249" srcset="https://www.notjustahousewife.net/wp-content/uploads/2024/06/wiping-off-access-stain.jpg 600w, https://www.notjustahousewife.net/wp-content/uploads/2024/06/wiping-off-access-stain-200x300.jpg 200w, https://www.notjustahousewife.net/wp-content/uploads/2024/06/wiping-off-access-stain-150x225.jpg 150w" sizes="(max-width: 600px) 100vw, 600px" /></a></figure> </figure> <p>Not only did I have a giant hexagon arch to stain, but I had 35 hexagon centerpieces too! It went by so much fast wit the sprayer than if I had brushed the stain on. </p> <div class="wp-block-image"> <figure class="aligncenter size-full is-resized"><a href="https://www.notjustahousewife.net/wp-content/uploads/2024/06/spraying-stain-on-wood-centerpieces.jpg"><img loading="lazy" decoding="async" width="600" height="900" src="https://www.notjustahousewife.net/wp-content/uploads/2024/06/spraying-stain-on-wood-centerpieces.jpg" alt="staining wood centerpieces with sprayer" class="wp-image-27244" style="width:502px;height:auto" srcset="https://www.notjustahousewife.net/wp-content/uploads/2024/06/spraying-stain-on-wood-centerpieces.jpg 600w, https://www.notjustahousewife.net/wp-content/uploads/2024/06/spraying-stain-on-wood-centerpieces-200x300.jpg 200w, https://www.notjustahousewife.net/wp-content/uploads/2024/06/spraying-stain-on-wood-centerpieces-150x225.jpg 150w" sizes="(max-width: 600px) 100vw, 600px" /></a><figcaption class="wp-element-caption"><em>I used the <a href="https://www.wagnerspraytech.com/product/flexio-series/flexio-3500-sprayer/" target="_blank" rel="noreferrer noopener sponsored nofollow">Flexio 3500 sprayer</a> with the fine finish nozzle </em></figcaption></figure></div> <p>Once I was done spraying, I grabbed some paper towels and wiped off the excess stain. They dried outside overnight and were ready to go by the wedding day. With everything else we had to do right before the wedding, it was so nice to be able to stain everything quickly!</p> <div class="wp-block-image"> <figure class="aligncenter size-full is-resized"><a href="https://www.notjustahousewife.net/wp-content/uploads/2024/06/wedding-centerpiece-hexagon.jpg"><img loading="lazy" decoding="async" width="600" height="900" src="https://www.notjustahousewife.net/wp-content/uploads/2024/06/wedding-centerpiece-hexagon.jpg" alt="hexagon wedding centerpieces" class="wp-image-27247" style="width:500px;height:auto" srcset="https://www.notjustahousewife.net/wp-content/uploads/2024/06/wedding-centerpiece-hexagon.jpg 600w, https://www.notjustahousewife.net/wp-content/uploads/2024/06/wedding-centerpiece-hexagon-200x300.jpg 200w, https://www.notjustahousewife.net/wp-content/uploads/2024/06/wedding-centerpiece-hexagon-150x225.jpg 150w" sizes="(max-width: 600px) 100vw, 600px" /></a></figure></div> <p>Another way I was able to help with the wedding, was with the flowers. I have a ton of white peonies in my yard so as they were in the soft bud stage, I cut them and stored them in my fridge. Over 3 weeks, I collected over 100 blooms. Then the night before I put them in water so they could open.</p> <p>We picked up a few other flowers from Trader Joes, and I was able to create the bride's bouquet and 35 centerpieces.</p> <p>Our friends had brought the eucalyptus from Vegas that was trimmed off trees on their property. Having both the peonies and the greenery saved them so much money!</p> <div class="wp-block-image"> <figure class="aligncenter size-full is-resized"><a href="https://www.notjustahousewife.net/wp-content/uploads/2024/06/wedding-bouquet-with-peonies.jpg"><img loading="lazy" decoding="async" width="600" height="900" src="https://www.notjustahousewife.net/wp-content/uploads/2024/06/wedding-bouquet-with-peonies.jpg" alt="peony bridal bouquet" class="wp-image-27246" style="width:501px;height:auto" srcset="https://www.notjustahousewife.net/wp-content/uploads/2024/06/wedding-bouquet-with-peonies.jpg 600w, https://www.notjustahousewife.net/wp-content/uploads/2024/06/wedding-bouquet-with-peonies-200x300.jpg 200w, https://www.notjustahousewife.net/wp-content/uploads/2024/06/wedding-bouquet-with-peonies-150x225.jpg 150w" sizes="(max-width: 600px) 100vw, 600px" /></a></figure></div> <p>I think the arch turned out so nice! The bride and groom were thrilled :)</p> <div class="wp-block-image"> <figure class="aligncenter size-full is-resized"><a href="https://www.notjustahousewife.net/wp-content/uploads/2024/06/DIY-hexagon-wedding-arch.jpg"><img loading="lazy" decoding="async" width="600" height="843" src="https://www.notjustahousewife.net/wp-content/uploads/2024/06/DIY-hexagon-wedding-arch.jpg" alt="hexagon wedding arch" class="wp-image-27240" style="width:500px;height:auto" srcset="https://www.notjustahousewife.net/wp-content/uploads/2024/06/DIY-hexagon-wedding-arch.jpg 600w, https://www.notjustahousewife.net/wp-content/uploads/2024/06/DIY-hexagon-wedding-arch-214x300.jpg 214w, https://www.notjustahousewife.net/wp-content/uploads/2024/06/DIY-hexagon-wedding-arch-150x211.jpg 150w" sizes="(max-width: 600px) 100vw, 600px" /></a><figcaption class="wp-element-caption"><em>The bride's dad also made the sign with their last name to hang from the hexagon.</em></figcaption></figure></div> <p> Because I was coordinating everything and running around like a crazy person, I was not able to get many photos. Plus I always feel weird about posting photos of people's faces without their permission. So here are the few shots that I did get. </p> <div class="wp-block-image"> <figure class="aligncenter size-full"><a href="https://www.notjustahousewife.net/wp-content/uploads/2024/06/backyard-wedding-collage-copy.jpg"><img loading="lazy" decoding="async" width="600" height="900" src="https://www.notjustahousewife.net/wp-content/uploads/2024/06/backyard-wedding-collage-copy.jpg" alt="backyard wedding idea collage" class="wp-image-27250" srcset="https://www.notjustahousewife.net/wp-content/uploads/2024/06/backyard-wedding-collage-copy.jpg 600w, https://www.notjustahousewife.net/wp-content/uploads/2024/06/backyard-wedding-collage-copy-200x300.jpg 200w, https://www.notjustahousewife.net/wp-content/uploads/2024/06/backyard-wedding-collage-copy-150x225.jpg 150w" sizes="(max-width: 600px) 100vw, 600px" /></a></figure></div> <p>We had 5 pots lining the driveway with string holding photos of the bride and groom. The poles are just PVC pipe that painted gold. I added a 2" wood ball to the top from the craft store. It was such a simple thing but was very impactful!</p> <p>When our friend cut out the couple's name sign, he was left with this board. Instead of using it as scrap wood, he turned it into a light up sign! We decided to hang it by the fountain since it looked so good with the vines as a background. </p> <div class="wp-block-image"> <figure class="aligncenter size-full is-resized"><a href="https://www.notjustahousewife.net/wp-content/uploads/2024/06/wedding-name-lit-up-sign.jpg"><img loading="lazy" decoding="async" width="600" height="900" src="https://www.notjustahousewife.net/wp-content/uploads/2024/06/wedding-name-lit-up-sign.jpg" alt="lit up name sign for wedding" class="wp-image-27248" style="width:503px;height:auto" srcset="https://www.notjustahousewife.net/wp-content/uploads/2024/06/wedding-name-lit-up-sign.jpg 600w, https://www.notjustahousewife.net/wp-content/uploads/2024/06/wedding-name-lit-up-sign-200x300.jpg 200w, https://www.notjustahousewife.net/wp-content/uploads/2024/06/wedding-name-lit-up-sign-150x225.jpg 150w" sizes="(max-width: 600px) 100vw, 600px" /></a></figure></div> <p>Even though I was all over the place (and very sweaty!) we managed to get a photo of use under the arch we made together. </p> <div class="wp-block-image"> <figure class="aligncenter size-full is-resized"><a href="https://www.notjustahousewife.net/wp-content/uploads/2024/06/making-hexagon-arch-rogether.jpg"><img loading="lazy" decoding="async" width="600" height="900" src="https://www.notjustahousewife.net/wp-content/uploads/2024/06/making-hexagon-arch-rogether.jpg" alt="" class="wp-image-27243" style="width:502px;height:auto" srcset="https://www.notjustahousewife.net/wp-content/uploads/2024/06/making-hexagon-arch-rogether.jpg 600w, https://www.notjustahousewife.net/wp-content/uploads/2024/06/making-hexagon-arch-rogether-200x300.jpg 200w, https://www.notjustahousewife.net/wp-content/uploads/2024/06/making-hexagon-arch-rogether-150x225.jpg 150w" sizes="(max-width: 600px) 100vw, 600px" /></a></figure></div> <p>I am so glad Shane and I were able to help our best friends create a beautiful celebration for their daughter. We are so happy for them!</p> <div class="wp-block-image"> <figure class="aligncenter size-large is-resized"><a href="https://www.notjustahousewife.net/wp-content/uploads/2024/06/1wedding-arch-hexagon.png"><img loading="lazy" decoding="async" width="768" height="1024" src="https://www.notjustahousewife.net/wp-content/uploads/2024/06/1wedding-arch-hexagon-768x1024.png" alt="DIY wedding arch with bride and groom" class="wp-image-27255" style="width:500px;height:auto" srcset="https://www.notjustahousewife.net/wp-content/uploads/2024/06/1wedding-arch-hexagon-768x1024.png 768w, https://www.notjustahousewife.net/wp-content/uploads/2024/06/1wedding-arch-hexagon-225x300.png 225w, https://www.notjustahousewife.net/wp-content/uploads/2024/06/1wedding-arch-hexagon-640x853.png 640w, https://www.notjustahousewife.net/wp-content/uploads/2024/06/1wedding-arch-hexagon-150x200.png 150w, https://www.notjustahousewife.net/wp-content/uploads/2024/06/1wedding-arch-hexagon.png 1000w" sizes="(max-width: 768px) 100vw, 768px" /></a></figure></div><div style="margin-top: 0px; margin-bottom: 0px;" class="sharethis-inline-share-buttons" ></div> ]]>
</content:encoded>
<wfw:commentRss>https://www.notjustahousewife.net/diy-wedding-arch/feed/</wfw:commentRss>
<slash:comments>5</slash:comments>
</item>
<item>
<title>Why I Grow Flowers In My Vegetable Garden</title>
<link>https://www.notjustahousewife.net/why-i-grow-flowers-in-my-vegetable-garden/</link>
<comments>https://www.notjustahousewife.net/why-i-grow-flowers-in-my-vegetable-garden/#respond</comments>
<dc:creator>
<![CDATA[ Stacy ]]>
</dc:creator>
<pubDate>Thu, 16 May 2024 05:20:11 +0000</pubDate>
<category>
<![CDATA[ Outdoor Projects & Gardening ]]>
</category>
<guid isPermaLink="false">https://www.notjustahousewife.net/?p=27211</guid>
<description>
<![CDATA[ There's nothing better than going into your own backyard to pick a fresh tomato or cucumber. Amongst many fruits and veggies, I also grow a variety of flowers. There are so many benefits to having flowers with your veggies! Here are the reasons why I grow flowers in my vegetable garden. Why I Grow Flowers...</p><p><a class="more-link" href="https://www.notjustahousewife.net/why-i-grow-flowers-in-my-vegetable-garden/">Read More</a></p> ]]>
</description>
<content:encoded>
<![CDATA[ <p>There's nothing better than going into your own backyard to pick a fresh tomato or cucumber. Amongst many fruits and veggies, I also grow a variety of flowers. There are so many benefits to having flowers with your veggies! Here are the reasons why I grow flowers in my vegetable garden.</p> <h2 class="wp-block-heading">Why I Grow Flowers In My Vegetable Garden</h2> <p>I decided 4 years ago that I wanted to grow cut flowers (flowers with long stems meant for bouquets). I didn't really have a space where I could do that so I ended up planting them in the vegetable garden. The first year I only grew a few types. But them I realized how much I loved growing them and increased the varieties.</p> <div class="wp-block-image"> <figure class="aligncenter size-full is-resized"><a href="https://www.notjustahousewife.net/wp-content/uploads/2024/05/growing-flowers-and-vegetables-together.jpg"><img loading="lazy" decoding="async" width="600" height="900" src="https://www.notjustahousewife.net/wp-content/uploads/2024/05/growing-flowers-and-vegetables-together.jpg" alt="picking an onion out of the garden" class="wp-image-27226" style="width:500px;height:auto" srcset="https://www.notjustahousewife.net/wp-content/uploads/2024/05/growing-flowers-and-vegetables-together.jpg 600w, https://www.notjustahousewife.net/wp-content/uploads/2024/05/growing-flowers-and-vegetables-together-200x300.jpg 200w, https://www.notjustahousewife.net/wp-content/uploads/2024/05/growing-flowers-and-vegetables-together-150x225.jpg 150w" sizes="(max-width: 600px) 100vw, 600px" /></a></figure></div> <h3 class="wp-block-heading">More Pollinators &amp; Beneficial bugs </h3> <p>The first thing I noticed was that my garden was filled with more pollinators than usual. Everything from honey bees, butterflies, to bumble bees and hummingbirds. They are attracted to the bright colors of the flowers but also stay and pollinate the blooms on your vegetables.</p> <p>Insects like lacewing, ladybugs, and dragonflies are also attracted to sweet smelling flowers. Lacewing larvae eat aphids, white flies, and other small pests. The adult lacewing feed on nectar from the flowers. Dragonflies eat mosquitoes (in all the stages of their life) so they are definitely an isect you want in your yard. </p> <div class="wp-block-image"> <figure class="aligncenter size-full is-resized"><a href="https://www.notjustahousewife.net/wp-content/uploads/2024/05/pollinators.jpg"><img loading="lazy" decoding="async" width="600" height="900" src="https://www.notjustahousewife.net/wp-content/uploads/2024/05/pollinators.jpg" alt="beneficial insects attracted by flowers" class="wp-image-27218" style="width:500px;height:auto" srcset="https://www.notjustahousewife.net/wp-content/uploads/2024/05/pollinators.jpg 600w, https://www.notjustahousewife.net/wp-content/uploads/2024/05/pollinators-200x300.jpg 200w, https://www.notjustahousewife.net/wp-content/uploads/2024/05/pollinators-150x225.jpg 150w" sizes="(max-width: 600px) 100vw, 600px" /></a></figure></div> <h3 class="wp-block-heading">Adds Color!</h3> <p>Flowers add so much color and visual interest to your vegetable garden. Don't get me wrong, I love my nice straight rows of green veggies. But a pop of color here and there is so cheerful.</p> <div class="wp-block-image"> <figure class="aligncenter size-large is-resized"><a href="https://www.notjustahousewife.net/wp-content/uploads/2024/05/zinnias-in-vegetable-garden-scaled.jpg"><img loading="lazy" decoding="async" width="726" height="1024" src="https://www.notjustahousewife.net/wp-content/uploads/2024/05/zinnias-in-vegetable-garden-726x1024.jpg" alt="zinnias growing in a vegetable garden" class="wp-image-27217" style="width:506px;height:auto" srcset="https://www.notjustahousewife.net/wp-content/uploads/2024/05/zinnias-in-vegetable-garden-726x1024.jpg 726w, https://www.notjustahousewife.net/wp-content/uploads/2024/05/zinnias-in-vegetable-garden-213x300.jpg 213w, https://www.notjustahousewife.net/wp-content/uploads/2024/05/zinnias-in-vegetable-garden-768x1083.jpg 768w, https://www.notjustahousewife.net/wp-content/uploads/2024/05/zinnias-in-vegetable-garden-1089x1536.jpg 1089w, https://www.notjustahousewife.net/wp-content/uploads/2024/05/zinnias-in-vegetable-garden-1452x2048.jpg 1452w, https://www.notjustahousewife.net/wp-content/uploads/2024/05/zinnias-in-vegetable-garden-150x212.jpg 150w, https://www.notjustahousewife.net/wp-content/uploads/2024/05/zinnias-in-vegetable-garden-scaled.jpg 1815w" sizes="(max-width: 726px) 100vw, 726px" /></a></figure></div> <p>I love the different textures the flowers bring to the garden space as well. </p> <div class="wp-block-image"> <figure class="aligncenter size-full is-resized"><a href="https://www.notjustahousewife.net/wp-content/uploads/2024/05/cosmos.jpg"><img loading="lazy" decoding="async" width="600" height="900" src="https://www.notjustahousewife.net/wp-content/uploads/2024/05/cosmos.jpg" alt="cosmos growing in a vegetable garden" class="wp-image-27227" style="width:503px;height:auto" srcset="https://www.notjustahousewife.net/wp-content/uploads/2024/05/cosmos.jpg 600w, https://www.notjustahousewife.net/wp-content/uploads/2024/05/cosmos-200x300.jpg 200w, https://www.notjustahousewife.net/wp-content/uploads/2024/05/cosmos-150x225.jpg 150w" sizes="(max-width: 600px) 100vw, 600px" /></a></figure></div> <h3 class="wp-block-heading">More Time In The Garden</h3> <p>I find that since I have started growing flowers in my vegetable garden, that I spend more time out there. I check on the progress of the flowers to see if they are blooming yet. I also go out and collect flowers to bring inside quite often. </p> <div class="wp-block-image"> <figure class="aligncenter size-full"><a href="https://www.notjustahousewife.net/wp-content/uploads/2024/05/globe-amaranth.jpg"><img loading="lazy" decoding="async" width="700" height="472" src="https://www.notjustahousewife.net/wp-content/uploads/2024/05/globe-amaranth.jpg" alt="globe amaranth flowers growing in a vegetable garden" class="wp-image-27214" srcset="https://www.notjustahousewife.net/wp-content/uploads/2024/05/globe-amaranth.jpg 700w, https://www.notjustahousewife.net/wp-content/uploads/2024/05/globe-amaranth-300x202.jpg 300w, https://www.notjustahousewife.net/wp-content/uploads/2024/05/globe-amaranth-150x101.jpg 150w" sizes="(max-width: 700px) 100vw, 700px" /></a><figcaption class="wp-element-caption"><em>Globe Amaranth and Morning Glory on the Trellis</em></figcaption></figure></div> <p>When you spend more time in your garden, you have a better chance of catching problems (like pests, weeds, and diseases) early before they get out of control. </p> <div class="wp-block-image"> <figure class="aligncenter size-full"><a href="https://www.notjustahousewife.net/wp-content/uploads/2024/05/crespedia.png"><img loading="lazy" decoding="async" width="700" height="491" src="https://www.notjustahousewife.net/wp-content/uploads/2024/05/crespedia.png" alt="craspedia flowers" class="wp-image-27213" srcset="https://www.notjustahousewife.net/wp-content/uploads/2024/05/crespedia.png 700w, https://www.notjustahousewife.net/wp-content/uploads/2024/05/crespedia-300x210.png 300w, https://www.notjustahousewife.net/wp-content/uploads/2024/05/crespedia-150x105.png 150w" sizes="(max-width: 700px) 100vw, 700px" /></a><figcaption class="wp-element-caption"><em>Craspedia Flowers</em></figcaption></figure></div> <h3 class="wp-block-heading">Repelling Pests</h3> <p>Some types of flowers will even deter pests! Flowers like Marigolds and Nasturtiums are well known for repelling bugs such as white fly, squash bugs and aphids.</p> <div class="wp-block-image"> <figure class="aligncenter size-full is-resized"><a href="https://www.notjustahousewife.net/wp-content/uploads/2024/05/petunias-copy.jpg"><img loading="lazy" decoding="async" width="600" height="900" src="https://www.notjustahousewife.net/wp-content/uploads/2024/05/petunias-copy.jpg" alt="petunias" class="wp-image-27228" style="width:501px;height:auto" srcset="https://www.notjustahousewife.net/wp-content/uploads/2024/05/petunias-copy.jpg 600w, https://www.notjustahousewife.net/wp-content/uploads/2024/05/petunias-copy-200x300.jpg 200w, https://www.notjustahousewife.net/wp-content/uploads/2024/05/petunias-copy-150x225.jpg 150w" sizes="(max-width: 600px) 100vw, 600px" /></a></figure></div> <p>Lavender, Bee Balm, and petunias are also great flowers to plant if you want to help keep pests off your veggies. </p> <h3 class="wp-block-heading">Bouquets</h3> <p>The reason I wanted to grow cut flowers in the first place was to have access to fresh flowers for my home. I have had so much fun growing them and playing around with different types of arrangements. I love to give them to family and friends. I have some tips for arranging bouquets in <a href="https://www.notjustahousewife.net/5-simple-tips-for-creating-beautiful-bouquets/">THIS POST</a>. </p> <div class="wp-block-image"> <figure class="aligncenter size-full"><a href="https://www.notjustahousewife.net/wp-content/uploads/2024/05/flower-bouquets.jpg"><img loading="lazy" decoding="async" width="600" height="900" src="https://www.notjustahousewife.net/wp-content/uploads/2024/05/flower-bouquets.jpg" alt="different examples of flower bouquets " class="wp-image-27224" srcset="https://www.notjustahousewife.net/wp-content/uploads/2024/05/flower-bouquets.jpg 600w, https://www.notjustahousewife.net/wp-content/uploads/2024/05/flower-bouquets-200x300.jpg 200w, https://www.notjustahousewife.net/wp-content/uploads/2024/05/flower-bouquets-150x225.jpg 150w" sizes="(max-width: 600px) 100vw, 600px" /></a></figure></div> <p>If you are interested in learning more about growing cut flowers from seeds indoors, check out this post <a href="https://www.notjustahousewife.net/starting-seeds-indoors/">HERE</a>. </p> <p>The types of flowers I am growing in the vegetable garden this year are:</p> <p><em>Cosmos, Zinnia, Sunflower, Bachelor Buttons, Dahlias, Craspedia, Delphinium, Nasturtium, Globe Amaranth, Pincushion, and Coneflower. I also grow Feverfew, Yarrow, and daisies in other areas of the yard. </em></p> <div class="wp-block-image"> <figure class="aligncenter size-full is-resized"><a href="https://www.notjustahousewife.net/wp-content/uploads/2024/05/growing-flowers-with-your-veggies.jpg"><img loading="lazy" decoding="async" width="600" height="900" src="https://www.notjustahousewife.net/wp-content/uploads/2024/05/growing-flowers-with-your-veggies.jpg" alt="vegetable garden with flowers" class="wp-image-27220" style="width:507px;height:auto" srcset="https://www.notjustahousewife.net/wp-content/uploads/2024/05/growing-flowers-with-your-veggies.jpg 600w, https://www.notjustahousewife.net/wp-content/uploads/2024/05/growing-flowers-with-your-veggies-200x300.jpg 200w, https://www.notjustahousewife.net/wp-content/uploads/2024/05/growing-flowers-with-your-veggies-150x225.jpg 150w" sizes="(max-width: 600px) 100vw, 600px" /></a></figure></div> <p><strong>Do you grow flowers in your garden? What kinds do you grow?</strong></p> <h3 class="wp-block-heading"><strong>PIN For Later:</strong></h3> <div class="wp-block-image"> <figure class="aligncenter size-full is-resized"><a href="https://www.notjustahousewife.net/wp-content/uploads/2024/05/reasons-to-grow-flowers-in-your-garden.jpg"><img loading="lazy" decoding="async" width="600" height="900" src="https://www.notjustahousewife.net/wp-content/uploads/2024/05/reasons-to-grow-flowers-in-your-garden.jpg" alt="reasons to grow flowers with your vegetables" class="wp-image-27221" style="width:502px;height:auto" srcset="https://www.notjustahousewife.net/wp-content/uploads/2024/05/reasons-to-grow-flowers-in-your-garden.jpg 600w, https://www.notjustahousewife.net/wp-content/uploads/2024/05/reasons-to-grow-flowers-in-your-garden-200x300.jpg 200w, https://www.notjustahousewife.net/wp-content/uploads/2024/05/reasons-to-grow-flowers-in-your-garden-150x225.jpg 150w" sizes="(max-width: 600px) 100vw, 600px" /></a></figure></div><div style="margin-top: 0px; margin-bottom: 0px;" class="sharethis-inline-share-buttons" ></div> ]]>
</content:encoded>
<wfw:commentRss>https://www.notjustahousewife.net/why-i-grow-flowers-in-my-vegetable-garden/feed/</wfw:commentRss>
<slash:comments>0</slash:comments>
</item>
<item>
<title>Raised Garden Beds With An Enclosure</title>
<link>https://www.notjustahousewife.net/raised-garden-beds-with-an-enclosure/</link>
<comments>https://www.notjustahousewife.net/raised-garden-beds-with-an-enclosure/#comments</comments>
<dc:creator>
<![CDATA[ Stacy ]]>
</dc:creator>
<pubDate>Tue, 07 May 2024 17:39:17 +0000</pubDate>
<category>
<![CDATA[ Outdoor Projects & Gardening ]]>
</category>
<category>
<![CDATA[ diy ]]>
</category>
<category>
<![CDATA[ diy project ]]>
</category>
<category>
<![CDATA[ garden ]]>
</category>
<category>
<![CDATA[ paint ]]>
</category>
<category>
<![CDATA[ scrap wood ]]>
</category>
<guid isPermaLink="false">https://www.notjustahousewife.net/?p=27183</guid>
<description>
<![CDATA[ It has been a couple of months since I posted here on the blog. This has been one of the busiest springs ever with lots of projects and some fun news. I can't share everything just now, but a family/life update post will be coming soon. Speaking of family, I have a project I recently...</p><p><a class="more-link" href="https://www.notjustahousewife.net/raised-garden-beds-with-an-enclosure/">Read More</a></p> ]]>
</description>
<content:encoded>
<![CDATA[ <p>It has been a couple of months since I posted here on the blog. This has been one of the busiest springs ever with lots of projects and some fun news. I can't share everything just now, but a family/life update post will be coming soon. Speaking of family, I have a project I recently did for my mom and an AMAZING giveaway to share today. I built my mom some raised garden beds with an enclosure. </p> <p class="has-text-align-center"><em>This post is sponsored by <a href="https://www.wagnerspraytech.com/product-sprayers/" target="_blank" rel="noreferrer noopener sponsored nofollow">Wagner</a>. All ideas and opinions are 100% my own.</em></p> <h2 class="wp-block-heading">Raised Garden Beds With An Enclosure</h2> <p>My mom expressed an interest in being able to grow a few things in her yard. Due to age and mobility issues, I knew that the garden would need to be close to the her house and elevated enough that she wouldn't need to bend over. I decided to build a couple of raised garden beds and place them against the back of her garage. This spot is just outside her kitchen door which is perfect.</p> <div class="wp-block-image"> <figure class="aligncenter size-full"><a href="https://www.notjustahousewife.net/wp-content/uploads/2024/05/before-of-back-of-house.jpg"><img loading="lazy" decoding="async" width="700" height="500" src="https://www.notjustahousewife.net/wp-content/uploads/2024/05/before-of-back-of-house.jpg" alt="" class="wp-image-27196" srcset="https://www.notjustahousewife.net/wp-content/uploads/2024/05/before-of-back-of-house.jpg 700w, https://www.notjustahousewife.net/wp-content/uploads/2024/05/before-of-back-of-house-300x214.jpg 300w, https://www.notjustahousewife.net/wp-content/uploads/2024/05/before-of-back-of-house-150x107.jpg 150w" sizes="(max-width: 700px) 100vw, 700px" /></a></figure></div> <h2 class="wp-block-heading">Prep Work</h2> <p>The siding has iron stains just like the front of her house from the sprinklers (well water) hitting it over the years. When I did her <a href="https://www.notjustahousewife.net/front-porch-makeover/">front porch makeover</a>, I used Iron Out to clean the majority of it off, so I did that again on the backside of her garage and house. It definitely wasn't perfect after, but much better! </p> <div class="wp-block-image"> <figure class="aligncenter size-full is-resized"><a href="https://www.notjustahousewife.net/wp-content/uploads/2024/05/cleaning-siding.jpg"><img loading="lazy" decoding="async" width="600" height="900" src="https://www.notjustahousewife.net/wp-content/uploads/2024/05/cleaning-siding.jpg" alt="cleaning siding with iron out" class="wp-image-27188" style="width:501px;height:auto" srcset="https://www.notjustahousewife.net/wp-content/uploads/2024/05/cleaning-siding.jpg 600w, https://www.notjustahousewife.net/wp-content/uploads/2024/05/cleaning-siding-200x300.jpg 200w, https://www.notjustahousewife.net/wp-content/uploads/2024/05/cleaning-siding-150x225.jpg 150w" sizes="(max-width: 600px) 100vw, 600px" /></a></figure></div> <h2 class="wp-block-heading">Building The Raised Beds</h2> <p>I have an overabundance of scrap wood in my garage from past projects, so I my goal this year is to use as much as possible to free up much needed space. Shane and I were able to cut enough for the planter and only needed to buy some 2x4s for the legs and some 2x3s for the enclosure.</p> <div class="wp-block-image"> <figure class="aligncenter size-full"><a href="https://www.notjustahousewife.net/wp-content/uploads/2024/05/scrap-wood-for-raised-beds.jpg"><img loading="lazy" decoding="async" width="700" height="500" src="https://www.notjustahousewife.net/wp-content/uploads/2024/05/scrap-wood-for-raised-beds.jpg" alt="scrap wood for building garden boxes" class="wp-image-27197" srcset="https://www.notjustahousewife.net/wp-content/uploads/2024/05/scrap-wood-for-raised-beds.jpg 700w, https://www.notjustahousewife.net/wp-content/uploads/2024/05/scrap-wood-for-raised-beds-300x214.jpg 300w, https://www.notjustahousewife.net/wp-content/uploads/2024/05/scrap-wood-for-raised-beds-150x107.jpg 150w" sizes="(max-width: 700px) 100vw, 700px" /></a></figure></div> <p>Shane did some of the assembly one evening while I worked on clearing the ground behind the garage. </p> <div class="wp-block-image"> <figure class="aligncenter size-full is-resized"><a href="https://www.notjustahousewife.net/wp-content/uploads/2024/05/building-raised-garden-beds.jpg"><img loading="lazy" decoding="async" width="600" height="900" src="https://www.notjustahousewife.net/wp-content/uploads/2024/05/building-raised-garden-beds.jpg" alt="building raised garden beds" class="wp-image-27187" style="width:503px;height:auto" srcset="https://www.notjustahousewife.net/wp-content/uploads/2024/05/building-raised-garden-beds.jpg 600w, https://www.notjustahousewife.net/wp-content/uploads/2024/05/building-raised-garden-beds-200x300.jpg 200w, https://www.notjustahousewife.net/wp-content/uploads/2024/05/building-raised-garden-beds-150x225.jpg 150w" sizes="(max-width: 600px) 100vw, 600px" /></a></figure></div> <p>I added 1x4 boards as trim on the top to hide the top of the legs and to beef up the look of the sides.</p> <div class="wp-block-image"> <figure class="aligncenter size-full is-resized"><a href="https://www.notjustahousewife.net/wp-content/uploads/2024/05/trim-for-top-of-raised-beds.jpg"><img loading="lazy" decoding="async" width="600" height="900" src="https://www.notjustahousewife.net/wp-content/uploads/2024/05/trim-for-top-of-raised-beds.jpg" alt="adding trim to to of garden boxes" class="wp-image-27194" style="width:503px;height:auto" srcset="https://www.notjustahousewife.net/wp-content/uploads/2024/05/trim-for-top-of-raised-beds.jpg 600w, https://www.notjustahousewife.net/wp-content/uploads/2024/05/trim-for-top-of-raised-beds-200x300.jpg 200w, https://www.notjustahousewife.net/wp-content/uploads/2024/05/trim-for-top-of-raised-beds-150x225.jpg 150w" sizes="(max-width: 600px) 100vw, 600px" /></a></figure></div> <p>While working on her planters, I had a few visitors. My mom lives fairly close to the mountains and occasionally will get deer in the fields surrounding her house. There is so much for them to eat out there, but on the chance that they venture close to her house and notice the veggies growing in her raised garden beds, I decided to add some sides with metal mesh. </p> <div class="wp-block-image"> <figure class="aligncenter size-full is-resized"><a href="https://www.notjustahousewife.net/wp-content/uploads/2024/05/deer-in-feild.jpg"><img loading="lazy" decoding="async" width="600" height="900" src="https://www.notjustahousewife.net/wp-content/uploads/2024/05/deer-in-feild.jpg" alt="deer in a field" class="wp-image-27189" style="width:505px;height:auto" srcset="https://www.notjustahousewife.net/wp-content/uploads/2024/05/deer-in-feild.jpg 600w, https://www.notjustahousewife.net/wp-content/uploads/2024/05/deer-in-feild-200x300.jpg 200w, https://www.notjustahousewife.net/wp-content/uploads/2024/05/deer-in-feild-150x225.jpg 150w" sizes="(max-width: 600px) 100vw, 600px" /></a></figure></div> <p>I used 2x3 boards to build the enclosure and stapled hardware cloth to the back sides. </p> <div class="wp-block-image"> <figure class="aligncenter size-full is-resized"><a href="https://www.notjustahousewife.net/wp-content/uploads/2024/05/building-enclosure-for-raised-beds.jpg"><img loading="lazy" decoding="async" width="600" height="900" src="https://www.notjustahousewife.net/wp-content/uploads/2024/05/building-enclosure-for-raised-beds.jpg" alt="making enclosure walls for garden boxes out of 2x3s and metal mesh" class="wp-image-27186" style="width:505px;height:auto" srcset="https://www.notjustahousewife.net/wp-content/uploads/2024/05/building-enclosure-for-raised-beds.jpg 600w, https://www.notjustahousewife.net/wp-content/uploads/2024/05/building-enclosure-for-raised-beds-200x300.jpg 200w, https://www.notjustahousewife.net/wp-content/uploads/2024/05/building-enclosure-for-raised-beds-150x225.jpg 150w" sizes="(max-width: 600px) 100vw, 600px" /></a></figure></div> <h2 class="wp-block-heading">Painting the Raised Garden Beds</h2> <p>I was so excited to paint these because I had a new sprayer to try out. <strong>IT IS CORDLESS!</strong> It comes with two batteries and depending on the spray settings, each battery will last 7-20 minutes. The sprayer also comes with two nozzles. One for smaller projects with a fine finish and a larger one for covering more area. </p> <div class="wp-block-image"> <figure class="aligncenter size-large is-resized"><a href="https://www.notjustahousewife.net/wp-content/uploads/2024/05/Screenshot-2024-05-07-at-10.31.29 AM.png"><img loading="lazy" decoding="async" width="1024" height="734" src="https://www.notjustahousewife.net/wp-content/uploads/2024/05/Screenshot-2024-05-07-at-10.31.29 AM-1024x734.png" alt="" class="wp-image-27205" style="width:539px;height:auto" srcset="https://www.notjustahousewife.net/wp-content/uploads/2024/05/Screenshot-2024-05-07-at-10.31.29 AM-1024x734.png 1024w, https://www.notjustahousewife.net/wp-content/uploads/2024/05/Screenshot-2024-05-07-at-10.31.29 AM-300x215.png 300w, https://www.notjustahousewife.net/wp-content/uploads/2024/05/Screenshot-2024-05-07-at-10.31.29 AM-768x551.png 768w, https://www.notjustahousewife.net/wp-content/uploads/2024/05/Screenshot-2024-05-07-at-10.31.29 AM-150x108.png 150w, https://www.notjustahousewife.net/wp-content/uploads/2024/05/Screenshot-2024-05-07-at-10.31.29 AM.png 1344w" sizes="(max-width: 1024px) 100vw, 1024px" /></a><figcaption class="wp-element-caption">Wagner Flexio 3550 Sprayer is available on <a href="https://amzn.to/3WOPrUL" target="_blank" rel="noreferrer noopener nofollow">Amazon</a></figcaption></figure></div> <div class="wp-block-image"> <figure class="aligncenter size-full is-resized"><a href="https://www.notjustahousewife.net/wp-content/uploads/2024/05/painting-raised-garden-beds.jpg"><img loading="lazy" decoding="async" width="600" height="900" src="https://www.notjustahousewife.net/wp-content/uploads/2024/05/painting-raised-garden-beds.jpg" alt="painting garden boxes black" class="wp-image-27192" style="width:503px;height:auto" srcset="https://www.notjustahousewife.net/wp-content/uploads/2024/05/painting-raised-garden-beds.jpg 600w, https://www.notjustahousewife.net/wp-content/uploads/2024/05/painting-raised-garden-beds-200x300.jpg 200w, https://www.notjustahousewife.net/wp-content/uploads/2024/05/painting-raised-garden-beds-150x225.jpg 150w" sizes="(max-width: 600px) 100vw, 600px" /></a></figure></div> <p>I decided to paint the planters black because they were a mix of old and new wood and because my mom's house is white with a black roof and black shutters. </p> <p>I used the small spray nozzle for the enclosure pieces since the boards were skinny and then easily swapped out and used the bigger nozzle for the planter boxes because I knew the old, dry wood would suck up the paint. The fact that the nozzles can detach from the motor makes for easy clean up too!</p> <div class="wp-block-image"> <figure class="aligncenter size-full is-resized"><a href="https://www.notjustahousewife.net/wp-content/uploads/2024/05/flexio-paint-sprayer.jpg"><img loading="lazy" decoding="async" width="600" height="900" src="https://www.notjustahousewife.net/wp-content/uploads/2024/05/flexio-paint-sprayer.jpg" alt="switching out nozzles on the wagner flexio 3550 sprayer" class="wp-image-27191" style="width:508px;height:auto" srcset="https://www.notjustahousewife.net/wp-content/uploads/2024/05/flexio-paint-sprayer.jpg 600w, https://www.notjustahousewife.net/wp-content/uploads/2024/05/flexio-paint-sprayer-200x300.jpg 200w, https://www.notjustahousewife.net/wp-content/uploads/2024/05/flexio-paint-sprayer-150x225.jpg 150w" sizes="(max-width: 600px) 100vw, 600px" /></a></figure></div> <p>Once the paint was dry, Shane and I attached the enclosure pieces to the garden boxes. Having the 1x4 trim on the edges ended up really helping because the enclosure pieces rested on them. </p> <div class="wp-block-image"> <figure class="aligncenter size-full is-resized"><a href="https://www.notjustahousewife.net/wp-content/uploads/2024/05/attaching-garden-bed-enclosure.jpg"><img loading="lazy" decoding="async" width="600" height="900" src="https://www.notjustahousewife.net/wp-content/uploads/2024/05/attaching-garden-bed-enclosure.jpg" alt="adding enclosure to garden boxes" class="wp-image-27184" style="width:506px;height:auto" srcset="https://www.notjustahousewife.net/wp-content/uploads/2024/05/attaching-garden-bed-enclosure.jpg 600w, https://www.notjustahousewife.net/wp-content/uploads/2024/05/attaching-garden-bed-enclosure-200x300.jpg 200w, https://www.notjustahousewife.net/wp-content/uploads/2024/05/attaching-garden-bed-enclosure-150x225.jpg 150w" sizes="(max-width: 600px) 100vw, 600px" /></a></figure></div> <p>We moved the planters in place. I had leveled the ground (there were big piles of dirt back there covered in weeds) and added a thick layer of bark. </p> <h2 class="wp-block-heading">Planting!</h2> <p>We filled the bottom with sticks, pinecones, and some bark before adding several bags of garden soil.</p> <p>This is when we revealed the finished planters to my mom! She and I got them planted them up. In one garden bed she has a tomato plant and 4 bell peppers. The other one has thyme, oregano, chives, sage, and basil. </p> <div class="wp-block-image"> <figure class="aligncenter size-full is-resized"><a href="https://www.notjustahousewife.net/wp-content/uploads/2024/05/raised-garden-beds-with-enclosure-veggies.jpg"><img loading="lazy" decoding="async" width="600" height="900" src="https://www.notjustahousewife.net/wp-content/uploads/2024/05/raised-garden-beds-with-enclosure-veggies.jpg" alt="planting vegetables in raised garden beds" class="wp-image-27193" style="width:509px;height:auto" srcset="https://www.notjustahousewife.net/wp-content/uploads/2024/05/raised-garden-beds-with-enclosure-veggies.jpg 600w, https://www.notjustahousewife.net/wp-content/uploads/2024/05/raised-garden-beds-with-enclosure-veggies-200x300.jpg 200w, https://www.notjustahousewife.net/wp-content/uploads/2024/05/raised-garden-beds-with-enclosure-veggies-150x225.jpg 150w" sizes="(max-width: 600px) 100vw, 600px" /></a></figure></div> <p>I can't wait to see them as the plants get bigger and fill to garden beds!</p> <figure class="wp-block-gallery has-nested-images columns-default is-cropped wp-block-gallery-17 is-layout-flex wp-block-gallery-is-layout-flex"> <figure class="wp-block-image size-large"><a href="https://www.notjustahousewife.net/wp-content/uploads/2024/05/Black-raised-garden-beds.png"><img loading="lazy" decoding="async" width="600" height="875" data-id="27185" src="https://www.notjustahousewife.net/wp-content/uploads/2024/05/Black-raised-garden-beds.png" alt="diy raised garden bed with enclosure" class="wp-image-27185" srcset="https://www.notjustahousewife.net/wp-content/uploads/2024/05/Black-raised-garden-beds.png 600w, https://www.notjustahousewife.net/wp-content/uploads/2024/05/Black-raised-garden-beds-206x300.png 206w, https://www.notjustahousewife.net/wp-content/uploads/2024/05/Black-raised-garden-beds-150x219.png 150w" sizes="(max-width: 600px) 100vw, 600px" /></a></figure> <figure class="wp-block-image size-full"><a href="https://www.notjustahousewife.net/wp-content/uploads/2024/05/garden-beds.jpg"><img loading="lazy" decoding="async" width="600" height="872" data-id="27198" src="https://www.notjustahousewife.net/wp-content/uploads/2024/05/garden-beds.jpg" alt="DIY raised garden bed with enclosure and latch" class="wp-image-27198" srcset="https://www.notjustahousewife.net/wp-content/uploads/2024/05/garden-beds.jpg 600w, https://www.notjustahousewife.net/wp-content/uploads/2024/05/garden-beds-206x300.jpg 206w, https://www.notjustahousewife.net/wp-content/uploads/2024/05/garden-beds-150x218.jpg 150w" sizes="(max-width: 600px) 100vw, 600px" /></a></figure> </figure> <p>The metal latches I wanted to use were out of stock so we added a temporary wood latch. I am going to add two (top and bottom) to each planter to make it really secure in case a curious deer or two find out about the veggies. </p> <div class="wp-block-image"> <figure class="aligncenter size-full is-resized"><a href="https://www.notjustahousewife.net/wp-content/uploads/2024/05/DIY-raised-garden-beds.jpg"><img loading="lazy" decoding="async" width="600" height="841" src="https://www.notjustahousewife.net/wp-content/uploads/2024/05/DIY-raised-garden-beds.jpg" alt="black raised garden beds with enclosure" class="wp-image-27190" style="width:509px;height:auto" srcset="https://www.notjustahousewife.net/wp-content/uploads/2024/05/DIY-raised-garden-beds.jpg 600w, https://www.notjustahousewife.net/wp-content/uploads/2024/05/DIY-raised-garden-beds-214x300.jpg 214w, https://www.notjustahousewife.net/wp-content/uploads/2024/05/DIY-raised-garden-beds-150x210.jpg 150w" sizes="(max-width: 600px) 100vw, 600px" /></a></figure></div> <p>I also did a poor job photoshopping grass over the few bare spots along the bark. Later this week I will need to reseed the lawn in these areas. But overall, this space is done! </p> <h2 class="wp-block-heading">GIVEAWAY!</h2> <p>Wagner has generously offered to giveaway one Cordless Flexio 3550 to a lucky winner. <strong>To enter, comment below telling me what you would use the sprayer for first! For a second entry, pin one of the images from this post and comment telling me you did. </strong></p> <p><em>You must be at least 18 years old to enter. You must be a resident of the USA to enter. The giveaway will go from May 7, 2024 until May 15, 2024.&nbsp; The winner will be chosen by random.org and will be notified by email. The winner will have 48 hours to respond before a new winner will be chosen. The shipping of the prize is the responsibility of the company, in this case Wagner.</em></p> <h3 class="wp-block-heading">PIN For Later:</h3> <div class="wp-block-image"> <figure class="aligncenter size-full"><a href="https://www.notjustahousewife.net/wp-content/uploads/2024/05/raised-beds-3.jpg"><img loading="lazy" decoding="async" width="600" height="900" src="https://www.notjustahousewife.net/wp-content/uploads/2024/05/raised-beds-3.jpg" alt="raised garden beds with enclosure" class="wp-image-27202" srcset="https://www.notjustahousewife.net/wp-content/uploads/2024/05/raised-beds-3.jpg 600w, https://www.notjustahousewife.net/wp-content/uploads/2024/05/raised-beds-3-200x300.jpg 200w, https://www.notjustahousewife.net/wp-content/uploads/2024/05/raised-beds-3-150x225.jpg 150w" sizes="(max-width: 600px) 100vw, 600px" /></a></figure></div> <div class="wp-block-image"> <figure class="aligncenter size-full"><a href="https://www.notjustahousewife.net/wp-content/uploads/2024/05/raised-garden-pin2.jpg"><img loading="lazy" decoding="async" width="600" height="900" src="https://www.notjustahousewife.net/wp-content/uploads/2024/05/raised-garden-pin2.jpg" alt="raised garden bed with an enclosure" class="wp-image-27201" srcset="https://www.notjustahousewife.net/wp-content/uploads/2024/05/raised-garden-pin2.jpg 600w, https://www.notjustahousewife.net/wp-content/uploads/2024/05/raised-garden-pin2-200x300.jpg 200w, https://www.notjustahousewife.net/wp-content/uploads/2024/05/raised-garden-pin2-150x225.jpg 150w" sizes="(max-width: 600px) 100vw, 600px" /></a></figure></div><div style="margin-top: 0px; margin-bottom: 0px;" class="sharethis-inline-share-buttons" ></div> ]]>
</content:encoded>
<wfw:commentRss>https://www.notjustahousewife.net/raised-garden-beds-with-an-enclosure/feed/</wfw:commentRss>
<slash:comments>49</slash:comments>
</item>
<item>
<title>5 Creative DIY Drawer Knobs</title>
<link>https://www.notjustahousewife.net/5-creative-diy-drawer-knobs/</link>
<comments>https://www.notjustahousewife.net/5-creative-diy-drawer-knobs/#respond</comments>
<dc:creator>
<![CDATA[ Stacy ]]>
</dc:creator>
<pubDate>Thu, 14 Mar 2024 20:54:41 +0000</pubDate>
<category>
<![CDATA[ DIY Projects & Tutorials ]]>
</category>
<guid isPermaLink="false">https://www.notjustahousewife.net/?p=27174</guid>
<description>
<![CDATA[ Over the years I have created some fun knobs for our dressers and cabinets. Making your own is an inexpensive way to customize furniture for the space based on your home decor style. Here are some of my favorite unique ideas for DIY drawer knobs!  This post contains affiliate links&#160; DIY Drawer Knobs We all...</p><p><a class="more-link" href="https://www.notjustahousewife.net/5-creative-diy-drawer-knobs/">Read More</a></p> ]]>
</description>
<content:encoded>
<![CDATA[ <p>Over the years I have created some fun knobs for our dressers and cabinets. Making your own is an inexpensive way to customize furniture for the space based on your home decor style. Here are some of my favorite unique ideas for DIY drawer knobs! </p> <p class="has-text-align-center"><em>This post contains affiliate links&nbsp;</em></p> <div class="wp-block-image"> <figure class="aligncenter size-full is-resized"><a href="https://www.notjustahousewife.net/wp-content/uploads/2024/03/DIY-drawer-knobs.jpg"><img loading="lazy" decoding="async" width="600" height="900" src="https://www.notjustahousewife.net/wp-content/uploads/2024/03/DIY-drawer-knobs.jpg" alt="" class="wp-image-27175" style="width:503px;height:auto" srcset="https://www.notjustahousewife.net/wp-content/uploads/2024/03/DIY-drawer-knobs.jpg 600w, https://www.notjustahousewife.net/wp-content/uploads/2024/03/DIY-drawer-knobs-200x300.jpg 200w, https://www.notjustahousewife.net/wp-content/uploads/2024/03/DIY-drawer-knobs-150x225.jpg 150w" sizes="(max-width: 600px) 100vw, 600px" /></a></figure></div> <h2 class="wp-block-heading">DIY Drawer Knobs</h2> <p>We all over to see and old piece of furniture get new life with a makeover! It is fun to see it transform with new stain or paint. One part of the makeover that may not get the all. the attention at first, is the hardware. There are TONS of options out there, but have you ever considered making your own? </p> <h4 class="wp-block-heading has-text-align-left">Supplies:</h4> <p>#8-32 Machine Screws (Flat Head)&nbsp;</p> <p>Hex Machine Screw Nut or Cap Nut (Optional)</p> <p>​<a href="https://amzn.to/3PkTenY" target="_blank" rel="noreferrer noopener nofollow">2 Part Epoxy Glue</a></p> <p>Drill &amp; Drill Bit</p> <h3 class="wp-block-heading">Let's Talk About Screws</h3> <div class="wp-block-image"> <figure class="aligncenter size-full is-resized"><a href="https://www.notjustahousewife.net/wp-content/uploads/2024/03/8-32-screws.jpg"><img loading="lazy" decoding="async" width="698" height="337" src="https://www.notjustahousewife.net/wp-content/uploads/2024/03/8-32-screws.jpg" alt="" class="wp-image-27176" style="width:456px;height:auto" srcset="https://www.notjustahousewife.net/wp-content/uploads/2024/03/8-32-screws.jpg 698w, https://www.notjustahousewife.net/wp-content/uploads/2024/03/8-32-screws-300x145.jpg 300w, https://www.notjustahousewife.net/wp-content/uploads/2024/03/8-32-screws-150x72.jpg 150w" sizes="(max-width: 698px) 100vw, 698px" /></a><figcaption class="wp-element-caption"><em>The flat heads helps when gluing.</em></figcaption></figure></div> <p>The standard size screw for cabinet hardware is a #8-32 screw in whatever length is needed. If you are using existing screw holes in the cabinet door or drawer front, you will need to verify that it is in fact the right size. Some knobs get screwed part way into the drawer front while others go all the way through. It depends on the thickness of the drawer or cabinet door and they design of the original knob. If the hole goes all the way through, you will need to have the screw a bit longer than the depth of the wood and then attach a nut on the end. This is the most secure way to keep the DIY knob attached. If you are adding new holes, you can decide which size or type of screw you use.&nbsp;</p> <h2 class="wp-block-heading">Wood Slices</h2> <p>I made these wood knobs for my son's mountain themed bedroom. They are perfect for a rustic feel. You could even use driftwood for a more beachy vibe. The species of wood used, the size and shape, will all make for unique knobs!&nbsp;</p> <div class="wp-block-image"> <figure class="aligncenter size-full is-resized"><a href="https://www.notjustahousewife.net/wp-content/uploads/2024/03/wood-knobs-on-dresser.jpg"><img loading="lazy" decoding="async" width="600" height="900" src="https://www.notjustahousewife.net/wp-content/uploads/2024/03/wood-knobs-on-dresser.jpg" alt="" class="wp-image-27172" style="width:501px;height:auto" srcset="https://www.notjustahousewife.net/wp-content/uploads/2024/03/wood-knobs-on-dresser.jpg 600w, https://www.notjustahousewife.net/wp-content/uploads/2024/03/wood-knobs-on-dresser-200x300.jpg 200w, https://www.notjustahousewife.net/wp-content/uploads/2024/03/wood-knobs-on-dresser-150x225.jpg 150w" sizes="(max-width: 600px) 100vw, 600px" /></a></figure></div> <p>The first thing I did was grab some branches from our yard that had been trimmed off our tree. I used my miter saw to cut uniform pieces that were about and inch, or inch and a half across and deep. A miter saw is the easiest way to cut branches, but if you don't have access to one, you can use a hand saw, or jigsaw as well.&nbsp;</p> <p>I sanded then a bit with a fine grit sandpaper to make sure there were no rough parts. You could seal them with poly if you wanted.</p> <div class="wp-block-image"> <figure class="aligncenter size-full is-resized"><a href="https://www.notjustahousewife.net/wp-content/uploads/2024/03/wood-slice-DIY-knobs.jpg"><img loading="lazy" decoding="async" width="700" height="477" src="https://www.notjustahousewife.net/wp-content/uploads/2024/03/wood-slice-DIY-knobs.jpg" alt="" class="wp-image-27173" style="width:610px;height:auto" srcset="https://www.notjustahousewife.net/wp-content/uploads/2024/03/wood-slice-DIY-knobs.jpg 700w, https://www.notjustahousewife.net/wp-content/uploads/2024/03/wood-slice-DIY-knobs-300x204.jpg 300w, https://www.notjustahousewife.net/wp-content/uploads/2024/03/wood-slice-DIY-knobs-150x102.jpg 150w" sizes="(max-width: 700px) 100vw, 700px" /></a></figure></div> <p>I used 2 part epoxy to attach the machine screws to the back of the wood slice. I prefer to get screws with a tapered, flat head so they lay better while the glue dries.&nbsp;</p> <p>These lasted on my son's dresser for few years before a couple broke. I think if I were to make these again, I would have drilled a shallow hole in the back of the wood slice for the glue and screw head to fit in.&nbsp;</p> <h2 class="wp-block-heading">Geodes</h2> <p>​When my boys were little we used to order the "Break Your Own" geodes online and then have fun breaking them open with hammers. They would get so excited to see the crystals growing inside! Because of this, I had a lot of geodes that were all roughly the same size and shape. I decided to make some truly beautiful drawer knobs for a friend's dresser.&nbsp;</p> <div class="wp-block-image"> <figure class="aligncenter size-full is-resized"><a href="https://www.notjustahousewife.net/wp-content/uploads/2024/03/geodes-for-dresser-knobs-diy.jpg"><img loading="lazy" decoding="async" width="600" height="900" src="https://www.notjustahousewife.net/wp-content/uploads/2024/03/geodes-for-dresser-knobs-diy.jpg" alt="" class="wp-image-27164" style="width:500px;height:auto" srcset="https://www.notjustahousewife.net/wp-content/uploads/2024/03/geodes-for-dresser-knobs-diy.jpg 600w, https://www.notjustahousewife.net/wp-content/uploads/2024/03/geodes-for-dresser-knobs-diy-200x300.jpg 200w, https://www.notjustahousewife.net/wp-content/uploads/2024/03/geodes-for-dresser-knobs-diy-150x225.jpg 150w" sizes="(max-width: 600px) 100vw, 600px" /></a></figure></div> <p>You could use just about any gem, mineral, geode, or rock. Think of how stunning a piece of furniture could be with a combination of colors!</p> <div class="wp-block-image"> <figure class="aligncenter size-full is-resized"><a href="https://www.notjustahousewife.net/wp-content/uploads/2024/03/gems-and-stones.jpg"><img loading="lazy" decoding="async" width="700" height="500" src="https://www.notjustahousewife.net/wp-content/uploads/2024/03/gems-and-stones.jpg" alt="" class="wp-image-27162" style="width:602px;height:auto" srcset="https://www.notjustahousewife.net/wp-content/uploads/2024/03/gems-and-stones.jpg 700w, https://www.notjustahousewife.net/wp-content/uploads/2024/03/gems-and-stones-300x214.jpg 300w, https://www.notjustahousewife.net/wp-content/uploads/2024/03/gems-and-stones-150x107.jpg 150w" sizes="(max-width: 700px) 100vw, 700px" /></a></figure></div> <p>I decided to pain the plain, rough exterior of the geodes to be gold. I even bought gold machine screws! So once the 2 part epoxy was dry, I painted them so that the glue would blend in and look like it was part of the geode.</p> <div class="wp-block-image"> <figure class="aligncenter size-full is-resized"><a href="https://www.notjustahousewife.net/wp-content/uploads/2024/03/gold-painted-geode.jpg"><img loading="lazy" decoding="async" width="700" height="500" src="https://www.notjustahousewife.net/wp-content/uploads/2024/03/gold-painted-geode.jpg" alt="" class="wp-image-27165" style="width:602px;height:auto" srcset="https://www.notjustahousewife.net/wp-content/uploads/2024/03/gold-painted-geode.jpg 700w, https://www.notjustahousewife.net/wp-content/uploads/2024/03/gold-painted-geode-300x214.jpg 300w, https://www.notjustahousewife.net/wp-content/uploads/2024/03/gold-painted-geode-150x107.jpg 150w" sizes="(max-width: 700px) 100vw, 700px" /></a></figure></div> <p>I love the way they look against the all white dresser!&nbsp;</p> <div class="wp-block-image"> <figure class="aligncenter size-full is-resized"><a href="https://www.notjustahousewife.net/wp-content/uploads/2024/03/geodes-diy-knobs.jpg"><img loading="lazy" decoding="async" width="600" height="900" src="https://www.notjustahousewife.net/wp-content/uploads/2024/03/geodes-diy-knobs.jpg" alt="" class="wp-image-27163" style="width:501px;height:auto" srcset="https://www.notjustahousewife.net/wp-content/uploads/2024/03/geodes-diy-knobs.jpg 600w, https://www.notjustahousewife.net/wp-content/uploads/2024/03/geodes-diy-knobs-200x300.jpg 200w, https://www.notjustahousewife.net/wp-content/uploads/2024/03/geodes-diy-knobs-150x225.jpg 150w" sizes="(max-width: 600px) 100vw, 600px" /></a></figure></div> <h2 class="wp-block-heading">Rocks</h2> <p>You don't need a fancy crystal or gem. You can use regular rocks as well! River rock or smooth rocks from the beach are perfect for this. When we visit a new place on vacation, we like to take a little something home with us to remember the trip. Sometimes it is a bit of sand, shells, or rocks. Whether you are buying river stones or you find rocks, they are a good item to use for your new knobs.&nbsp;</p> <div class="wp-block-image"> <figure class="aligncenter size-full is-resized"><a href="https://www.notjustahousewife.net/wp-content/uploads/2024/03/rock-diy-knobs.jpg"><img loading="lazy" decoding="async" width="600" height="900" src="https://www.notjustahousewife.net/wp-content/uploads/2024/03/rock-diy-knobs.jpg" alt="" class="wp-image-27166" style="width:501px;height:auto" srcset="https://www.notjustahousewife.net/wp-content/uploads/2024/03/rock-diy-knobs.jpg 600w, https://www.notjustahousewife.net/wp-content/uploads/2024/03/rock-diy-knobs-200x300.jpg 200w, https://www.notjustahousewife.net/wp-content/uploads/2024/03/rock-diy-knobs-150x225.jpg 150w" sizes="(max-width: 600px) 100vw, 600px" /></a></figure></div> <p>I had some larger rocks that were so smooth and pretty that I also decided to create wall hooks with them! I followed the same steps, except I used 4 inch long wood screws instead.&nbsp;</p> <div class="wp-block-image"> <figure class="aligncenter size-full is-resized"><a href="https://www.notjustahousewife.net/wp-content/uploads/2024/03/river-rocks.jpg"><img loading="lazy" decoding="async" width="700" height="500" src="https://www.notjustahousewife.net/wp-content/uploads/2024/03/river-rocks.jpg" alt="" class="wp-image-27177" style="width:609px;height:auto" srcset="https://www.notjustahousewife.net/wp-content/uploads/2024/03/river-rocks.jpg 700w, https://www.notjustahousewife.net/wp-content/uploads/2024/03/river-rocks-300x214.jpg 300w, https://www.notjustahousewife.net/wp-content/uploads/2024/03/river-rocks-150x107.jpg 150w" sizes="(max-width: 700px) 100vw, 700px" /></a></figure></div> <p>The wall hooks needed to stick out from the wall a bit. I also cut some metal pipe in 3 inch long pieces that slipped over the screw and served as a spacer. It also looked better than a skinny screw sticking out from the wall.&nbsp;</p> <div class="wp-block-image"> <figure class="aligncenter size-full is-resized"><a href="https://www.notjustahousewife.net/wp-content/uploads/2024/03/rock-wall-hook-diy.jpg"><img loading="lazy" decoding="async" width="600" height="878" src="https://www.notjustahousewife.net/wp-content/uploads/2024/03/rock-wall-hook-diy.jpg" alt="" class="wp-image-27178" style="width:502px;height:auto" srcset="https://www.notjustahousewife.net/wp-content/uploads/2024/03/rock-wall-hook-diy.jpg 600w, https://www.notjustahousewife.net/wp-content/uploads/2024/03/rock-wall-hook-diy-205x300.jpg 205w, https://www.notjustahousewife.net/wp-content/uploads/2024/03/rock-wall-hook-diy-150x220.jpg 150w" sizes="(max-width: 600px) 100vw, 600px" /></a></figure></div> <h2 class="wp-block-heading">Resin</h2> <p>Several years ago I shared these resin DIY knobs. I had them on another dresser in our home and I loved how the green of the leaves looked against the dark blue paint of the dresser. </p> <div class="wp-block-image"> <figure class="aligncenter size-full"><a href="https://www.notjustahousewife.net/wp-content/uploads/2019/08/resin-dresser-knobs.png"><img loading="lazy" decoding="async" width="500" height="750" src="https://www.notjustahousewife.net/wp-content/uploads/2019/08/resin-dresser-knobs.png" alt="" class="wp-image-21037" srcset="https://www.notjustahousewife.net/wp-content/uploads/2019/08/resin-dresser-knobs.png 500w, https://www.notjustahousewife.net/wp-content/uploads/2019/08/resin-dresser-knobs-200x300.png 200w" sizes="(max-width: 500px) 100vw, 500px" /></a></figure></div> <p>For the full tutorial on for these pressed leaf resin knobs, you can read <a href="https://www.notjustahousewife.net/diy-resin-drawer-knobs/">THIS POST</a>.&nbsp;</p> <div class="wp-block-image"> <figure class="aligncenter size-full"><a href="https://www.notjustahousewife.net/wp-content/uploads/2019/08/remove-the-knobs-from-mold.png"><img loading="lazy" decoding="async" width="500" height="750" src="https://www.notjustahousewife.net/wp-content/uploads/2019/08/remove-the-knobs-from-mold.png" alt="" class="wp-image-21046" srcset="https://www.notjustahousewife.net/wp-content/uploads/2019/08/remove-the-knobs-from-mold.png 500w, https://www.notjustahousewife.net/wp-content/uploads/2019/08/remove-the-knobs-from-mold-200x300.png 200w" sizes="(max-width: 500px) 100vw, 500px" /></a></figure></div> <h2 class="wp-block-heading">Shells</h2> <p>Shells are another fun thing to collect when traveling. I had left over gold screws from the geodes so I added a little gold detail to them.&nbsp;</p> <div class="wp-block-image"> <figure class="aligncenter size-full is-resized"><a href="https://www.notjustahousewife.net/wp-content/uploads/2024/03/screws-for-knobs.jpg"><img loading="lazy" decoding="async" width="700" height="500" src="https://www.notjustahousewife.net/wp-content/uploads/2024/03/screws-for-knobs.jpg" alt="" class="wp-image-27169" style="width:521px;height:auto" srcset="https://www.notjustahousewife.net/wp-content/uploads/2024/03/screws-for-knobs.jpg 700w, https://www.notjustahousewife.net/wp-content/uploads/2024/03/screws-for-knobs-300x214.jpg 300w, https://www.notjustahousewife.net/wp-content/uploads/2024/03/screws-for-knobs-150x107.jpg 150w" sizes="(max-width: 700px) 100vw, 700px" /></a></figure></div> <p>I made these shell knobs using the same 2 part epoxy. </p> <div class="wp-block-image"> <figure class="aligncenter size-full is-resized"><a href="https://www.notjustahousewife.net/wp-content/uploads/2024/03/shell-turned-into-a-knob.jpg"><img loading="lazy" decoding="async" width="700" height="500" src="https://www.notjustahousewife.net/wp-content/uploads/2024/03/shell-turned-into-a-knob.jpg" alt="" class="wp-image-27170" style="width:602px;height:auto" srcset="https://www.notjustahousewife.net/wp-content/uploads/2024/03/shell-turned-into-a-knob.jpg 700w, https://www.notjustahousewife.net/wp-content/uploads/2024/03/shell-turned-into-a-knob-300x214.jpg 300w, https://www.notjustahousewife.net/wp-content/uploads/2024/03/shell-turned-into-a-knob-150x107.jpg 150w" sizes="(max-width: 700px) 100vw, 700px" /></a></figure></div> <h2 class="wp-block-heading">Other DIY Dresser Knob Ideas</h2> <p>The possibilities are almost endless when it comes to creating your own DIY version of cabinet knobs or dresser knobs. You could use small plastic toys, small ceramic knick knacks collected over the years, large buttons, coins, or napkin rings. Whether you buy them from the dollar store, antique store, or find them on a nature walk, making your own DIY drawer knobs is a great way to add some uniqueness to your space in a subtle way. You can add so much personality to a piece with these little touches!</p> <p><strong>What are some DIY ideas for knobs that you can think of? Have you ever made your own knobs before?&nbsp;</strong></p> <p></p> <div style="margin-top: 0px; margin-bottom: 0px;" class="sharethis-inline-share-buttons" ></div> ]]>
</content:encoded>
<wfw:commentRss>https://www.notjustahousewife.net/5-creative-diy-drawer-knobs/feed/</wfw:commentRss>
<slash:comments>0</slash:comments>
</item>
<item>
<title>Adding Texture To A Planter</title>
<link>https://www.notjustahousewife.net/adding-texture-to-a-planter/</link>
<comments>https://www.notjustahousewife.net/adding-texture-to-a-planter/#respond</comments>
<dc:creator>
<![CDATA[ Stacy ]]>
</dc:creator>
<pubDate>Mon, 26 Feb 2024 22:02:10 +0000</pubDate>
<category>
<![CDATA[ Houseplants ]]>
</category>
<guid isPermaLink="false">https://www.notjustahousewife.net/?p=27108</guid>
<description>
<![CDATA[ I will admit I have more planters than I should. More planters than even plants. But it is nice when you have a plant that needs to be repotted, to have options. I had a couple of terracotta pots lying around and while I loved the shape, they were a bit plain. I decided to...</p><p><a class="more-link" href="https://www.notjustahousewife.net/adding-texture-to-a-planter/">Read More</a></p> ]]>
</description>
<content:encoded>
<![CDATA[ <p>I will admit I have more planters than I should. More planters than even plants. But it is nice when you have a plant that needs to be repotted, to have options. I had a couple of terracotta pots lying around and while I loved the shape, they were a bit plain. I decided to add some texture. Adding texture to your space is a great way to add visual interest. Here is how I added some fun texture to these planters!</p> <div class="wp-block-image"> <figure class="aligncenter size-full is-resized"><a href="https://www.notjustahousewife.net/wp-content/uploads/2024/02/diy-textured-terra-cotta-pot.jpg"><img loading="lazy" decoding="async" width="600" height="900" src="https://www.notjustahousewife.net/wp-content/uploads/2024/02/diy-textured-terra-cotta-pot.jpg" alt="" class="wp-image-27113" style="width:501px;height:auto" srcset="https://www.notjustahousewife.net/wp-content/uploads/2024/02/diy-textured-terra-cotta-pot.jpg 600w, https://www.notjustahousewife.net/wp-content/uploads/2024/02/diy-textured-terra-cotta-pot-200x300.jpg 200w, https://www.notjustahousewife.net/wp-content/uploads/2024/02/diy-textured-terra-cotta-pot-150x225.jpg 150w" sizes="(max-width: 600px) 100vw, 600px" /></a></figure></div> <h3 class="wp-block-heading">Choosing A Medium </h3> <p>I have seen a lot of videos on social media of people using joint compound (drywall mud) to create textured art pieces for their walls. While it would work for an art piece, I don't think it would have been a good choice for a pot that gets handled often and gets wet. After weighing the options, I decided to use <a href="https://amzn.to/4bLn4f7" target="_blank" rel="noreferrer noopener nofollow">paintable caulk</a>.</p> <h2 class="wp-block-heading">Adding Texture To A Planter</h2> <p>I spread the caulk around, only doing a small section at a time. Then I used a <a href="https://amzn.to/48vrBiT" target="_blank" rel="noreferrer noopener nofollow">notched tool</a> to create the lines. I played around with all the sizes but like the smaller notches best. The caulk that got removed by the tool as it scraped, was then added back on the pot for the next section so none was wasted.</p> <p>You can really have fun with this and use all sorts of things to create the texture. You could use a fork, wire brush, a sponge, or even leaves. </p> <figure class="wp-block-gallery has-nested-images columns-default is-cropped wp-block-gallery-18 is-layout-flex wp-block-gallery-is-layout-flex"> <figure class="wp-block-image size-large"><a href="https://www.notjustahousewife.net/wp-content/uploads/2024/02/adding-caulk-to-terra-cotta-pot-copy.jpg"><img loading="lazy" decoding="async" width="600" height="900" data-id="27110" src="https://www.notjustahousewife.net/wp-content/uploads/2024/02/adding-caulk-to-terra-cotta-pot-copy.jpg" alt="" class="wp-image-27110" srcset="https://www.notjustahousewife.net/wp-content/uploads/2024/02/adding-caulk-to-terra-cotta-pot-copy.jpg 600w, https://www.notjustahousewife.net/wp-content/uploads/2024/02/adding-caulk-to-terra-cotta-pot-copy-200x300.jpg 200w, https://www.notjustahousewife.net/wp-content/uploads/2024/02/adding-caulk-to-terra-cotta-pot-copy-150x225.jpg 150w" sizes="(max-width: 600px) 100vw, 600px" /></a></figure> <figure class="wp-block-image size-large"><a href="https://www.notjustahousewife.net/wp-content/uploads/2024/02/adding-texture-to-plain-terra-cotta-pot-copy.jpg"><img loading="lazy" decoding="async" width="600" height="900" data-id="27111" src="https://www.notjustahousewife.net/wp-content/uploads/2024/02/adding-texture-to-plain-terra-cotta-pot-copy.jpg" alt="" class="wp-image-27111" srcset="https://www.notjustahousewife.net/wp-content/uploads/2024/02/adding-texture-to-plain-terra-cotta-pot-copy.jpg 600w, https://www.notjustahousewife.net/wp-content/uploads/2024/02/adding-texture-to-plain-terra-cotta-pot-copy-200x300.jpg 200w, https://www.notjustahousewife.net/wp-content/uploads/2024/02/adding-texture-to-plain-terra-cotta-pot-copy-150x225.jpg 150w" sizes="(max-width: 600px) 100vw, 600px" /></a></figure> <figure class="wp-block-image size-large"><a href="https://www.notjustahousewife.net/wp-content/uploads/2024/02/spreading-caulk-onto-pot-copy.jpg"><img loading="lazy" decoding="async" width="600" height="900" data-id="27117" src="https://www.notjustahousewife.net/wp-content/uploads/2024/02/spreading-caulk-onto-pot-copy.jpg" alt="" class="wp-image-27117" srcset="https://www.notjustahousewife.net/wp-content/uploads/2024/02/spreading-caulk-onto-pot-copy.jpg 600w, https://www.notjustahousewife.net/wp-content/uploads/2024/02/spreading-caulk-onto-pot-copy-200x300.jpg 200w, https://www.notjustahousewife.net/wp-content/uploads/2024/02/spreading-caulk-onto-pot-copy-150x225.jpg 150w" sizes="(max-width: 600px) 100vw, 600px" /></a></figure> </figure> <p>I love projects where you can be creative and you don't have to worry about everything being perfect.</p> <div class="wp-block-image"> <figure class="aligncenter size-full is-resized"><a href="https://www.notjustahousewife.net/wp-content/uploads/2024/02/wait-for-caulk-to-dry-before-painting-copy.jpg"><img loading="lazy" decoding="async" width="600" height="900" src="https://www.notjustahousewife.net/wp-content/uploads/2024/02/wait-for-caulk-to-dry-before-painting-copy.jpg" alt="" class="wp-image-27118" style="width:501px;height:auto" srcset="https://www.notjustahousewife.net/wp-content/uploads/2024/02/wait-for-caulk-to-dry-before-painting-copy.jpg 600w, https://www.notjustahousewife.net/wp-content/uploads/2024/02/wait-for-caulk-to-dry-before-painting-copy-200x300.jpg 200w, https://www.notjustahousewife.net/wp-content/uploads/2024/02/wait-for-caulk-to-dry-before-painting-copy-150x225.jpg 150w" sizes="(max-width: 600px) 100vw, 600px" /></a></figure></div> <p>You can use the caulk to make all sorts of designs! I made some lines on the second pot but you could also do dots, squiggles, or even a face. Have fun with it!</p> <figure class="wp-block-gallery has-nested-images columns-default is-cropped wp-block-gallery-19 is-layout-flex wp-block-gallery-is-layout-flex"> <figure class="wp-block-image size-large"><a href="https://www.notjustahousewife.net/wp-content/uploads/2024/02/adding-caulk-to-pot-to-create-texture-copy.jpg"><img loading="lazy" decoding="async" width="600" height="900" data-id="27109" src="https://www.notjustahousewife.net/wp-content/uploads/2024/02/adding-caulk-to-pot-to-create-texture-copy.jpg" alt="" class="wp-image-27109" srcset="https://www.notjustahousewife.net/wp-content/uploads/2024/02/adding-caulk-to-pot-to-create-texture-copy.jpg 600w, https://www.notjustahousewife.net/wp-content/uploads/2024/02/adding-caulk-to-pot-to-create-texture-copy-200x300.jpg 200w, https://www.notjustahousewife.net/wp-content/uploads/2024/02/adding-caulk-to-pot-to-create-texture-copy-150x225.jpg 150w" sizes="(max-width: 600px) 100vw, 600px" /></a></figure> <figure class="wp-block-image size-large"><a href="https://www.notjustahousewife.net/wp-content/uploads/2024/02/smoothing-down-caulk-stripes-copy.jpg"><img loading="lazy" decoding="async" width="600" height="900" data-id="27116" src="https://www.notjustahousewife.net/wp-content/uploads/2024/02/smoothing-down-caulk-stripes-copy.jpg" alt="" class="wp-image-27116" srcset="https://www.notjustahousewife.net/wp-content/uploads/2024/02/smoothing-down-caulk-stripes-copy.jpg 600w, https://www.notjustahousewife.net/wp-content/uploads/2024/02/smoothing-down-caulk-stripes-copy-200x300.jpg 200w, https://www.notjustahousewife.net/wp-content/uploads/2024/02/smoothing-down-caulk-stripes-copy-150x225.jpg 150w" sizes="(max-width: 600px) 100vw, 600px" /></a></figure> </figure> <p>Once the caulk was completely dry, it was time to paint. Because caulk still has some flexibility to it even when dry, I don't suggest using spray paint.</p> <div class="wp-block-image"> <figure class="aligncenter size-full is-resized"><a href="https://www.notjustahousewife.net/wp-content/uploads/2024/02/painting-terra-cotta-pots-copy.jpg"><img loading="lazy" decoding="async" width="600" height="900" src="https://www.notjustahousewife.net/wp-content/uploads/2024/02/painting-terra-cotta-pots-copy.jpg" alt="" class="wp-image-27115" style="width:500px;height:auto" srcset="https://www.notjustahousewife.net/wp-content/uploads/2024/02/painting-terra-cotta-pots-copy.jpg 600w, https://www.notjustahousewife.net/wp-content/uploads/2024/02/painting-terra-cotta-pots-copy-200x300.jpg 200w, https://www.notjustahousewife.net/wp-content/uploads/2024/02/painting-terra-cotta-pots-copy-150x225.jpg 150w" sizes="(max-width: 600px) 100vw, 600px" /></a></figure></div> <p>I love the pots even more now! They look great filled with the plants that needed a bigger home. </p> <div class="wp-block-image"> <figure class="aligncenter size-full is-resized"><a href="https://www.notjustahousewife.net/wp-content/uploads/2024/02/DIY-textured-planter-copy.jpg"><img loading="lazy" decoding="async" width="600" height="900" src="https://www.notjustahousewife.net/wp-content/uploads/2024/02/DIY-textured-planter-copy.jpg" alt="" class="wp-image-27119" style="width:502px;height:auto" srcset="https://www.notjustahousewife.net/wp-content/uploads/2024/02/DIY-textured-planter-copy.jpg 600w, https://www.notjustahousewife.net/wp-content/uploads/2024/02/DIY-textured-planter-copy-200x300.jpg 200w, https://www.notjustahousewife.net/wp-content/uploads/2024/02/DIY-textured-planter-copy-150x225.jpg 150w" sizes="(max-width: 600px) 100vw, 600px" /></a></figure></div> <h3 class="wp-block-heading">Pin For Later:</h3> <div class="wp-block-image"> <figure class="aligncenter size-full is-resized"><a href="https://www.notjustahousewife.net/wp-content/uploads/2024/02/creating-texture-on-planters-1.jpg"><img loading="lazy" decoding="async" width="600" height="900" src="https://www.notjustahousewife.net/wp-content/uploads/2024/02/creating-texture-on-planters-1.jpg" alt="" class="wp-image-27121" style="width:551px;height:auto" srcset="https://www.notjustahousewife.net/wp-content/uploads/2024/02/creating-texture-on-planters-1.jpg 600w, https://www.notjustahousewife.net/wp-content/uploads/2024/02/creating-texture-on-planters-1-200x300.jpg 200w, https://www.notjustahousewife.net/wp-content/uploads/2024/02/creating-texture-on-planters-1-150x225.jpg 150w" sizes="(max-width: 600px) 100vw, 600px" /></a></figure></div><div style="margin-top: 0px; margin-bottom: 0px;" class="sharethis-inline-share-buttons" ></div> ]]>
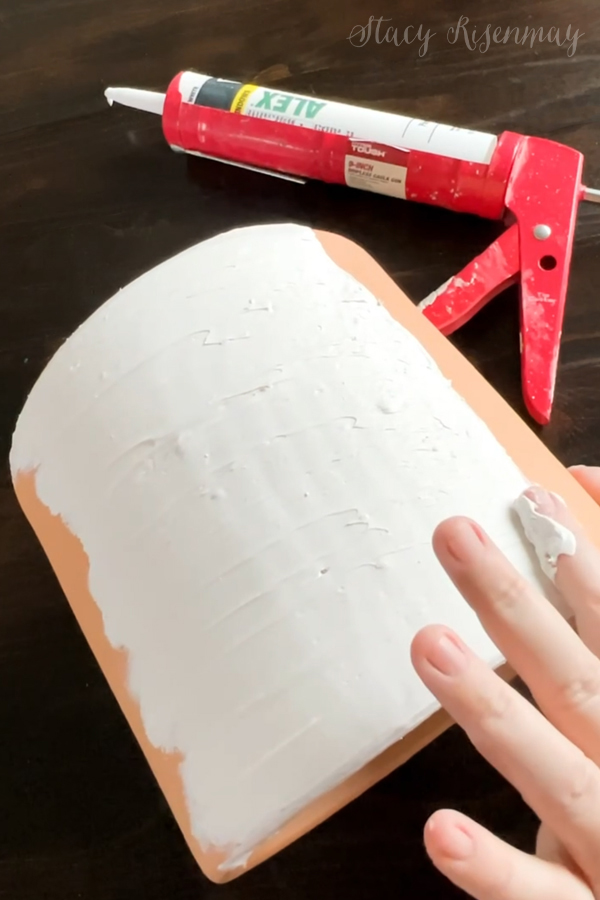
</content:encoded>
<wfw:commentRss>https://www.notjustahousewife.net/adding-texture-to-a-planter/feed/</wfw:commentRss>
<slash:comments>0</slash:comments>
</item>
<item>
<title>DIY Log Candle Holder (+Planter!)</title>
<link>https://www.notjustahousewife.net/diy-log-candle-holder/</link>
<comments>https://www.notjustahousewife.net/diy-log-candle-holder/#respond</comments>
<dc:creator>
<![CDATA[ Stacy ]]>
</dc:creator>
<pubDate>Thu, 22 Feb 2024 12:30:00 +0000</pubDate>
<category>
<![CDATA[ DIY Projects & Tutorials ]]>
</category>
<category>
<![CDATA[ Houseplants ]]>
</category>
<guid isPermaLink="false">https://www.notjustahousewife.net/?p=27103</guid>
<description>
<![CDATA[ Are you looking for a unique decor item to place on an entry table or maybe to use as a centerpiece on your dining room table? Do you love adding natural elements into your home? I have the perfect project for you! Not only is it very inexpensive, is an easy project to make. This...</p><p><a class="more-link" href="https://www.notjustahousewife.net/diy-log-candle-holder/">Read More</a></p> ]]>
</description>
<content:encoded>
<![CDATA[ <p id="isPasted">Are you looking for a unique decor item to place on an entry table or maybe to use as a centerpiece on your dining room table? Do you love adding natural elements into your home? I have the perfect project for you! Not only is it very inexpensive, is an easy project to make. This DIY log candle holder also functions as a planter! So go foraging in the woods or grab some unused firewood, because we are about to make a random log look better than it ever has! </p> <div class="wp-block-image"> <figure class="aligncenter size-full"><a href="https://www.notjustahousewife.net/wp-content/uploads/2024/02/log-planter-candle-holder.jpg"><img loading="lazy" decoding="async" width="700" height="464" src="https://www.notjustahousewife.net/wp-content/uploads/2024/02/log-planter-candle-holder.jpg" alt="" class="wp-image-27074" srcset="https://www.notjustahousewife.net/wp-content/uploads/2024/02/log-planter-candle-holder.jpg 700w, https://www.notjustahousewife.net/wp-content/uploads/2024/02/log-planter-candle-holder-300x199.jpg 300w, https://www.notjustahousewife.net/wp-content/uploads/2024/02/log-planter-candle-holder-150x99.jpg 150w" sizes="(max-width: 700px) 100vw, 700px" /></a></figure></div> <h2 class="wp-block-heading">DIY Log Candle Holder (+Planter!)</h2> <p id="isPasted">Let's make some natural candle holders that will be a great addition to your cozy home. First you just need to gather a few supplies. You probably already have them all in or around your home.</p> <h3 class="wp-block-heading">Supplies:</h3> <ul> <li>Log</li> <li>Drill</li> <li>Spade Bit, or Forstner Bit (Bore Bit)</li> <li>Small Plant</li> <li>Candles</li> </ul> <h4 class="wp-block-heading">Step 1: Choose Log</h4> <p>I went into our backyard to our wood pile and got a log that the bark had already fallen off. You can certainly use one with bark. The type of wood (tree) will also change the look of this project. You could go with something straight and colunar, or pick a twisted, gnarled branch. Birch logs with its black and white markings would be beautiful too! The natural beauty of each log makes each of these handmade pieces unique! </p> <p>I liked how my piece had insect burrowing lines along it. Whichever type or size of log you choose to use, make sure to clean it well before starting. If it is too long or has uneven ends, cut the ends with a saw or sand the rough edges.</p> <div class="wp-block-image"> <figure class="aligncenter size-full"><a href="https://www.notjustahousewife.net/wp-content/uploads/2024/02/drill-hole-in-log.jpg"><img loading="lazy" decoding="async" width="600" height="400" src="https://www.notjustahousewife.net/wp-content/uploads/2024/02/drill-hole-in-log.jpg" alt="" class="wp-image-27073" srcset="https://www.notjustahousewife.net/wp-content/uploads/2024/02/drill-hole-in-log.jpg 600w, https://www.notjustahousewife.net/wp-content/uploads/2024/02/drill-hole-in-log-300x200.jpg 300w, https://www.notjustahousewife.net/wp-content/uploads/2024/02/drill-hole-in-log-150x100.jpg 150w" sizes="(max-width: 600px) 100vw, 600px" /></a></figure></div> <p>Depending on your log, you may need to saw part of the bottom off to create a flat surface. A flat bottom will ensure that it doesn't roll. Obviously you don't want something that is on fire to be able to tip. Wood candle holders should be sturdy. You could also use battery operated candles if your log isn't as stable as you would like.&nbsp;</p> <p>*Note: If your log or branch has recently been cut down and is fresh (wet) wood, it may need to dry out before being used for projects.&nbsp;</p> <h4 class="wp-block-heading">Step 2: Drill Holes</h4> <p>Once your log is clean and dry, you will start by drilling holes for the candles. Choose which candles you will use so you know which size holes to drill. I chose to use taper candles but you could use tea lights candles or any type of smaller pillar candles. I chose a large drill bit that was the same diameter as the base of the candles. You could also use a drill press if you have access to one. </p> <div class="wp-block-image"> <figure class="aligncenter size-full"><a href="https://www.notjustahousewife.net/wp-content/uploads/2024/02/drill-2-smaller-holes-in-log-copy.jpg"><img loading="lazy" decoding="async" width="600" height="400" src="https://www.notjustahousewife.net/wp-content/uploads/2024/02/drill-2-smaller-holes-in-log-copy.jpg" alt="" class="wp-image-27076" srcset="https://www.notjustahousewife.net/wp-content/uploads/2024/02/drill-2-smaller-holes-in-log-copy.jpg 600w, https://www.notjustahousewife.net/wp-content/uploads/2024/02/drill-2-smaller-holes-in-log-copy-300x200.jpg 300w, https://www.notjustahousewife.net/wp-content/uploads/2024/02/drill-2-smaller-holes-in-log-copy-150x100.jpg 150w" sizes="(max-width: 600px) 100vw, 600px" /></a></figure></div> <p>I also chose to do 2 candles but if you make a longer candle holder, you can add as many as you want. It would be stunning to have one that went the length of a dining table!&nbsp;</p> <p>Then you will need to drill a larger hole for the plant to go in. I used a paddle bit but a bore bit also works. You will need one that is at minimum 2" wide. The bigger the better since you will need to fit dirt and a small plant in it.&nbsp;</p> <div class="wp-block-image"> <figure class="aligncenter size-full"><a href="https://www.notjustahousewife.net/wp-content/uploads/2024/02/drill-large-hole-in-log-copy.jpg"><img loading="lazy" decoding="async" width="600" height="400" src="https://www.notjustahousewife.net/wp-content/uploads/2024/02/drill-large-hole-in-log-copy.jpg" alt="" class="wp-image-27077" srcset="https://www.notjustahousewife.net/wp-content/uploads/2024/02/drill-large-hole-in-log-copy.jpg 600w, https://www.notjustahousewife.net/wp-content/uploads/2024/02/drill-large-hole-in-log-copy-300x200.jpg 300w, https://www.notjustahousewife.net/wp-content/uploads/2024/02/drill-large-hole-in-log-copy-150x100.jpg 150w" sizes="(max-width: 600px) 100vw, 600px" /></a></figure></div> <p><br>The last step is the add a plant. The best type of plants for a small planter like this would be succulents. They like to dry out in between waterings and are less fussy than small terrarium plants like ferns. But if you were creating this log centerpiece for a wedding or other event and just needed them to be planted for a short period, ferns would look beautiful in these wooden candle holders.&nbsp;</p> <div class="wp-block-image"> <figure class="aligncenter size-full"><a href="https://www.notjustahousewife.net/wp-content/uploads/2024/02/plant-in-log-copy.jpg"><img loading="lazy" decoding="async" width="600" height="400" src="https://www.notjustahousewife.net/wp-content/uploads/2024/02/plant-in-log-copy.jpg" alt="" class="wp-image-27078" srcset="https://www.notjustahousewife.net/wp-content/uploads/2024/02/plant-in-log-copy.jpg 600w, https://www.notjustahousewife.net/wp-content/uploads/2024/02/plant-in-log-copy-300x200.jpg 300w, https://www.notjustahousewife.net/wp-content/uploads/2024/02/plant-in-log-copy-150x100.jpg 150w" sizes="(max-width: 600px) 100vw, 600px" /></a></figure></div> <p>If it will be in your home as a more permanent part of your decor, then something more waterwise is better and will last for a long time before needing to be repotted. You can find succulents that are already in 2" and 3" pots at your local nursery or <a href="https://amzn.to/3OWebFB" target="_blank" rel="noreferrer noopener nofollow">online at Amazon</a>. </p> <p>Now all that is left is to light candles! I love adding in bits of nature into my home like this natural wood and some greenery. These rustic candle holders are perfect for that! I love that you can take a scrap piece of wood and give it new life. This simple DIY project is one of my favorites from my book, <a href="https://amzn.to/42KXbYF" target="_blank" rel="noreferrer noopener nofollow">Natural Accents. </a></p> <div class="wp-block-image"> <figure class="aligncenter size-full is-resized"><a href="https://www.notjustahousewife.net/wp-content/uploads/2024/02/log-candle-holder.jpg"><img loading="lazy" decoding="async" width="600" height="900" src="https://www.notjustahousewife.net/wp-content/uploads/2024/02/log-candle-holder.jpg" alt="" class="wp-image-27075" style="width:549px;height:auto" srcset="https://www.notjustahousewife.net/wp-content/uploads/2024/02/log-candle-holder.jpg 600w, https://www.notjustahousewife.net/wp-content/uploads/2024/02/log-candle-holder-200x300.jpg 200w, https://www.notjustahousewife.net/wp-content/uploads/2024/02/log-candle-holder-150x225.jpg 150w" sizes="(max-width: 600px) 100vw, 600px" /></a></figure></div> <p><strong>Create your own natural piece of home decor by creating your own rustic wood candle holders or try some of these other DIY projects:</strong></p> <figure class="wp-block-gallery has-nested-images columns-default is-cropped wp-block-gallery-20 is-layout-flex wp-block-gallery-is-layout-flex"> <figure class="wp-block-image size-large"><a href="https://www.notjustahousewife.net/modern-tree-stump-planter/"><img loading="lazy" decoding="async" width="682" height="1024" data-id="9903" src="https://www.notjustahousewife.net/wp-content/uploads/2014/11/modern-log-planter_edited-1-682x1024.jpg" alt="" class="wp-image-9903" srcset="https://www.notjustahousewife.net/wp-content/uploads/2014/11/modern-log-planter_edited-1-682x1024.jpg 682w, https://www.notjustahousewife.net/wp-content/uploads/2014/11/modern-log-planter_edited-1-200x300.jpg 200w" sizes="(max-width: 682px) 100vw, 682px" /></a></figure> <figure class="wp-block-image size-large"><a href="https://www.notjustahousewife.net/diy-plant-propagation-station/"><img loading="lazy" decoding="async" width="600" height="800" data-id="26447" src="https://www.notjustahousewife.net/wp-content/uploads/2023/08/DIY-wood-arch-prpagation-station-1.jpg" alt="" class="wp-image-26447" srcset="https://www.notjustahousewife.net/wp-content/uploads/2023/08/DIY-wood-arch-prpagation-station-1.jpg 600w, https://www.notjustahousewife.net/wp-content/uploads/2023/08/DIY-wood-arch-prpagation-station-1-225x300.jpg 225w, https://www.notjustahousewife.net/wp-content/uploads/2023/08/DIY-wood-arch-prpagation-station-1-150x200.jpg 150w" sizes="(max-width: 600px) 100vw, 600px" /></a></figure> <figure class="wp-block-image size-large"><a href="https://www.notjustahousewife.net/easy-diy-terrarium-lamp/"><img loading="lazy" decoding="async" width="500" height="750" data-id="17272" src="https://www.notjustahousewife.net/wp-content/uploads/2017/11/DIY-terrarium-lamp-lit-up.png" alt="" class="wp-image-17272" srcset="https://www.notjustahousewife.net/wp-content/uploads/2017/11/DIY-terrarium-lamp-lit-up.png 500w, https://www.notjustahousewife.net/wp-content/uploads/2017/11/DIY-terrarium-lamp-lit-up-200x300.png 200w" sizes="(max-width: 500px) 100vw, 500px" /></a></figure> <figure class="wp-block-image size-large"><a href="https://www.notjustahousewife.net/15-easy-wood-projects-you-can-do-in-a-day/"><img loading="lazy" decoding="async" width="600" height="900" data-id="27022" src="https://www.notjustahousewife.net/wp-content/uploads/2024/01/15-simple-wood-projects.jpg" alt="" class="wp-image-27022" srcset="https://www.notjustahousewife.net/wp-content/uploads/2024/01/15-simple-wood-projects.jpg 600w, https://www.notjustahousewife.net/wp-content/uploads/2024/01/15-simple-wood-projects-200x300.jpg 200w, https://www.notjustahousewife.net/wp-content/uploads/2024/01/15-simple-wood-projects-150x225.jpg 150w" sizes="(max-width: 600px) 100vw, 600px" /></a></figure> <figure class="wp-block-image size-large"><a href="https://www.notjustahousewife.net/wood-slice-styled-x3/"><img loading="lazy" decoding="async" width="500" height="500" data-id="25949" src="https://www.notjustahousewife.net/wp-content/uploads/2016/02/wood-slice-shelf.jpg" alt="" class="wp-image-25949" srcset="https://www.notjustahousewife.net/wp-content/uploads/2016/02/wood-slice-shelf.jpg 500w, https://www.notjustahousewife.net/wp-content/uploads/2016/02/wood-slice-shelf-300x300.jpg 300w, https://www.notjustahousewife.net/wp-content/uploads/2016/02/wood-slice-shelf-150x150.jpg 150w, https://www.notjustahousewife.net/wp-content/uploads/2016/02/wood-slice-shelf-360x360.jpg 360w, https://www.notjustahousewife.net/wp-content/uploads/2016/02/wood-slice-shelf-180x180.jpg 180w, https://www.notjustahousewife.net/wp-content/uploads/2016/02/wood-slice-shelf-250x250.jpg 250w, https://www.notjustahousewife.net/wp-content/uploads/2016/02/wood-slice-shelf-40x40.jpg 40w, https://www.notjustahousewife.net/wp-content/uploads/2016/02/wood-slice-shelf-96x96.jpg 96w" sizes="(max-width: 500px) 100vw, 500px" /></a></figure> <figure class="wp-block-image size-large"><a href="https://www.notjustahousewife.net/driftwood-vase-giveaway/"><img loading="lazy" decoding="async" width="600" height="900" data-id="15890" src="https://www.notjustahousewife.net/wp-content/uploads/2017/03/drift-wood-vase.png" alt="" class="wp-image-15890" srcset="https://www.notjustahousewife.net/wp-content/uploads/2017/03/drift-wood-vase.png 600w, https://www.notjustahousewife.net/wp-content/uploads/2017/03/drift-wood-vase-200x300.png 200w" sizes="(max-width: 600px) 100vw, 600px" /></a></figure> </figure> <div style="margin-top: 0px; margin-bottom: 0px;" class="sharethis-inline-share-buttons" ></div> ]]>
</content:encoded>
<wfw:commentRss>https://www.notjustahousewife.net/diy-log-candle-holder/feed/</wfw:commentRss>
<slash:comments>0</slash:comments>
</item>
<item>
<title>Building Hexagon Planters</title>
<link>https://www.notjustahousewife.net/hexagon-planters/</link>
<comments>https://www.notjustahousewife.net/hexagon-planters/#comments</comments>
<dc:creator>
<![CDATA[ Stacy ]]>
</dc:creator>
<pubDate>Wed, 21 Feb 2024 05:36:02 +0000</pubDate>
<category>
<![CDATA[ Houseplants ]]>
</category>
<guid isPermaLink="false">http://www.notjustahousewife.net/?p=13618</guid>
<description>
<![CDATA[ You may recognize these hexagon planters if you have been a long time reader. They were originally featured in my book, Natural Accents. I have decided to share the tutorial on how to build a hexagon planter here on my blog.  Hexagon Planter Tutorial This is a fun woodworking project that only requires a miter saw,...</p><p><a class="more-link" href="https://www.notjustahousewife.net/hexagon-planters/">Read More</a></p> ]]>
</description>
<content:encoded>
<![CDATA[ <p>You may recognize these hexagon planters if you have been a long time reader. They were originally featured in my book, <a href="https://amzn.to/3I88T6c" target="_blank" rel="noreferrer noopener nofollow">Natural Accents</a>. I have decided to share the tutorial on how to build a hexagon planter here on my blog. </p> <div class="wp-block-image"> <figure class="aligncenter is-resized"><img loading="lazy" decoding="async" width="683" height="1024" src="https://www.notjustahousewife.net/wp-content/uploads/2015/08/gold-hexagon-planters-683x1024.jpg" alt="gold hexagon planters" class="wp-image-11506" style="width:550px;height:auto" srcset="https://www.notjustahousewife.net/wp-content/uploads/2015/08/gold-hexagon-planters-683x1024.jpg 683w, https://www.notjustahousewife.net/wp-content/uploads/2015/08/gold-hexagon-planters-200x300.jpg 200w, https://www.notjustahousewife.net/wp-content/uploads/2015/08/gold-hexagon-planters-900x1350.jpg 900w" sizes="(max-width: 683px) 100vw, 683px" /></figure></div> <h2 class="wp-block-heading">Hexagon Planter Tutorial</h2> <p>This is a fun woodworking project that only requires a miter saw, a table saw, and brad nailer. &nbsp;And if you made a short, small planter only, you could get away with only using a miter saw and not the table saw. You can choose to stain it or paint it. Customize the sizes too! Use these angles to create other hexagon projects as well like a&nbsp;hexagon picture frame, centerpieces, or a hexagon wall planter.&nbsp;</p> <h3 class="wp-block-heading">Supplies for Hexagon Planter</h3> <ul> <li>Measuring Tape</li> <li>1x6 Boards</li> <li>Miter Saw</li> <li>Table Saw</li> <li>Wood Glue</li> <li>Nail Gun</li> <li>Pencil</li> <li>Drill with Large Drill Bit</li> <li>Plywood</li> </ul> <h4 class="wp-block-heading">Step 1:</h4> <p>I chose to use pine boards, but you could also use cedar boards. Especially if these planters will be in an outdoor space. Cut your boards to the length you want. The length you cut them will determine how tall they are. You will need 6 boards per planter. My planters were 8 inches, 13 inches, and 18 inches tall. </p> <h4 class="wp-block-heading">Step 2: </h4> <p>Once they are all cut to length, you will need to make an angled cut on each of the long sides. Set your blade to 30 degrees. </p> <div class="wp-block-image"> <figure class="aligncenter size-full is-resized"><a href="https://www.notjustahousewife.net/wp-content/uploads/2016/05/cutting-at-30-degree-angle-2.jpg"><img loading="lazy" decoding="async" width="600" height="900" src="https://www.notjustahousewife.net/wp-content/uploads/2016/05/cutting-at-30-degree-angle-2.jpg" alt="" class="wp-image-27089" style="width:501px;height:auto" srcset="https://www.notjustahousewife.net/wp-content/uploads/2016/05/cutting-at-30-degree-angle-2.jpg 600w, https://www.notjustahousewife.net/wp-content/uploads/2016/05/cutting-at-30-degree-angle-2-200x300.jpg 200w, https://www.notjustahousewife.net/wp-content/uploads/2016/05/cutting-at-30-degree-angle-2-150x225.jpg 150w" sizes="(max-width: 600px) 100vw, 600px" /></a></figure></div> <h4 class="wp-block-heading">Step 3:</h4> <p>Add wood a thin layer of wood glue to the edges that are to be joined. Only use a little bit of wood glue so it doesn't ooze out as you attach them. If it does, simply wipe it off with a wet rag. </p> <div class="wp-block-image"> <figure class="aligncenter size-full is-resized"><a href="https://www.notjustahousewife.net/wp-content/uploads/2016/05/gluing-the-sides-of-the-hexagon-planter-2.jpg"><img loading="lazy" decoding="async" width="600" height="900" src="https://www.notjustahousewife.net/wp-content/uploads/2016/05/gluing-the-sides-of-the-hexagon-planter-2.jpg" alt="" class="wp-image-27090" style="width:503px;height:auto" srcset="https://www.notjustahousewife.net/wp-content/uploads/2016/05/gluing-the-sides-of-the-hexagon-planter-2.jpg 600w, https://www.notjustahousewife.net/wp-content/uploads/2016/05/gluing-the-sides-of-the-hexagon-planter-2-200x300.jpg 200w, https://www.notjustahousewife.net/wp-content/uploads/2016/05/gluing-the-sides-of-the-hexagon-planter-2-150x225.jpg 150w" sizes="(max-width: 600px) 100vw, 600px" /></a></figure></div> <p>Then, using a nailer, attach the boards together until you have them all nailed together to form the hexagon shape. </p> <div class="wp-block-image"> <figure class="aligncenter size-full"><a href="https://www.notjustahousewife.net/wp-content/uploads/2016/05/nailing-sides-of-hexagon-planter-together-2.jpg"><img loading="lazy" decoding="async" width="700" height="464" src="https://www.notjustahousewife.net/wp-content/uploads/2016/05/nailing-sides-of-hexagon-planter-together-2.jpg" alt="" class="wp-image-27091" srcset="https://www.notjustahousewife.net/wp-content/uploads/2016/05/nailing-sides-of-hexagon-planter-together-2.jpg 700w, https://www.notjustahousewife.net/wp-content/uploads/2016/05/nailing-sides-of-hexagon-planter-together-2-300x199.jpg 300w, https://www.notjustahousewife.net/wp-content/uploads/2016/05/nailing-sides-of-hexagon-planter-together-2-150x99.jpg 150w" sizes="(max-width: 700px) 100vw, 700px" /></a></figure></div> <h4 class="wp-block-heading">Step 4:</h4> <p>To create a bottom of the planter, place the hexagon onto a scrap piece of plywood (or any other wood that is wide enough). Then trace the inside of the planter onto the board. Use a miter saw or jigsaw to cut out the hexagon shape.</p> <h4 class="wp-block-heading">Step 5:</h4> <p>Drill at least one large hole in the bottom board for drainage. Drainage holes are important not only for the health of the plant, but also so the wood doesn't rot. </p> <div class="wp-block-image"> <figure class="aligncenter size-full is-resized"><a href="https://www.notjustahousewife.net/wp-content/uploads/2016/05/bottom-of-hexagon-planter-2.jpg"><img loading="lazy" decoding="async" width="600" height="900" src="https://www.notjustahousewife.net/wp-content/uploads/2016/05/bottom-of-hexagon-planter-2.jpg" alt="" class="wp-image-27088" style="width:501px;height:auto" srcset="https://www.notjustahousewife.net/wp-content/uploads/2016/05/bottom-of-hexagon-planter-2.jpg 600w, https://www.notjustahousewife.net/wp-content/uploads/2016/05/bottom-of-hexagon-planter-2-200x300.jpg 200w, https://www.notjustahousewife.net/wp-content/uploads/2016/05/bottom-of-hexagon-planter-2-150x225.jpg 150w" sizes="(max-width: 600px) 100vw, 600px" /></a></figure></div> <h4 class="wp-block-heading">Step 6:</h4> <p>Attach the bottom to the planter using wood glue and brand nails. I chose to attach the bottom higher up into the planter so I could have a bowl or something to catch any water that may drain out of the planter. </p> <p>*If you are using this as a catch pot (as in you are not adding soil directly to this planter), you can skip the drainage hole step. Simply add a liner or bowl to the inside of the planter before you add your plant inside with its plastic pot. You will need to add the bottom piece of the planter high enough up into the planter so it isn't too deep for the plastic pots.&nbsp;</p> <div class="wp-block-image"> <figure class="aligncenter size-full is-resized"><a href="https://www.notjustahousewife.net/wp-content/uploads/2024/02/the-bottom-of-hexagon-planter.jpg"><img loading="lazy" decoding="async" width="600" height="810" src="https://www.notjustahousewife.net/wp-content/uploads/2024/02/the-bottom-of-hexagon-planter.jpg" alt="" class="wp-image-27097" style="width:501px;height:auto" srcset="https://www.notjustahousewife.net/wp-content/uploads/2024/02/the-bottom-of-hexagon-planter.jpg 600w, https://www.notjustahousewife.net/wp-content/uploads/2024/02/the-bottom-of-hexagon-planter-222x300.jpg 222w, https://www.notjustahousewife.net/wp-content/uploads/2024/02/the-bottom-of-hexagon-planter-150x203.jpg 150w" sizes="(max-width: 600px) 100vw, 600px" /></a><figcaption class="wp-element-caption"><em>The planter is upside down in this photo. This is showing how high off the ground I added the bottom piece so I could place a bowl beneath it. </em></figcaption></figure></div> <h4 class="wp-block-heading">Step 6:</h4> <p>After it is all assembled, fill the nail holes with a stainable, paintable putty. Wait for it to harden, and then sand smooth. </p> <div class="wp-block-image"> <figure class="aligncenter size-full is-resized"><a href="https://www.notjustahousewife.net/wp-content/uploads/2016/05/putty-the-nail-holes-in-the-hexagon-planter-copy-2.jpg"><img loading="lazy" decoding="async" width="600" height="900" src="https://www.notjustahousewife.net/wp-content/uploads/2016/05/putty-the-nail-holes-in-the-hexagon-planter-copy-2.jpg" alt="" class="wp-image-27092" style="width:501px;height:auto" srcset="https://www.notjustahousewife.net/wp-content/uploads/2016/05/putty-the-nail-holes-in-the-hexagon-planter-copy-2.jpg 600w, https://www.notjustahousewife.net/wp-content/uploads/2016/05/putty-the-nail-holes-in-the-hexagon-planter-copy-2-200x300.jpg 200w, https://www.notjustahousewife.net/wp-content/uploads/2016/05/putty-the-nail-holes-in-the-hexagon-planter-copy-2-150x225.jpg 150w" sizes="(max-width: 600px) 100vw, 600px" /></a></figure></div> <h4 class="wp-block-heading">Step 7: </h4> <p>Now you are ready to paint or stain! I first chose gold paint for mine, but later decided to go with black since my office decor changed. They look great by themselves or grouped together. </p> <div class="wp-block-image"> <figure class="aligncenter size-full is-resized"><a href="https://www.notjustahousewife.net/wp-content/uploads/2016/05/black-hexagon-planters.jpg"><img loading="lazy" decoding="async" width="600" height="900" src="https://www.notjustahousewife.net/wp-content/uploads/2016/05/black-hexagon-planters.jpg" alt="" class="wp-image-27096" style="width:549px;height:auto" srcset="https://www.notjustahousewife.net/wp-content/uploads/2016/05/black-hexagon-planters.jpg 600w, https://www.notjustahousewife.net/wp-content/uploads/2016/05/black-hexagon-planters-200x300.jpg 200w, https://www.notjustahousewife.net/wp-content/uploads/2016/05/black-hexagon-planters-150x225.jpg 150w" sizes="(max-width: 600px) 100vw, 600px" /></a></figure></div> <p>Customized planters are a great way to add something unique to your space. Whether you use these for houseplants or outdoor plants, they are a fun addition to your home. </p> <h3 class="wp-block-heading">PIN For Later: </h3> <div class="wp-block-image"> <figure class="aligncenter size-full is-resized"><a href="https://www.notjustahousewife.net/wp-content/uploads/2016/05/hexagon-planters.jpg"><img loading="lazy" decoding="async" width="600" height="900" src="https://www.notjustahousewife.net/wp-content/uploads/2016/05/hexagon-planters.jpg" alt="" class="wp-image-27098" style="width:550px;height:auto" srcset="https://www.notjustahousewife.net/wp-content/uploads/2016/05/hexagon-planters.jpg 600w, https://www.notjustahousewife.net/wp-content/uploads/2016/05/hexagon-planters-200x300.jpg 200w, https://www.notjustahousewife.net/wp-content/uploads/2016/05/hexagon-planters-150x225.jpg 150w" sizes="(max-width: 600px) 100vw, 600px" /></a></figure></div> <h5 class="wp-block-heading">Click The Images To See These Other Planters:</h5> <figure class="wp-block-gallery has-nested-images columns-default is-cropped wp-block-gallery-21 is-layout-flex wp-block-gallery-is-layout-flex"> <figure class="wp-block-image size-large"><a href="https://www.notjustahousewife.net/wood-bead-planter/"><img loading="lazy" decoding="async" width="500" height="500" data-id="25938" src="https://www.notjustahousewife.net/wp-content/uploads/2016/10/hanging-planter.jpg" alt="" class="wp-image-25938" srcset="https://www.notjustahousewife.net/wp-content/uploads/2016/10/hanging-planter.jpg 500w, https://www.notjustahousewife.net/wp-content/uploads/2016/10/hanging-planter-300x300.jpg 300w, https://www.notjustahousewife.net/wp-content/uploads/2016/10/hanging-planter-150x150.jpg 150w, https://www.notjustahousewife.net/wp-content/uploads/2016/10/hanging-planter-360x360.jpg 360w, https://www.notjustahousewife.net/wp-content/uploads/2016/10/hanging-planter-180x180.jpg 180w, https://www.notjustahousewife.net/wp-content/uploads/2016/10/hanging-planter-250x250.jpg 250w, https://www.notjustahousewife.net/wp-content/uploads/2016/10/hanging-planter-40x40.jpg 40w, https://www.notjustahousewife.net/wp-content/uploads/2016/10/hanging-planter-96x96.jpg 96w" sizes="(max-width: 500px) 100vw, 500px" /></a></figure> <figure class="wp-block-image size-large"><a href="https://www.notjustahousewife.net/diy-modern-planter-box/"><img loading="lazy" decoding="async" width="500" height="500" data-id="25929" src="https://www.notjustahousewife.net/wp-content/uploads/2017/05/slatted-planter-featured.jpg" alt="" class="wp-image-25929" srcset="https://www.notjustahousewife.net/wp-content/uploads/2017/05/slatted-planter-featured.jpg 500w, https://www.notjustahousewife.net/wp-content/uploads/2017/05/slatted-planter-featured-300x300.jpg 300w, https://www.notjustahousewife.net/wp-content/uploads/2017/05/slatted-planter-featured-150x150.jpg 150w, https://www.notjustahousewife.net/wp-content/uploads/2017/05/slatted-planter-featured-360x360.jpg 360w, https://www.notjustahousewife.net/wp-content/uploads/2017/05/slatted-planter-featured-180x180.jpg 180w, https://www.notjustahousewife.net/wp-content/uploads/2017/05/slatted-planter-featured-250x250.jpg 250w, https://www.notjustahousewife.net/wp-content/uploads/2017/05/slatted-planter-featured-40x40.jpg 40w, https://www.notjustahousewife.net/wp-content/uploads/2017/05/slatted-planter-featured-96x96.jpg 96w" sizes="(max-width: 500px) 100vw, 500px" /></a></figure> <figure class="wp-block-image size-large"><a href="https://www.notjustahousewife.net/diy-outdoor-planters/"><img loading="lazy" decoding="async" width="500" height="750" data-id="21869" src="https://www.notjustahousewife.net/wp-content/uploads/2020/07/DIY-outdoor-planters.png" alt="" class="wp-image-21869" srcset="https://www.notjustahousewife.net/wp-content/uploads/2020/07/DIY-outdoor-planters.png 500w, https://www.notjustahousewife.net/wp-content/uploads/2020/07/DIY-outdoor-planters-200x300.png 200w" sizes="(max-width: 500px) 100vw, 500px" /></a></figure> <figure class="wp-block-image size-large"><a href="https://www.notjustahousewife.net/my-favorite-planter-projects/"><img loading="lazy" decoding="async" width="694" height="1024" data-id="11509" src="https://www.notjustahousewife.net/wp-content/uploads/2015/08/hanging-clay-planter-tutorial-694x1024.jpg" alt="" class="wp-image-11509" srcset="https://www.notjustahousewife.net/wp-content/uploads/2015/08/hanging-clay-planter-tutorial-694x1024.jpg 694w, https://www.notjustahousewife.net/wp-content/uploads/2015/08/hanging-clay-planter-tutorial-203x300.jpg 203w, https://www.notjustahousewife.net/wp-content/uploads/2015/08/hanging-clay-planter-tutorial-900x1328.jpg 900w" sizes="(max-width: 694px) 100vw, 694px" /></a></figure> <figure class="wp-block-image size-large"><a href="https://www.notjustahousewife.net/modern-tree-stump-planter/"><img loading="lazy" decoding="async" width="682" height="1024" data-id="9906" src="https://www.notjustahousewife.net/wp-content/uploads/2014/11/stump-planter_edited-3-682x1024.jpg" alt="" class="wp-image-9906" srcset="https://www.notjustahousewife.net/wp-content/uploads/2014/11/stump-planter_edited-3-682x1024.jpg 682w, https://www.notjustahousewife.net/wp-content/uploads/2014/11/stump-planter_edited-3-200x300.jpg 200w" sizes="(max-width: 682px) 100vw, 682px" /></a></figure> <figure class="wp-block-image size-large"><a href="https://www.notjustahousewife.net/clay-head-planter/"><img loading="lazy" decoding="async" width="500" height="500" data-id="25737" src="https://www.notjustahousewife.net/wp-content/uploads/2019/07/clay-head-planter.jpg" alt="" class="wp-image-25737" srcset="https://www.notjustahousewife.net/wp-content/uploads/2019/07/clay-head-planter.jpg 500w, https://www.notjustahousewife.net/wp-content/uploads/2019/07/clay-head-planter-300x300.jpg 300w, https://www.notjustahousewife.net/wp-content/uploads/2019/07/clay-head-planter-150x150.jpg 150w, https://www.notjustahousewife.net/wp-content/uploads/2019/07/clay-head-planter-360x360.jpg 360w, https://www.notjustahousewife.net/wp-content/uploads/2019/07/clay-head-planter-180x180.jpg 180w, https://www.notjustahousewife.net/wp-content/uploads/2019/07/clay-head-planter-250x250.jpg 250w, https://www.notjustahousewife.net/wp-content/uploads/2019/07/clay-head-planter-40x40.jpg 40w, https://www.notjustahousewife.net/wp-content/uploads/2019/07/clay-head-planter-96x96.jpg 96w" sizes="(max-width: 500px) 100vw, 500px" /></a></figure> </figure> <div style="margin-top: 0px; margin-bottom: 0px;" class="sharethis-inline-share-buttons" ></div> ]]>
</content:encoded>
<wfw:commentRss>https://www.notjustahousewife.net/hexagon-planters/feed/</wfw:commentRss>
<slash:comments>27</slash:comments>
</item>
<item>
<title>White & Gold Valentine Decor {Wood Burned Vase}</title>
<link>https://www.notjustahousewife.net/white-gold-valentine-decor-wood-burned-vase/</link>
<comments>https://www.notjustahousewife.net/white-gold-valentine-decor-wood-burned-vase/#comments</comments>
<dc:creator>
<![CDATA[ Stacy ]]>
</dc:creator>
<pubDate>Thu, 15 Feb 2024 01:31:56 +0000</pubDate>
<category>
<![CDATA[ Holiday ]]>
</category>
<guid isPermaLink="false">https://www.notjustahousewife.net/?p=27045</guid>
<description>
<![CDATA[ I know Valentine's Day is one of those holidays where you either love it or hate it, but I love to decorate for this holiday. During the long winter days, it is nice to have an excuse to have fresh flowers around and eat chocolate. This year I decided to go with white &#38; gold...</p><p><a class="more-link" href="https://www.notjustahousewife.net/white-gold-valentine-decor-wood-burned-vase/">Read More</a></p> ]]>
</description>
<content:encoded>
<![CDATA[ <p>I know Valentine's Day is one of those holidays where you either love it or hate it, but I love to decorate for this holiday. During the long winter days, it is nice to have an excuse to have fresh flowers around and eat chocolate. This year I decided to go with white &amp; gold Valentine decor instead of the <a href="https://www.notjustahousewife.net/diy-valentines-wreath/">traditional pink and red like last year</a>. </p> <h3 class="wp-block-heading">White &amp; Gold Valentine Decor</h3> <p>Since I recently painted my fireplace green, I wanted to see how it would look with a more neutral looking color scheme. </p> <div class="wp-block-image"> <figure class="aligncenter size-full is-resized"><a href="https://www.notjustahousewife.net/wp-content/uploads/2024/02/wood-burned-vase-stump.jpg"><img loading="lazy" decoding="async" width="600" height="847" src="https://www.notjustahousewife.net/wp-content/uploads/2024/02/wood-burned-vase-stump.jpg" alt="" class="wp-image-27054" style="width:501px;height:auto" srcset="https://www.notjustahousewife.net/wp-content/uploads/2024/02/wood-burned-vase-stump.jpg 600w, https://www.notjustahousewife.net/wp-content/uploads/2024/02/wood-burned-vase-stump-213x300.jpg 213w, https://www.notjustahousewife.net/wp-content/uploads/2024/02/wood-burned-vase-stump-150x212.jpg 150w" sizes="(max-width: 600px) 100vw, 600px" /></a></figure></div> <p>I loved the <a href="https://www.notjustahousewife.net/valentine-candlesticks/">wood burned candlesticks</a> from last year so much I decided to make a vase! I had this beautiful tree stump in my garage that had been drying out for over a year. It was ready to hollow out. Shane and I used bore bits to drill out the majority of the wood.</p> <div class="wp-block-image"> <figure class="aligncenter size-full is-resized"><a href="https://www.notjustahousewife.net/wp-content/uploads/2024/02/hollowing-out-stump-with-bore-bits.jpg"><img loading="lazy" decoding="async" width="600" height="900" src="https://www.notjustahousewife.net/wp-content/uploads/2024/02/hollowing-out-stump-with-bore-bits.jpg" alt="" class="wp-image-27055" style="width:501px;height:auto" srcset="https://www.notjustahousewife.net/wp-content/uploads/2024/02/hollowing-out-stump-with-bore-bits.jpg 600w, https://www.notjustahousewife.net/wp-content/uploads/2024/02/hollowing-out-stump-with-bore-bits-200x300.jpg 200w, https://www.notjustahousewife.net/wp-content/uploads/2024/02/hollowing-out-stump-with-bore-bits-150x225.jpg 150w" sizes="(max-width: 600px) 100vw, 600px" /></a></figure></div> <p>The rest we were able to chisel out. </p> <div class="wp-block-image"> <figure class="aligncenter size-full is-resized"><a href="https://www.notjustahousewife.net/wp-content/uploads/2024/02/use-chisel-to-hollow-out-stump-1.jpg"><img loading="lazy" decoding="async" width="600" height="900" src="https://www.notjustahousewife.net/wp-content/uploads/2024/02/use-chisel-to-hollow-out-stump-1.jpg" alt="" class="wp-image-27056" style="width:501px;height:auto" srcset="https://www.notjustahousewife.net/wp-content/uploads/2024/02/use-chisel-to-hollow-out-stump-1.jpg 600w, https://www.notjustahousewife.net/wp-content/uploads/2024/02/use-chisel-to-hollow-out-stump-1-200x300.jpg 200w, https://www.notjustahousewife.net/wp-content/uploads/2024/02/use-chisel-to-hollow-out-stump-1-150x225.jpg 150w" sizes="(max-width: 600px) 100vw, 600px" /></a></figure></div> <p>Once it was hollowed out as far as we wanted, I got to wood burning the heart and initials into the side of the stump. </p> <div class="wp-block-image"> <figure class="aligncenter size-full is-resized"><a href="https://www.notjustahousewife.net/wp-content/uploads/2024/02/wood-burn-the-tree-stump.jpg"><img loading="lazy" decoding="async" width="600" height="900" src="https://www.notjustahousewife.net/wp-content/uploads/2024/02/wood-burn-the-tree-stump.jpg" alt="" class="wp-image-27050" style="width:501px;height:auto" srcset="https://www.notjustahousewife.net/wp-content/uploads/2024/02/wood-burn-the-tree-stump.jpg 600w, https://www.notjustahousewife.net/wp-content/uploads/2024/02/wood-burn-the-tree-stump-200x300.jpg 200w, https://www.notjustahousewife.net/wp-content/uploads/2024/02/wood-burn-the-tree-stump-150x225.jpg 150w" sizes="(max-width: 600px) 100vw, 600px" /></a></figure></div> <p>In order to use it as a vase, you will need to add a water tight container. I had a vase that worked perfectly!</p> <div class="wp-block-image"> <figure class="aligncenter size-full is-resized"><a href="https://www.notjustahousewife.net/wp-content/uploads/2024/02/add-water-tight-container-to-make-it-a-vase.jpg"><img loading="lazy" decoding="async" width="600" height="900" src="https://www.notjustahousewife.net/wp-content/uploads/2024/02/add-water-tight-container-to-make-it-a-vase.jpg" alt="" class="wp-image-27046" style="width:501px;height:auto" srcset="https://www.notjustahousewife.net/wp-content/uploads/2024/02/add-water-tight-container-to-make-it-a-vase.jpg 600w, https://www.notjustahousewife.net/wp-content/uploads/2024/02/add-water-tight-container-to-make-it-a-vase-200x300.jpg 200w, https://www.notjustahousewife.net/wp-content/uploads/2024/02/add-water-tight-container-to-make-it-a-vase-150x225.jpg 150w" sizes="(max-width: 600px) 100vw, 600px" /></a></figure></div> <p>I cut out some Xs and Os out of gold cardstock so that I could make a garland. They were 3 inches tall which ended up being the perfect size! I cut out 16 per sheet (2 sheets) and had some left over. </p> <div class="wp-block-image"> <figure class="aligncenter size-full is-resized"><a href="https://www.notjustahousewife.net/wp-content/uploads/2024/02/cutting-out-gold-garland.jpg"><img loading="lazy" decoding="async" width="600" height="900" src="https://www.notjustahousewife.net/wp-content/uploads/2024/02/cutting-out-gold-garland.jpg" alt="" class="wp-image-27061" style="width:501px;height:auto" srcset="https://www.notjustahousewife.net/wp-content/uploads/2024/02/cutting-out-gold-garland.jpg 600w, https://www.notjustahousewife.net/wp-content/uploads/2024/02/cutting-out-gold-garland-200x300.jpg 200w, https://www.notjustahousewife.net/wp-content/uploads/2024/02/cutting-out-gold-garland-150x225.jpg 150w" sizes="(max-width: 600px) 100vw, 600px" /></a></figure></div> <p>I glued them to a string about 2 inches apart from each other. The whole thing ended up being about 8 feet long.</p> <div class="wp-block-image"> <figure class="aligncenter size-full is-resized"><a href="https://www.notjustahousewife.net/wp-content/uploads/2024/02/making-garland.jpg"><img loading="lazy" decoding="async" width="600" height="900" src="https://www.notjustahousewife.net/wp-content/uploads/2024/02/making-garland.jpg" alt="" class="wp-image-27062" style="width:501px;height:auto" srcset="https://www.notjustahousewife.net/wp-content/uploads/2024/02/making-garland.jpg 600w, https://www.notjustahousewife.net/wp-content/uploads/2024/02/making-garland-200x300.jpg 200w, https://www.notjustahousewife.net/wp-content/uploads/2024/02/making-garland-150x225.jpg 150w" sizes="(max-width: 600px) 100vw, 600px" /></a></figure></div> <p>I added the X &amp; O garland to the mantel along with a <a href="https://amzn.to/48qDQxi">pompom &amp; bead garland</a> I got from Amazon. </p> <p>Some art and gold candles completed the look! I love how the vase looks with fresh tulips.</p> <div class="wp-block-image"> <figure class="aligncenter size-full is-resized"><a href="https://www.notjustahousewife.net/wp-content/uploads/2024/02/gold-and-white-valentines-mantel.jpg"><img loading="lazy" decoding="async" width="600" height="900" src="https://www.notjustahousewife.net/wp-content/uploads/2024/02/gold-and-white-valentines-mantel.jpg" alt="" class="wp-image-27058" style="width:500px;height:auto" srcset="https://www.notjustahousewife.net/wp-content/uploads/2024/02/gold-and-white-valentines-mantel.jpg 600w, https://www.notjustahousewife.net/wp-content/uploads/2024/02/gold-and-white-valentines-mantel-200x300.jpg 200w, https://www.notjustahousewife.net/wp-content/uploads/2024/02/gold-and-white-valentines-mantel-150x225.jpg 150w" sizes="(max-width: 600px) 100vw, 600px" /></a></figure></div> <p>You can also use the stump as a planter. Remember the first time I hollowed out a tree stump? I love that <a href="https://www.notjustahousewife.net/modern-tree-stump-planter/">original version too with its hairpin legs</a>. </p> <div class="wp-block-image"> <figure class="aligncenter size-full is-resized"><a href="https://www.notjustahousewife.net/wp-content/uploads/2024/02/stump-wood-burned-planter.jpg"><img loading="lazy" decoding="async" width="600" height="847" src="https://www.notjustahousewife.net/wp-content/uploads/2024/02/stump-wood-burned-planter.jpg" alt="" class="wp-image-27059" style="width:500px;height:auto" srcset="https://www.notjustahousewife.net/wp-content/uploads/2024/02/stump-wood-burned-planter.jpg 600w, https://www.notjustahousewife.net/wp-content/uploads/2024/02/stump-wood-burned-planter-213x300.jpg 213w, https://www.notjustahousewife.net/wp-content/uploads/2024/02/stump-wood-burned-planter-150x212.jpg 150w" sizes="(max-width: 600px) 100vw, 600px" /></a></figure></div> <h4 class="wp-block-heading">Do you decorate for Valentines Day? Are you team "Red &amp; Pink" or team "Neutrals"?</h4> <p><strong>Pin For Later:</strong></p> <div class="wp-block-image"> <figure class="aligncenter size-full is-resized"><a href="https://www.notjustahousewife.net/wp-content/uploads/2024/02/gold-and-white-valentines-decor-ideas.jpg"><img loading="lazy" decoding="async" width="600" height="900" src="https://www.notjustahousewife.net/wp-content/uploads/2024/02/gold-and-white-valentines-decor-ideas.jpg" alt="" class="wp-image-27060" style="width:501px;height:auto" srcset="https://www.notjustahousewife.net/wp-content/uploads/2024/02/gold-and-white-valentines-decor-ideas.jpg 600w, https://www.notjustahousewife.net/wp-content/uploads/2024/02/gold-and-white-valentines-decor-ideas-200x300.jpg 200w, https://www.notjustahousewife.net/wp-content/uploads/2024/02/gold-and-white-valentines-decor-ideas-150x225.jpg 150w" sizes="(max-width: 600px) 100vw, 600px" /></a></figure></div><div style="margin-top: 0px; margin-bottom: 0px;" class="sharethis-inline-share-buttons" ></div> ]]>
</content:encoded>
<wfw:commentRss>https://www.notjustahousewife.net/white-gold-valentine-decor-wood-burned-vase/feed/</wfw:commentRss>
<slash:comments>2</slash:comments>
</item>
<item>
<title>Steam Cleaning FAQ: Everything You Need To Know!</title>
<link>https://www.notjustahousewife.net/steam-cleaning-faq-everything-you-need-to-know/</link>
<comments>https://www.notjustahousewife.net/steam-cleaning-faq-everything-you-need-to-know/#comments</comments>
<dc:creator>
<![CDATA[ Stacy ]]>
</dc:creator>
<pubDate>Mon, 29 Jan 2024 07:12:20 +0000</pubDate>
<category>
<![CDATA[ Cleaning ]]>
</category>
<guid isPermaLink="false">https://www.notjustahousewife.net/?p=27014</guid>
<description>
<![CDATA[ I've been using a steam cleaner for over a decade now and occasionally share posts about it here on the blog. Over the years I have been asked lots of questions about steam cleaning so I thought I would address the most commonly asked ones. Here are the steam cleaning FAQ. Everything you need to...</p><p><a class="more-link" href="https://www.notjustahousewife.net/steam-cleaning-faq-everything-you-need-to-know/">Read More</a></p> ]]>
</description>
<content:encoded>
<![CDATA[ <p>I've been using a steam cleaner for over a decade now and occasionally share posts about it here on the blog. Over the years I have been asked lots of questions about steam cleaning so I thought I would address the most commonly asked ones. Here are the steam cleaning FAQ. Everything you need to know about cleaning your home with steam!</p> <p class="has-text-align-center"><em>This post is sponsored by <a href="https://www.wagnerspraytech.com/product/steamers/915e-on-demand-steamer/" target="_blank" rel="noreferrer noopener sponsored nofollow">Wagner</a> but the thoughts and opinions are 100% my own!</em></p> <div class="wp-block-image"> <figure class="aligncenter size-full is-resized"><a href="https://www.notjustahousewife.net/wp-content/uploads/2024/01/steam-clean-mopping-floor-.jpg"><img loading="lazy" decoding="async" width="600" height="900" src="https://www.notjustahousewife.net/wp-content/uploads/2024/01/steam-clean-mopping-floor-.jpg" alt="steam mopping floor" class="wp-image-27035" style="width:501px;height:auto" srcset="https://www.notjustahousewife.net/wp-content/uploads/2024/01/steam-clean-mopping-floor-.jpg 600w, https://www.notjustahousewife.net/wp-content/uploads/2024/01/steam-clean-mopping-floor--200x300.jpg 200w, https://www.notjustahousewife.net/wp-content/uploads/2024/01/steam-clean-mopping-floor--150x225.jpg 150w" sizes="(max-width: 600px) 100vw, 600px" /></a></figure></div> <h2 class="wp-block-heading">Steam Cleaning FAQ</h2> <p>Steam cleaning is a great way to sanitize your home without the use of harsh chemicals. Perfect for those with children, pets, sensitive skin, or allergies. It is an easy way to clean just about everything in your home! Here are the most asked questions I have received over the years.</p> <h3 class="wp-block-heading">Q1: Can I Use Tap Water?</h3> <div class="wp-block-image"> <figure class="aligncenter size-full is-resized"><a href="https://www.notjustahousewife.net/wp-content/uploads/2024/01/steam-cleaning-can-you-use-tap-water.jpg"><img loading="lazy" decoding="async" width="600" height="900" src="https://www.notjustahousewife.net/wp-content/uploads/2024/01/steam-cleaning-can-you-use-tap-water.jpg" alt="adding water to steam machine" class="wp-image-27026" style="width:503px;height:auto" srcset="https://www.notjustahousewife.net/wp-content/uploads/2024/01/steam-cleaning-can-you-use-tap-water.jpg 600w, https://www.notjustahousewife.net/wp-content/uploads/2024/01/steam-cleaning-can-you-use-tap-water-200x300.jpg 200w, https://www.notjustahousewife.net/wp-content/uploads/2024/01/steam-cleaning-can-you-use-tap-water-150x225.jpg 150w" sizes="(max-width: 600px) 100vw, 600px" /></a></figure></div> <p>Probably the most asked question is about the water. Is it okay to use tap water, especially if you have hard water? It is recommended to use distilled water. I usually try to have a few gallons in my food storage area in the basement but during covid (and for quite a bit after) there was a shortage of distilled water. People needed it for baby formula, breathing treatments, humidifiers, and cpap machines. </p> <p>During this time I got into the habit of using water from my PUR water pitcher. If you have a water pitcher with a filter, or one that attaches to your faucet, this would be the second best option. If you do not have access to either the distilled water or filtered water, then use tap water. You will at some point need to clean out the mineral build up in your steamer. That leads us to the the next question!</p> <h3 class="wp-block-heading">Q2: How Do You Clean A Steam Machine?</h3> <p>Always make sure that the steam machine is unplugged before cleaning. Mix 8 oz of water and 8 oz of white vinegar. Pour the mixture into the steam machine using the funnel. Allow it to sit for at least 30 minutes and then empty it into the sink. Add clean water into the tank to rinse the vinegar out. Repeat the rinsing process until it no longer smells of vinegar. </p> <h3 class="wp-block-heading">Q3: How Much Water Do I add and How Long Will It Last?</h3> <p>Steamer come with a measuring cup with a spout for easy pouring. If you add 400ml you will be able to steam clean for approximately 15 minutes. 800 ml will last 30 minutes and 1200ml will last 40 minutes. Please make sure that the machine has fully cooled down before opening it to add more water if needed. </p> <h3 class="wp-block-heading">Q4: Why Is My Machine Squirting Water Instead Of Steam?</h3> <div class="wp-block-image"> <figure class="aligncenter size-full is-resized"><a href="https://www.notjustahousewife.net/wp-content/uploads/2024/01/why-is-my-steamer-squrting-water.jpg"><img loading="lazy" decoding="async" width="600" height="900" src="https://www.notjustahousewife.net/wp-content/uploads/2024/01/why-is-my-steamer-squrting-water.jpg" alt="steam cleaner spurting water" class="wp-image-27033" style="width:501px;height:auto" srcset="https://www.notjustahousewife.net/wp-content/uploads/2024/01/why-is-my-steamer-squrting-water.jpg 600w, https://www.notjustahousewife.net/wp-content/uploads/2024/01/why-is-my-steamer-squrting-water-200x300.jpg 200w, https://www.notjustahousewife.net/wp-content/uploads/2024/01/why-is-my-steamer-squrting-water-150x225.jpg 150w" sizes="(max-width: 600px) 100vw, 600px" /></a><figcaption class="wp-element-caption"><em>Notice in this photo the orange light is still on</em></figcaption></figure></div> <p>This will happen if you have squeezed the trigger before the machine has fully heated and had enough time to built up pressure. </p> <p>When you push the power button, both the red and the orange light will light up. You need to wait until the orange light turns off. It can take up to ten minutes to heat and build up pressure. If you do start using the steamer before it is fully ready and water squirts out, it is okay. Steam will follow the initial squirt of water. You can use a rag to clean it up. It doesn't mean anything is wrong with your machine. </p> <h3 class="wp-block-heading">Q5: How Is It Possible To Clean With Only Water?</h3> <div class="wp-block-image"> <figure class="aligncenter size-full is-resized"><a href="https://www.notjustahousewife.net/wp-content/uploads/2023/01/steam-clean-bathroom-with-steam-machine.jpg"><img loading="lazy" decoding="async" width="600" height="900" src="https://www.notjustahousewife.net/wp-content/uploads/2023/01/steam-clean-bathroom-with-steam-machine.jpg" alt="steam cleaning toilet" class="wp-image-25298" style="width:501px;height:auto" srcset="https://www.notjustahousewife.net/wp-content/uploads/2023/01/steam-clean-bathroom-with-steam-machine.jpg 600w, https://www.notjustahousewife.net/wp-content/uploads/2023/01/steam-clean-bathroom-with-steam-machine-200x300.jpg 200w, https://www.notjustahousewife.net/wp-content/uploads/2023/01/steam-clean-bathroom-with-steam-machine-150x225.jpg 150w" sizes="(max-width: 600px) 100vw, 600px" /></a></figure></div> <p>Steam Machines can exceed 212 degrees. The steam's hot temperature is enough to kill germs, dust mites, mold, and bacteria and all other yucky things. My favorite place to use it is on my toilet. The steam forces all the gunk hiding under the seat hinges out. It is the grossest, most satisfying thing ever. </p> <p>When using a steamer on soft surfaces like upholstery, it softens and loosens up the dirt so it can be easily removed with a rag. You can see a pretty impressive before and after when we cleaned out Shane's car! I also like to <a href="https://www.notjustahousewife.net/steam-clean-your-mattress-giveaway/">use it on mattresses</a> and rugs to kill dust mites. </p> <h3 class="wp-block-heading">Q6: When Steaming Soft Surfaces, How Long Is The Dry Time?</h3> <div class="wp-block-image"> <figure class="aligncenter size-full is-resized"><a href="https://www.notjustahousewife.net/wp-content/uploads/2024/01/steam-cleaning-upholstery.jpg"><img loading="lazy" decoding="async" width="600" height="900" src="https://www.notjustahousewife.net/wp-content/uploads/2024/01/steam-cleaning-upholstery.jpg" alt="steam cleaning upholstery" class="wp-image-27028" style="width:505px;height:auto" srcset="https://www.notjustahousewife.net/wp-content/uploads/2024/01/steam-cleaning-upholstery.jpg 600w, https://www.notjustahousewife.net/wp-content/uploads/2024/01/steam-cleaning-upholstery-200x300.jpg 200w, https://www.notjustahousewife.net/wp-content/uploads/2024/01/steam-cleaning-upholstery-150x225.jpg 150w" sizes="(max-width: 600px) 100vw, 600px" /></a></figure></div> <p>Speaking of steaming mattresses.... How long does it take for upholstery, rugs, mattresses and other soft surfaces to dry? That is a hard one to answer because it depends on how long you steamed the item, and the humidity level in your home. But I will say that it will dry much faster than if you had used a wet rag to scrub it. </p> <h3 class="wp-block-heading">Q7: What Can I NOT Steam Clean?</h3> <p>One of my most popular posts about steaming is one I wrote years ago called <a href="https://www.notjustahousewife.net/40-ways-to-use-steam-cleaner/">"40 WAYS TO USE A STEAM CLEANER"</a> detailing ways I have used mine around my home. With so many things that you CAN clean, what about the things that you shouldn't clean with a steamer? I'll refer you to the owner's manual of the <a href="https://amzn.to/4998njK" target="_blank" rel="noreferrer noopener sponsored nofollow">Wagner 915E On-Demand Steamer</a>.</p> <p><em>DO NOT use on leather, wax polished furniture or floors,<br>synthetic fabrics, velvet, Dralon® or other delicate, steam<br>sensitive materials.</em></p> <p>Also, while the steamer cleans glass like a champ, avoid steam cleaning your windows and other glass when the temperature of the glass is cold (colder than 32 degrees) or you risk it cracking. I avoid cleaning the windows in the winter months all together to be safe. </p> <h3 class="wp-block-heading">Q8: Can I Add Anything To The Water Like Essential Oils?</h3> <div class="wp-block-image"> <figure class="aligncenter size-full is-resized"><a href="https://www.notjustahousewife.net/wp-content/uploads/2024/01/essential-oils.jpg"><img loading="lazy" decoding="async" width="600" height="900" src="https://www.notjustahousewife.net/wp-content/uploads/2024/01/essential-oils.jpg" alt="adding essential oils to steam pad only" class="wp-image-27036" style="width:502px;height:auto" srcset="https://www.notjustahousewife.net/wp-content/uploads/2024/01/essential-oils.jpg 600w, https://www.notjustahousewife.net/wp-content/uploads/2024/01/essential-oils-200x300.jpg 200w, https://www.notjustahousewife.net/wp-content/uploads/2024/01/essential-oils-150x225.jpg 150w" sizes="(max-width: 600px) 100vw, 600px" /></a></figure></div> <p>No. It is not recommended to add anything but distilled or filtered water to a steam cleaner. It could mess up your steamer and it is not necessary. As stated above, the water gets hot enough to disinfect on its own. But if you are wanting to have a lemony fresh smell (or pine, or any other scent) you can add the oil to the mopping pad. </p> <p><strong>I hope that helped answer any questions you had about steam cleaning. If I missed any questions that you still might have, please leave them in the comments and I will do my best to answer them. </strong></p> <div class="wp-block-image"> <figure class="aligncenter size-full is-resized"><a href="https://www.notjustahousewife.net/wp-content/uploads/2024/01/1-steam-cleaning-FAQ.jpg"><img loading="lazy" decoding="async" width="600" height="900" src="https://www.notjustahousewife.net/wp-content/uploads/2024/01/1-steam-cleaning-FAQ.jpg" alt="faq steam cleaning" class="wp-image-27039" style="width:501px;height:auto" srcset="https://www.notjustahousewife.net/wp-content/uploads/2024/01/1-steam-cleaning-FAQ.jpg 600w, https://www.notjustahousewife.net/wp-content/uploads/2024/01/1-steam-cleaning-FAQ-200x300.jpg 200w, https://www.notjustahousewife.net/wp-content/uploads/2024/01/1-steam-cleaning-FAQ-150x225.jpg 150w" sizes="(max-width: 600px) 100vw, 600px" /></a></figure></div> <p><strong>And if you already have a steam cleaner that you use, I am curious what your favorite thing to steam clean is. Spill it in the comments! </strong></p> <div style="margin-top: 0px; margin-bottom: 0px;" class="sharethis-inline-share-buttons" ></div> ]]>
</content:encoded>
<wfw:commentRss>https://www.notjustahousewife.net/steam-cleaning-faq-everything-you-need-to-know/feed/</wfw:commentRss>
<slash:comments>5</slash:comments>
</item>
<item>
<title>Top 10 Posts {2023}</title>
<link>https://www.notjustahousewife.net/top-10-posts-2023/</link>
<comments>https://www.notjustahousewife.net/top-10-posts-2023/#comments</comments>
<dc:creator>
<![CDATA[ Stacy ]]>
</dc:creator>
<pubDate>Sun, 31 Dec 2023 21:08:28 +0000</pubDate>
<category>
<![CDATA[ Favorites ]]>
</category>
<guid isPermaLink="false">https://www.notjustahousewife.net/?p=27001</guid>
<description>
<![CDATA[ 2023 was a busy year. But it was the kind of busy that led to less projects than usual. The stage of life I am currently in pulls me in a lot of directions. When my kids were little, I was home more, which made it easier to get things done. But no matter how...</p><p><a class="more-link" href="https://www.notjustahousewife.net/top-10-posts-2023/">Read More</a></p> ]]>
</description>
<content:encoded>
<![CDATA[ <p>2023 was a busy year. But it was the kind of busy that led to less projects than usual. The stage of life I am currently in pulls me in a lot of directions. When my kids were little, I was home more, which made it easier to get things done. But no matter how crazy life gets, being creative is what keeps me calm. I value the time I get to build, paint, grow things, and decorate. Here are my top projects from this past year!</p> <h3 class="wp-block-heading"><a href="https://www.notjustahousewife.net/front-porch-makeover/">#1 My Mom's Porch</a></h3> <p>This <a href="https://www.notjustahousewife.net/front-porch-makeover/">porch makeover</a> was my favorite thing I was able to do this year. I love doing makeovers for others and it brought me so much joy to be able to give my mom's home a bit of a facelift. </p> <div class="wp-block-image"> <figure class="aligncenter size-full is-resized"><a href="https://www.notjustahousewife.net/wp-content/uploads/2023/05/Front-porch-makeover-ideas-2.jpg"><img loading="lazy" decoding="async" width="600" height="800" src="https://www.notjustahousewife.net/wp-content/uploads/2023/05/Front-porch-makeover-ideas-2.jpg" alt="" class="wp-image-26242" style="aspect-ratio:0.75;width:500px;height:auto" srcset="https://www.notjustahousewife.net/wp-content/uploads/2023/05/Front-porch-makeover-ideas-2.jpg 600w, https://www.notjustahousewife.net/wp-content/uploads/2023/05/Front-porch-makeover-ideas-2-225x300.jpg 225w, https://www.notjustahousewife.net/wp-content/uploads/2023/05/Front-porch-makeover-ideas-2-150x200.jpg 150w" sizes="(max-width: 600px) 100vw, 600px" /></a></figure></div> <h3 class="wp-block-heading"><a href="https://www.notjustahousewife.net/diy-plant-propagation-station/">#2 Plant Propagation</a></h3> <p>This <a href="https://www.notjustahousewife.net/diy-plant-propagation-station/">propagation station</a> was fun to make, plus it was quite the step up from a crusty old mason jar! I like that it is reversible too!</p> <div class="wp-block-image"> <figure class="aligncenter size-full is-resized"><a href="https://www.notjustahousewife.net/wp-content/uploads/2023/08/DIY-wood-propagation-station.jpg"><img loading="lazy" decoding="async" width="600" height="800" src="https://www.notjustahousewife.net/wp-content/uploads/2023/08/DIY-wood-propagation-station.jpg" alt="" class="wp-image-26448" style="aspect-ratio:0.75;width:503px;height:auto" srcset="https://www.notjustahousewife.net/wp-content/uploads/2023/08/DIY-wood-propagation-station.jpg 600w, https://www.notjustahousewife.net/wp-content/uploads/2023/08/DIY-wood-propagation-station-225x300.jpg 225w, https://www.notjustahousewife.net/wp-content/uploads/2023/08/DIY-wood-propagation-station-150x200.jpg 150w" sizes="(max-width: 600px) 100vw, 600px" /></a></figure></div> <h3 class="wp-block-heading"><a href="https://www.notjustahousewife.net/green-fireplace-makeover/">#3 Fireplace Makeover</a></h3> <p>This was my most recent post. This <a href="https://www.notjustahousewife.net/green-fireplace-makeover/">fireplace makeover </a>was done just in time to get decorated for Christmas. Remind me to never again dive head first into a big project at the beginning of December...</p> <div class="wp-block-image"> <figure class="aligncenter size-full is-resized"><a href="https://www.notjustahousewife.net/wp-content/uploads/2023/12/green-fireplace-makeover.jpg"><img loading="lazy" decoding="async" width="600" height="811" src="https://www.notjustahousewife.net/wp-content/uploads/2023/12/green-fireplace-makeover.jpg" alt="" class="wp-image-26990" style="aspect-ratio:0.7398273736128237;width:500px;height:auto" srcset="https://www.notjustahousewife.net/wp-content/uploads/2023/12/green-fireplace-makeover.jpg 600w, https://www.notjustahousewife.net/wp-content/uploads/2023/12/green-fireplace-makeover-222x300.jpg 222w, https://www.notjustahousewife.net/wp-content/uploads/2023/12/green-fireplace-makeover-150x203.jpg 150w" sizes="(max-width: 600px) 100vw, 600px" /></a></figure></div> <h3 class="wp-block-heading"><a href="https://www.notjustahousewife.net/diy-fairy-garden-ideas/">#4 Fairy Garden</a></h3> <p>I will admit to not completely getting everyone's fascination with <a href="https://www.notjustahousewife.net/diy-fairy-garden-ideas/">fairy gardens</a> until I actually made one. I think I had more fun making the accessories out of clay than anything else. I also shared the best type of plants to use for fairy gardens. Have you ever made one? </p> <div class="wp-block-image"> <figure class="aligncenter size-full is-resized"><a href="https://www.notjustahousewife.net/wp-content/uploads/2023/03/fairy-vegetable-garden-1.jpg"><img loading="lazy" decoding="async" width="600" height="857" src="https://www.notjustahousewife.net/wp-content/uploads/2023/03/fairy-vegetable-garden-1.jpg" alt="" class="wp-image-25511" style="aspect-ratio:0.7001166861143524;width:501px;height:auto" srcset="https://www.notjustahousewife.net/wp-content/uploads/2023/03/fairy-vegetable-garden-1.jpg 600w, https://www.notjustahousewife.net/wp-content/uploads/2023/03/fairy-vegetable-garden-1-210x300.jpg 210w, https://www.notjustahousewife.net/wp-content/uploads/2023/03/fairy-vegetable-garden-1-150x214.jpg 150w" sizes="(max-width: 600px) 100vw, 600px" /></a></figure></div> <h3 class="wp-block-heading"><a href="https://www.notjustahousewife.net/diy-moss-wall-art/">#5 Moss Art</a></h3> <p>It was fun to make an updated <a href="https://www.notjustahousewife.net/diy-moss-wall-art/">moss art for the secret garden</a>. It turned out even better than I had hoped. Not only does the word "grow" seem fitting for a garden, but it is one of my favorite words since my goal is to grow and be better each day.</p> <div class="wp-block-image"> <figure class="aligncenter size-full is-resized"><a href="https://www.notjustahousewife.net/wp-content/uploads/2023/10/DIY-moss-wall-art-2.jpg"><img loading="lazy" decoding="async" width="600" height="852" src="https://www.notjustahousewife.net/wp-content/uploads/2023/10/DIY-moss-wall-art-2.jpg" alt="" class="wp-image-26809" style="aspect-ratio:0.704225352112676;width:501px;height:auto" srcset="https://www.notjustahousewife.net/wp-content/uploads/2023/10/DIY-moss-wall-art-2.jpg 600w, https://www.notjustahousewife.net/wp-content/uploads/2023/10/DIY-moss-wall-art-2-211x300.jpg 211w, https://www.notjustahousewife.net/wp-content/uploads/2023/10/DIY-moss-wall-art-2-150x213.jpg 150w" sizes="(max-width: 600px) 100vw, 600px" /></a></figure></div> <h3 class="wp-block-heading"><a href="https://www.notjustahousewife.net/5-simple-tips-for-creating-beautiful-bouquets/">#6 Floral Arranging</a></h3> <p>The best thing about <a href="https://www.notjustahousewife.net/5-simple-tips-for-creating-beautiful-bouquets/">floral arranging</a> is, there is no "right" way. I did share some tips to make it a bit easier to get started. Including my favorite fillers and greenery that can come from your garden and yard!</p> <div class="wp-block-image"> <figure class="aligncenter size-full is-resized"><a href="https://www.notjustahousewife.net/wp-content/uploads/2023/09/how-to-create-floral-arrangments-at-home.jpg"><img loading="lazy" decoding="async" width="600" height="900" src="https://www.notjustahousewife.net/wp-content/uploads/2023/09/how-to-create-floral-arrangments-at-home.jpg" alt="" class="wp-image-26652" style="aspect-ratio:0.6666666666666666;width:500px;height:auto" srcset="https://www.notjustahousewife.net/wp-content/uploads/2023/09/how-to-create-floral-arrangments-at-home.jpg 600w, https://www.notjustahousewife.net/wp-content/uploads/2023/09/how-to-create-floral-arrangments-at-home-200x300.jpg 200w, https://www.notjustahousewife.net/wp-content/uploads/2023/09/how-to-create-floral-arrangments-at-home-150x225.jpg 150w" sizes="(max-width: 600px) 100vw, 600px" /></a></figure></div> <h3 class="wp-block-heading"><a href="https://www.notjustahousewife.net/diy-valentines-wreath/">#7 Valentine Wreath</a></h3> <p>I'm not sure why I like Valentine's Day so much, but I do! I ended up doing a few different Valentine crafts to get my mantel all gussied up. <a href="https://www.notjustahousewife.net/diy-valentines-wreath/">The heart wreath</a> was my favorite.</p> <div class="wp-block-image"> <figure class="aligncenter size-full is-resized"><a href="https://www.notjustahousewife.net/wp-content/uploads/2023/02/DIY-valentines-day-wreath.jpg"><img loading="lazy" decoding="async" width="600" height="900" src="https://www.notjustahousewife.net/wp-content/uploads/2023/02/DIY-valentines-day-wreath.jpg" alt="" class="wp-image-25371" style="aspect-ratio:0.6666666666666666;width:501px;height:auto" srcset="https://www.notjustahousewife.net/wp-content/uploads/2023/02/DIY-valentines-day-wreath.jpg 600w, https://www.notjustahousewife.net/wp-content/uploads/2023/02/DIY-valentines-day-wreath-200x300.jpg 200w, https://www.notjustahousewife.net/wp-content/uploads/2023/02/DIY-valentines-day-wreath-150x225.jpg 150w" sizes="(max-width: 600px) 100vw, 600px" /></a></figure></div> <h3 class="wp-block-heading"><a href="https://www.notjustahousewife.net/diy-ghost-candle/">#8 Ghost Candle</a></h3> <p>Unlike Valentine's Day, I do not love Halloween. But my kids do, so I have always at least decorated the mantel for their enjoyment. I made <a href="https://www.notjustahousewife.net/diy-ghost-candle/">these candle holders</a> and I have to admit, I really thought they turned out cute! </p> <div class="wp-block-image"> <figure class="aligncenter size-full is-resized"><a href="https://www.notjustahousewife.net/wp-content/uploads/2023/10/ghost-candle-holder-tall.jpg"><img loading="lazy" decoding="async" width="600" height="900" src="https://www.notjustahousewife.net/wp-content/uploads/2023/10/ghost-candle-holder-tall.jpg" alt="" class="wp-image-26829" style="aspect-ratio:0.6666666666666666;width:501px;height:auto" srcset="https://www.notjustahousewife.net/wp-content/uploads/2023/10/ghost-candle-holder-tall.jpg 600w, https://www.notjustahousewife.net/wp-content/uploads/2023/10/ghost-candle-holder-tall-200x300.jpg 200w, https://www.notjustahousewife.net/wp-content/uploads/2023/10/ghost-candle-holder-tall-150x225.jpg 150w" sizes="(max-width: 600px) 100vw, 600px" /></a></figure></div> <h3 class="wp-block-heading"><a href="https://www.notjustahousewife.net/growing-herbs-annual-vs-perennial-herbs/">#9 Growing Herbs </a></h3> <p>Working at my neighbors garden center and nursery, we got asked a lot of questions about <a href="https://www.notjustahousewife.net/growing-herbs-annual-vs-perennial-herbs/">growing herbs</a>. I thought it would be a good idea to write a post all about growing herbs. Annuals VS perennials, how to care for each of them, and how to use them in your home. It was fun to write! I love herbs :) </p> <div class="wp-block-image"> <figure class="aligncenter size-large is-resized"><a href="https://www.notjustahousewife.net/wp-content/uploads/2023/04/growing-herbs-annual-vs-perennial.jpg"><img loading="lazy" decoding="async" width="683" height="1024" src="https://www.notjustahousewife.net/wp-content/uploads/2023/04/growing-herbs-annual-vs-perennial-683x1024.jpg" alt="" class="wp-image-25617" style="aspect-ratio:0.6669921875;width:500px;height:auto" srcset="https://www.notjustahousewife.net/wp-content/uploads/2023/04/growing-herbs-annual-vs-perennial-683x1024.jpg 683w, https://www.notjustahousewife.net/wp-content/uploads/2023/04/growing-herbs-annual-vs-perennial-200x300.jpg 200w, https://www.notjustahousewife.net/wp-content/uploads/2023/04/growing-herbs-annual-vs-perennial-768x1152.jpg 768w, https://www.notjustahousewife.net/wp-content/uploads/2023/04/growing-herbs-annual-vs-perennial-150x225.jpg 150w, https://www.notjustahousewife.net/wp-content/uploads/2023/04/growing-herbs-annual-vs-perennial.jpg 1000w" sizes="(max-width: 683px) 100vw, 683px" /></a></figure></div> <h3 class="wp-block-heading"><a href="https://www.notjustahousewife.net/unique-terrarium-ideas/">#10 Gumball Terrarium</a></h3> <p>You know when you have had an idea in your head for a LONG time and you finally get around to making it happen? That was this <a href="https://www.notjustahousewife.net/unique-terrarium-ideas/">gumball terrarium </a>project! I love how it turned out. It is currently living in my son's dorm at college since he loved it too. </p> <div class="wp-block-image"> <figure class="aligncenter size-full is-resized"><a href="https://www.notjustahousewife.net/wp-content/uploads/2023/08/DIY-gumball-machine-terrarium-1.jpg"><img loading="lazy" decoding="async" width="600" height="900" src="https://www.notjustahousewife.net/wp-content/uploads/2023/08/DIY-gumball-machine-terrarium-1.jpg" alt="" class="wp-image-26586" style="aspect-ratio:0.6666666666666666;width:500px;height:auto" srcset="https://www.notjustahousewife.net/wp-content/uploads/2023/08/DIY-gumball-machine-terrarium-1.jpg 600w, https://www.notjustahousewife.net/wp-content/uploads/2023/08/DIY-gumball-machine-terrarium-1-200x300.jpg 200w, https://www.notjustahousewife.net/wp-content/uploads/2023/08/DIY-gumball-machine-terrarium-1-150x225.jpg 150w" sizes="(max-width: 600px) 100vw, 600px" /></a></figure></div> <h4 class="wp-block-heading">I hope you were also able to find time to create. I'd love to know what some of your favorite projects that you were able to get done this year were! Share in the comments below. </h4> <div style="margin-top: 0px; margin-bottom: 0px;" class="sharethis-inline-share-buttons" ></div> ]]>
</content:encoded>
<wfw:commentRss>https://www.notjustahousewife.net/top-10-posts-2023/feed/</wfw:commentRss>
<slash:comments>2</slash:comments>
</item>
<item>
<title>My Fireplace Makeover!</title>
<link>https://www.notjustahousewife.net/green-fireplace-makeover/</link>
<comments>https://www.notjustahousewife.net/green-fireplace-makeover/#comments</comments>
<dc:creator>
<![CDATA[ Stacy ]]>
</dc:creator>
<pubDate>Tue, 19 Dec 2023 22:11:18 +0000</pubDate>
<category>
<![CDATA[ DIY Projects & Tutorials ]]>
</category>
<guid isPermaLink="false">https://www.notjustahousewife.net/?p=26987</guid>
<description>
<![CDATA[ I don't know what possessed me to start a fireplace makeover in December as the totes full of Christmas decor were stacked in the family room, but I did. I also have a severe case of "I think a project will take less time than it really will" syndrome. Call it optimism or over confidence,...</p><p><a class="more-link" href="https://www.notjustahousewife.net/green-fireplace-makeover/">Read More</a></p> ]]>
</description>
<content:encoded>
<![CDATA[ <p>I don't know what possessed me to start a fireplace makeover in December as the totes full of Christmas decor were stacked in the family room, but I did. I also have a severe case of "I think a project will take less time than it really will" syndrome. Call it optimism or over confidence, but I genuinely thought we could knock this project out in a few days. Almost 2 weeks later.... The fireplace makeover is done! </p> <p class="has-text-align-center"><em>Keep reading to the end to see it decorated for Christmas</em>!</p> <div class="wp-block-image"> <figure class="aligncenter size-full"><a href="https://www.notjustahousewife.net/wp-content/uploads/2023/12/fireplace-makeover-after.jpg"><img loading="lazy" decoding="async" width="600" height="600" src="https://www.notjustahousewife.net/wp-content/uploads/2023/12/fireplace-makeover-after.jpg" alt="" class="wp-image-26997" srcset="https://www.notjustahousewife.net/wp-content/uploads/2023/12/fireplace-makeover-after.jpg 600w, https://www.notjustahousewife.net/wp-content/uploads/2023/12/fireplace-makeover-after-300x300.jpg 300w, https://www.notjustahousewife.net/wp-content/uploads/2023/12/fireplace-makeover-after-150x150.jpg 150w, https://www.notjustahousewife.net/wp-content/uploads/2023/12/fireplace-makeover-after-360x360.jpg 360w, https://www.notjustahousewife.net/wp-content/uploads/2023/12/fireplace-makeover-after-180x180.jpg 180w, https://www.notjustahousewife.net/wp-content/uploads/2023/12/fireplace-makeover-after-250x250.jpg 250w, https://www.notjustahousewife.net/wp-content/uploads/2023/12/fireplace-makeover-after-40x40.jpg 40w, https://www.notjustahousewife.net/wp-content/uploads/2023/12/fireplace-makeover-after-96x96.jpg 96w" sizes="(max-width: 600px) 100vw, 600px" /></a></figure></div> <h3 class="wp-block-heading">Fireplace Before</h3> <p>Shane and I built this fireplace about 12 years ago. It has worked well for us but there have always been things about it that I didn't love. In order for it to have as much DVD storage as we needed, we built it pretty deep. As a result, it looked more like a piece of furniture than an actual fireplace. </p> <div class="wp-block-image"> <figure class="aligncenter size-full"><a href="https://www.notjustahousewife.net/wp-content/uploads/2019/03/fireplace-with-hidden-storage.png"><img loading="lazy" decoding="async" width="500" height="750" src="https://www.notjustahousewife.net/wp-content/uploads/2019/03/fireplace-with-hidden-storage.png" alt="" class="wp-image-20081" srcset="https://www.notjustahousewife.net/wp-content/uploads/2019/03/fireplace-with-hidden-storage.png 500w, https://www.notjustahousewife.net/wp-content/uploads/2019/03/fireplace-with-hidden-storage-200x300.png 200w" sizes="(max-width: 500px) 100vw, 500px" /></a></figure></div> <h4 class="wp-block-heading">#1 Change: Cut it in half to make it more shallow.</h4> <p>The walls in the family room are white. So is the rug. So the fireplace being mostly white made this section of the room seem <em>too</em> white. It also made the room seem unbalanced since there are shelves filled with books, large indoor trees, and cabinets in the rest of the space. </p> <h4 class="wp-block-heading">#2 Change: Paint the fireplace something other than white.</h4> <p>The "tile" on the fireplace was actually wallpaper with a raised pattern that I painted. Remember forever ago when it was painted gold? </p> <div class="wp-block-image"> <figure class="aligncenter size-large is-resized"><a href="https://www.notjustahousewife.net/wp-content/uploads/2015/07/fireplace-before.jpg"><img loading="lazy" decoding="async" width="700" height="1024" src="https://www.notjustahousewife.net/wp-content/uploads/2015/07/fireplace-before-700x1024.jpg" alt="" class="wp-image-11304" style="aspect-ratio:0.68359375;width:501px;height:auto" srcset="https://www.notjustahousewife.net/wp-content/uploads/2015/07/fireplace-before-700x1024.jpg 700w, https://www.notjustahousewife.net/wp-content/uploads/2015/07/fireplace-before-205x300.jpg 205w, https://www.notjustahousewife.net/wp-content/uploads/2015/07/fireplace-before-900x1316.jpg 900w" sizes="(max-width: 700px) 100vw, 700px" /></a></figure></div> <h4 class="wp-block-heading">#3 Change: Use actual tile for the surround.</h4> <p>The fireplace sits on top of a cold air return vent. In the past, to compensate, we added a wood shim under the other side to keep it more level. But that made it so there was a gap all across the front. It always bothered me. </p> <h4 class="wp-block-heading">#4 Change: Create new vent cover.</h4> <p>The old version of our fireplace never had a back. We added an electric fireplace insert at first, but when it broke, it was just an open cavity. We always meant to add a back, but never did. I stuck a board that I painted black behind it so you couldn't see the white wall, but it wasn't even the right size.</p> <h4 class="wp-block-heading">#5 Change: Make an actual backing/insert.</h4> <div class="wp-block-image"> <figure class="aligncenter size-full"><a href="https://www.notjustahousewife.net/wp-content/uploads/2019/10/living-room-firelpace.png"><img loading="lazy" decoding="async" width="500" height="750" src="https://www.notjustahousewife.net/wp-content/uploads/2019/10/living-room-firelpace.png" alt="" class="wp-image-21167" srcset="https://www.notjustahousewife.net/wp-content/uploads/2019/10/living-room-firelpace.png 500w, https://www.notjustahousewife.net/wp-content/uploads/2019/10/living-room-firelpace-200x300.png 200w" sizes="(max-width: 500px) 100vw, 500px" /></a></figure></div> <h2 class="wp-block-heading">Fireplace Makeover Reveal!</h2> <p>We cut 7 inches off the depth of the fireplace making it only 8 inches deep now. I also cut out along the bottom of the side pieces to fit around the baseboard. Now it is right up against the wall! </p> <div class="wp-block-image"> <figure class="aligncenter size-full is-resized"><a href="https://www.notjustahousewife.net/wp-content/uploads/2023/12/green-fireplace-makeover.jpg"><img loading="lazy" decoding="async" width="600" height="811" src="https://www.notjustahousewife.net/wp-content/uploads/2023/12/green-fireplace-makeover.jpg" alt="" class="wp-image-26990" style="aspect-ratio:0.7398273736128237;width:502px;height:auto" srcset="https://www.notjustahousewife.net/wp-content/uploads/2023/12/green-fireplace-makeover.jpg 600w, https://www.notjustahousewife.net/wp-content/uploads/2023/12/green-fireplace-makeover-222x300.jpg 222w, https://www.notjustahousewife.net/wp-content/uploads/2023/12/green-fireplace-makeover-150x203.jpg 150w" sizes="(max-width: 600px) 100vw, 600px" /></a></figure></div> <p>We painted it green since it is our favorite color and since there are a lot of green tones in this space already. The paint color I chose <em>Conifer Green</em> by Behr. I had it mixed at 75% so it would be slightly lighter. I think it is the perfect sagey green!</p> <p>The reason I didn't do this project sooner was I was torn on what tile to pick. I was going to stick with black for the surround like the orginal, but I couldn't settle on one I liked well enough to pull the trigger and order. When I was browsing the Home Depot website, I stumbled upon this checkerboard tile and fell in love. It reminded me of <a href="https://www.notjustahousewife.net/kitchen/">my kitchen ceiling</a>. </p> <p>Since an entire case would have been way too much tile for this little project, I ordered sample tiles. I only needed 12 tiles total. </p> <p>I decided to set the fireplace in its place and secure it to the wall without the vent cover on. This way it would be level on the floor without having to add a shim and have any gaps. Then I built a new cover that was shorter than the original one to fit over the vent hole. </p> <div class="wp-block-image"> <figure class="aligncenter size-full is-resized"><a href="https://www.notjustahousewife.net/wp-content/uploads/2023/12/vent-by-fireplace.jpg"><img loading="lazy" decoding="async" width="600" height="900" src="https://www.notjustahousewife.net/wp-content/uploads/2023/12/vent-by-fireplace.jpg" alt="" class="wp-image-26993" style="aspect-ratio:0.6666666666666666;width:502px;height:auto" srcset="https://www.notjustahousewife.net/wp-content/uploads/2023/12/vent-by-fireplace.jpg 600w, https://www.notjustahousewife.net/wp-content/uploads/2023/12/vent-by-fireplace-200x300.jpg 200w, https://www.notjustahousewife.net/wp-content/uploads/2023/12/vent-by-fireplace-150x225.jpg 150w" sizes="(max-width: 600px) 100vw, 600px" /></a></figure></div> <p>I haven't sealed it with polyurethane yet, but I am really happy with how close I was able to match the stain to the flooring! </p> <div class="wp-block-image"> <figure class="aligncenter size-full is-resized"><a href="https://www.notjustahousewife.net/wp-content/uploads/2023/12/new-wood-vent-cover.jpg"><img loading="lazy" decoding="async" width="600" height="800" src="https://www.notjustahousewife.net/wp-content/uploads/2023/12/new-wood-vent-cover.jpg" alt="" class="wp-image-26995" style="aspect-ratio:0.75;width:505px;height:auto" srcset="https://www.notjustahousewife.net/wp-content/uploads/2023/12/new-wood-vent-cover.jpg 600w, https://www.notjustahousewife.net/wp-content/uploads/2023/12/new-wood-vent-cover-225x300.jpg 225w, https://www.notjustahousewife.net/wp-content/uploads/2023/12/new-wood-vent-cover-150x200.jpg 150w" sizes="(max-width: 600px) 100vw, 600px" /></a></figure></div> <p>Real fireplaces have a brick background and I wanted mine to look as real as possible. I thought I had some of the brick paneling left over from doing <a href="https://www.notjustahousewife.net/faux-brick-wall/">our faux brick wall</a>, but we didn't. I wasn't willing to pay almost $50 for a whole 4x8 sheet when I only needed a little bit, so I created my own! </p> <div class="wp-block-image"> <figure class="aligncenter size-full is-resized"><a href="https://www.notjustahousewife.net/wp-content/uploads/2023/12/making-faux-brick-panels.jpg"><img loading="lazy" decoding="async" width="700" height="500" src="https://www.notjustahousewife.net/wp-content/uploads/2023/12/making-faux-brick-panels.jpg" alt="" class="wp-image-26991" style="aspect-ratio:1.4;width:603px;height:auto" srcset="https://www.notjustahousewife.net/wp-content/uploads/2023/12/making-faux-brick-panels.jpg 700w, https://www.notjustahousewife.net/wp-content/uploads/2023/12/making-faux-brick-panels-300x214.jpg 300w, https://www.notjustahousewife.net/wp-content/uploads/2023/12/making-faux-brick-panels-150x107.jpg 150w" sizes="(max-width: 700px) 100vw, 700px" /></a></figure></div> <p>I cut some scrap pieces of plywood I had in the garage into panels. Then I used washi tape to create a brick pattern. I was worried at first because the tape was not sticking well to the plywood. I slathered some drywall mud (joint compound) onto the boards and used a putty knife to spread it around. When I peeled the tape off, it left depressions which looked like grout lines.</p> <p>I think it looks pretty convincing! </p> <div class="wp-block-image"> <figure class="aligncenter size-full is-resized"><a href="https://www.notjustahousewife.net/wp-content/uploads/2023/12/fau-brick-fireplace-insert.jpg"><img loading="lazy" decoding="async" width="600" height="900" src="https://www.notjustahousewife.net/wp-content/uploads/2023/12/fau-brick-fireplace-insert.jpg" alt="" class="wp-image-26989" style="aspect-ratio:0.6666666666666666;width:503px;height:auto" srcset="https://www.notjustahousewife.net/wp-content/uploads/2023/12/fau-brick-fireplace-insert.jpg 600w, https://www.notjustahousewife.net/wp-content/uploads/2023/12/fau-brick-fireplace-insert-200x300.jpg 200w, https://www.notjustahousewife.net/wp-content/uploads/2023/12/fau-brick-fireplace-insert-150x225.jpg 150w" sizes="(max-width: 600px) 100vw, 600px" /></a></figure></div> <p>Since we cut it to be shallower, we could no longer have slide out storage. But I still wanted to have a place for DVDs. We now have those front panels as doors that open like cabinets. The shelves inside hold 98 DVDs. We also put DVDs in the top panel with the DVD player. Since we did lose some storage space, the DVDs of little kids movies or things that are easily streamed, got put away in the attic. </p> <div class="wp-block-image"> <figure class="aligncenter size-full is-resized"><a href="https://www.notjustahousewife.net/wp-content/uploads/2023/12/fireplace-storage.jpg"><img loading="lazy" decoding="async" width="600" height="800" src="https://www.notjustahousewife.net/wp-content/uploads/2023/12/fireplace-storage.jpg" alt="" class="wp-image-26996" style="aspect-ratio:0.75;width:600px;height:auto" srcset="https://www.notjustahousewife.net/wp-content/uploads/2023/12/fireplace-storage.jpg 600w, https://www.notjustahousewife.net/wp-content/uploads/2023/12/fireplace-storage-225x300.jpg 225w, https://www.notjustahousewife.net/wp-content/uploads/2023/12/fireplace-storage-150x200.jpg 150w" sizes="(max-width: 600px) 100vw, 600px" /></a></figure></div> <p>While the timing of this project was probably not ideal, I am happy that we got this project done in time to decorate it for Christmas. Would it have been easier to build a new one from scratch? Probably. But I am a big believer in using what you have already and not wasting materials. </p> <div class="wp-block-image"> <figure class="aligncenter size-full is-resized"><a href="https://www.notjustahousewife.net/wp-content/uploads/2023/12/green-christmas-fireplace-mantel.jpg"><img loading="lazy" decoding="async" width="600" height="836" src="https://www.notjustahousewife.net/wp-content/uploads/2023/12/green-christmas-fireplace-mantel.jpg" alt="" class="wp-image-26998" style="aspect-ratio:0.7177033492822966;width:545px;height:auto" srcset="https://www.notjustahousewife.net/wp-content/uploads/2023/12/green-christmas-fireplace-mantel.jpg 600w, https://www.notjustahousewife.net/wp-content/uploads/2023/12/green-christmas-fireplace-mantel-215x300.jpg 215w, https://www.notjustahousewife.net/wp-content/uploads/2023/12/green-christmas-fireplace-mantel-150x209.jpg 150w" sizes="(max-width: 600px) 100vw, 600px" /></a></figure></div> <p>I have plans for more changes in the family room, but I will wait until after the first of the year to start more projects :) So stay tuned for a family room refresh!</p> <p><strong>UPDATE:</strong></p> <p>I ended up painting it a darker green and I love it with more contrast!</p> <div class="wp-block-image"> <figure class="aligncenter size-large is-resized"><a href="https://www.notjustahousewife.net/wp-content/uploads/2023/12/dark-dreen-fireplace-makeover.jpg"><img loading="lazy" decoding="async" width="716" height="1024" src="https://www.notjustahousewife.net/wp-content/uploads/2023/12/dark-dreen-fireplace-makeover-716x1024.jpg" alt="" class="wp-image-27614" style="width:502px;height:auto" srcset="https://www.notjustahousewife.net/wp-content/uploads/2023/12/dark-dreen-fireplace-makeover-716x1024.jpg 716w, https://www.notjustahousewife.net/wp-content/uploads/2023/12/dark-dreen-fireplace-makeover-210x300.jpg 210w, https://www.notjustahousewife.net/wp-content/uploads/2023/12/dark-dreen-fireplace-makeover-768x1098.jpg 768w, https://www.notjustahousewife.net/wp-content/uploads/2023/12/dark-dreen-fireplace-makeover-150x215.jpg 150w, https://www.notjustahousewife.net/wp-content/uploads/2023/12/dark-dreen-fireplace-makeover.jpg 1000w" sizes="(max-width: 716px) 100vw, 716px" /></a></figure></div><div style="margin-top: 0px; margin-bottom: 0px;" class="sharethis-inline-share-buttons" ></div> ]]>
</content:encoded>
<wfw:commentRss>https://www.notjustahousewife.net/green-fireplace-makeover/feed/</wfw:commentRss>
<slash:comments>4</slash:comments>
</item>
<item>
<title>DIY Ornaments Made With a Heat Gun</title>
<link>https://www.notjustahousewife.net/diy-ornaments-made-with-a-heat-gun/</link>
<comments>https://www.notjustahousewife.net/diy-ornaments-made-with-a-heat-gun/#comments</comments>
<dc:creator>
<![CDATA[ Stacy ]]>
</dc:creator>
<pubDate>Tue, 28 Nov 2023 20:01:13 +0000</pubDate>
<category>
<![CDATA[ Holiday ]]>
</category>
<category>
<![CDATA[ christmas ]]>
</category>
<category>
<![CDATA[ diy ]]>
</category>
<category>
<![CDATA[ diy project ]]>
</category>
<category>
<![CDATA[ heat gun ]]>
</category>
<category>
<![CDATA[ ornament ]]>
</category>
<category>
<![CDATA[ scrap wood ]]>
</category>
<guid isPermaLink="false">https://www.notjustahousewife.net/?p=26904</guid>
<description>
<![CDATA[ I LOVE handmade ornaments! There's no better way to save money and customize your tree than with ornaments you have made. If you make them with found items or things you have already at home, even better. It is not only a beautiful way to decorate your tree, it is a fun activity to get...</p><p><a class="more-link" href="https://www.notjustahousewife.net/diy-ornaments-made-with-a-heat-gun/">Read More</a></p> ]]>
</description>
<content:encoded>
<![CDATA[ <p>I LOVE handmade ornaments! There's no better way to save money and customize your tree than with ornaments you have made. If you make them with found items or things you have already at home, even better. It is not only a beautiful way to decorate your tree, it is a fun activity to get into the Christmas mood! These ideas I am sharing today all use one of my favorite crafting tools, a heat gun! </p> <p class="has-text-align-center"><em>This post is sponsored by HomeRight but all ideas and opinions are 100% my own :)</em></p> <div class="wp-block-image"> <figure class="aligncenter size-full is-resized"><a href="https://www.notjustahousewife.net/wp-content/uploads/2023/11/ornaments-made-with-a-heat-gun.jpg"><img loading="lazy" decoding="async" width="600" height="900" src="https://www.notjustahousewife.net/wp-content/uploads/2023/11/ornaments-made-with-a-heat-gun.jpg" alt="collage of ornaments made with a heat gun" class="wp-image-26911" style="aspect-ratio:0.6666666666666666;width:500px;height:auto" srcset="https://www.notjustahousewife.net/wp-content/uploads/2023/11/ornaments-made-with-a-heat-gun.jpg 600w, https://www.notjustahousewife.net/wp-content/uploads/2023/11/ornaments-made-with-a-heat-gun-200x300.jpg 200w, https://www.notjustahousewife.net/wp-content/uploads/2023/11/ornaments-made-with-a-heat-gun-150x225.jpg 150w" sizes="(max-width: 600px) 100vw, 600px" /></a></figure></div> <h2 class="wp-block-heading">Ornaments Made With A Heat Gun</h2> <p>A Heat gun is a handy tool to have if you are a crafter and/or a DIYer. I have shared many projects over the years where I have used them for all sorts of things. These are my favorite ornaments that I have made using a heat gun!</p> <h3 class="wp-block-heading">Wood Burning With A Scortch Pen</h3> <p>Last year I made <a href="https://www.notjustahousewife.net/diy-garden-markers/">garden markers</a> using this method and ever since I have wanted to try making more things with the scorch pen. Wood slice ornaments seemed like the perfect way! </p> <h4 class="wp-block-heading">Supplies:</h4> <p><a href="https://amzn.to/3GmjwRQ" target="_blank" rel="noreferrer noopener nofollow">Wood Scorch Pen</a></p> <p><a href="https://amzn.to/46zQNUf" target="_blank" rel="noreferrer noopener nofollow">Wood Slices</a></p> <p><a href="https://amzn.to/47zDeFV" target="_blank" rel="noreferrer noopener nofollow">Heat Gun</a></p> <p>Stencils or Vinyl </p> <p>I cut my own wood slices with the miter saw with branches from my yard, but if you aren't comfortable using power tools, you can easily buy them at craft stores or on Amazon. </p> <p>Using the scorch pen, add your design. If I am drawing it on, I like to draw it with pencil first. Draw it on lightly and then you can go over it with the wood burning pen. </p> <p>If you are using a stencil, it is very important to prep your pen properly since they have a tendency to bleed. You will need to push down on the pen tip to get the ink to flow to the tip. At first, it will come out heavily. I use a scrap piece of paper or wood to write on until the ink comes out only a little at a time. Now you are ready to fill in your stencil design.</p> <p><em>*If you do experience bleeding, it is easier to wood burn it with the heat gun and then sand it off than it is to try to sand or clean off the wet ink. Once burned, it sands off fairly easily with 120 grit sandpaper. Then you don't waste a wood slice!</em></p> <div class="wp-block-image"> <figure class="aligncenter size-full is-resized"><a href="https://www.notjustahousewife.net/wp-content/uploads/2023/11/heat-gun-wood-burning-ornaments.jpg"><img loading="lazy" decoding="async" width="600" height="900" src="https://www.notjustahousewife.net/wp-content/uploads/2023/11/heat-gun-wood-burning-ornaments.jpg" alt="collage of steps to make wood burned ornaments" class="wp-image-26907" style="aspect-ratio:0.6666666666666666;width:500px;height:auto" srcset="https://www.notjustahousewife.net/wp-content/uploads/2023/11/heat-gun-wood-burning-ornaments.jpg 600w, https://www.notjustahousewife.net/wp-content/uploads/2023/11/heat-gun-wood-burning-ornaments-200x300.jpg 200w, https://www.notjustahousewife.net/wp-content/uploads/2023/11/heat-gun-wood-burning-ornaments-150x225.jpg 150w" sizes="(max-width: 600px) 100vw, 600px" /></a></figure></div> <p>Then the magic happens! Place your heat gun over the wood slice and watch the heat transform and burn the design into the wood! It is so fun to watch! I have a video below so you can watch it happen. </p> <div class="wp-block-image"> <figure class="aligncenter size-full is-resized"><a href="https://www.notjustahousewife.net/wp-content/uploads/2023/11/wood-burned-ornament.jpg"><img loading="lazy" decoding="async" width="600" height="900" src="https://www.notjustahousewife.net/wp-content/uploads/2023/11/wood-burned-ornament.jpg" alt="wood burned ornament made with heat gun" class="wp-image-26910" style="aspect-ratio:0.6666666666666666;width:501px;height:auto" srcset="https://www.notjustahousewife.net/wp-content/uploads/2023/11/wood-burned-ornament.jpg 600w, https://www.notjustahousewife.net/wp-content/uploads/2023/11/wood-burned-ornament-200x300.jpg 200w, https://www.notjustahousewife.net/wp-content/uploads/2023/11/wood-burned-ornament-150x225.jpg 150w" sizes="(max-width: 600px) 100vw, 600px" /></a></figure></div> <p>What designs or words would you wood burn into your ornaments? </p> <div class="wp-block-image"> <figure class="aligncenter size-full is-resized"><a href="https://www.notjustahousewife.net/wp-content/uploads/2023/11/wood-slice-wood-burned-ornaments.jpg"><img loading="lazy" decoding="async" width="600" height="900" src="https://www.notjustahousewife.net/wp-content/uploads/2023/11/wood-slice-wood-burned-ornaments.jpg" alt="wood burned ornament with heat gun and scorch pen" class="wp-image-26909" style="aspect-ratio:0.6666666666666666;width:501px;height:auto" srcset="https://www.notjustahousewife.net/wp-content/uploads/2023/11/wood-slice-wood-burned-ornaments.jpg 600w, https://www.notjustahousewife.net/wp-content/uploads/2023/11/wood-slice-wood-burned-ornaments-200x300.jpg 200w, https://www.notjustahousewife.net/wp-content/uploads/2023/11/wood-slice-wood-burned-ornaments-150x225.jpg 150w" sizes="(max-width: 600px) 100vw, 600px" /></a></figure></div> <p></p> <center><iframe loading="lazy" width="331" height="588" src="https://www.youtube.com/embed/7n7WoJwZ2g0" title="Wood Burned Christmas Ornaments!" frameborder="0" allow="accelerometer; autoplay; clipboard-write; encrypted-media; gyroscope; picture-in-picture; web-share" allowfullscreen></iframe><center> <h3 class="wp-block-heading has-text-align-left">Heat Embossed Ornaments</h3> <p class="has-text-align-left">Last year I <a href="https://www.notjustahousewife.net/heat-embossed-gift-tags-cards/">embossed some holiday cards and gift tags</a>. I had done embossing with my mom when I was growing up and had forgotten just how much fun it was to do! Ever since, I have wanted an excuse to to put my embossing powder and these cute snowflake stamps to use again. So I decided to try heat embossing on wood!</p> <h4 class="wp-block-heading has-text-align-left">Supplies:</h4> <p class="has-text-align-left"><a href="https://amzn.to/47ADC6S" target="_blank" rel="noreferrer noopener nofollow">Wood Slices</a></p> <p class="has-text-align-left"><a href="https://amzn.to/416CuFJ" target="_blank" rel="noreferrer noopener nofollow">Heat Gun</a></p> <p class="has-text-align-left">Embossing Powder (<a href="https://amzn.to/3t0EYJ1" target="_blank" rel="noreferrer noopener nofollow">Gold</a>, <a href="https://amzn.to/40ZpiCw" target="_blank" rel="noreferrer noopener nofollow">Silver</a>, <a href="https://amzn.to/46zF9J6" target="_blank" rel="noreferrer noopener nofollow">White</a>)</p> <p class="has-text-align-left"><a href="https://amzn.to/3T32L5Y" target="_blank" rel="noreferrer noopener nofollow">Embossing Ink Pad</a></p> <p class="has-text-align-left"><a href="https://amzn.to/47QCETO" target="_blank" rel="noreferrer noopener nofollow">Stamps</a></p> <p class="has-text-align-left">I cut smaller wood slices. I made them tiny because it is good to have a variety of sized ornaments on your tree and also because the snowflake stamps I have are small. </p> <p class="has-text-align-left">Use an embossing stamp pad to add the ink to the stamp and then press it hard onto the wood slice. </p> <p class="has-text-align-left">Add your choice of colored embossing powder. I chose silver and gold. Dump the excess powder back into the jar. </p> <p></p> <div class="wp-block-image"> <figure class="aligncenter size-full is-resized"><a href="https://www.notjustahousewife.net/wp-content/uploads/2023/11/heat-embossed-wood-ornaments.jpg"><img loading="lazy" decoding="async" width="600" height="900" src="https://www.notjustahousewife.net/wp-content/uploads/2023/11/heat-embossed-wood-ornaments.jpg" alt="collage of steps to make heat embossed ornaments" class="wp-image-26905" style="aspect-ratio:0.6666666666666666;width:501px;height:auto" srcset="https://www.notjustahousewife.net/wp-content/uploads/2023/11/heat-embossed-wood-ornaments.jpg 600w, https://www.notjustahousewife.net/wp-content/uploads/2023/11/heat-embossed-wood-ornaments-200x300.jpg 200w, https://www.notjustahousewife.net/wp-content/uploads/2023/11/heat-embossed-wood-ornaments-150x225.jpg 150w" sizes="(max-width: 600px) 100vw, 600px" /></a></figure></div> <p class="has-text-align-left">Use the heat gun to melt the embossing powder. It is so fun to watch it turn shiny! I used the Wagner HT400 heat gun. It is very affordable and small which makes it perfect for crafting. </p> <p class="has-text-align-left">Drill a small hole in the wood so you can hang it on your tree. </p> <div class="wp-block-image"> <figure class="aligncenter size-full is-resized"><a href="https://www.notjustahousewife.net/wp-content/uploads/2023/11/wood-heat-embossed-ornaments.jpg"><img loading="lazy" decoding="async" width="600" height="900" src="https://www.notjustahousewife.net/wp-content/uploads/2023/11/wood-heat-embossed-ornaments.jpg" alt="embossed ornaments" class="wp-image-26908" style="aspect-ratio:0.6666666666666666;width:504px;height:auto" srcset="https://www.notjustahousewife.net/wp-content/uploads/2023/11/wood-heat-embossed-ornaments.jpg 600w, https://www.notjustahousewife.net/wp-content/uploads/2023/11/wood-heat-embossed-ornaments-200x300.jpg 200w, https://www.notjustahousewife.net/wp-content/uploads/2023/11/wood-heat-embossed-ornaments-150x225.jpg 150w" sizes="(max-width: 600px) 100vw, 600px" /></a></figure></div> <p class="has-text-align-left">Here is a video so you can better see the process of the embossing powder heating up. </p> <center><iframe loading="lazy" width="331" height="588" src="https://www.youtube.com/embed/yXpMpQC_p3U" title="Embossed Christmas Ornaments" frameborder="0" allow="accelerometer; autoplay; clipboard-write; encrypted-media; gyroscope; picture-in-picture; web-share" allowfullscreen></iframe><center> <p class="has-text-align-center"><strong>Here are some other ornaments I have made in the past using a heat gun.</strong></p> <h3 class="wp-block-heading has-text-align-left">DIY Icicle Ornaments </h3> <p class="has-text-align-left">I first shared these <a href="https://www.notjustahousewife.net/diy-icicle-ornament/">icicle ornaments</a> back in 2014. I made a bunch more last year since my theme for my tree was winter wonderland. It was oddly satisfying to heat and twist the plexiglass! </p> <div class="wp-block-image"> <figure class="aligncenter size-full is-resized"><a href="https://www.notjustahousewife.net/wp-content/uploads/2014/12/icicle-ornaments-DIY.jpg"><img loading="lazy" decoding="async" width="600" height="833" src="https://www.notjustahousewife.net/wp-content/uploads/2014/12/icicle-ornaments-DIY.jpg" alt="diy icicle ornament" class="wp-image-25133" style="aspect-ratio:0.7202881152460985;width:501px;height:auto" srcset="https://www.notjustahousewife.net/wp-content/uploads/2014/12/icicle-ornaments-DIY.jpg 600w, https://www.notjustahousewife.net/wp-content/uploads/2014/12/icicle-ornaments-DIY-216x300.jpg 216w, https://www.notjustahousewife.net/wp-content/uploads/2014/12/icicle-ornaments-DIY-150x208.jpg 150w" sizes="(max-width: 600px) 100vw, 600px" /></a></figure></div> <h3 class="wp-block-heading has-text-align-left">Resin Snowflake Ornaments</h3> <p class="has-text-align-left">Resin is so fun to work with! I create two types of <a href="https://www.notjustahousewife.net/snowflake-resin-ornaments/">resin ornaments</a> several years ago. I accidentally bought resin that turns white. It is a casting resin. But instead of being mad at my mistake, I had the idea to use them to make snowflake ornaments! I had a silicone mold already and they turned out great.</p> <div class="wp-block-image"> <figure class="aligncenter size-full"><a href="https://www.notjustahousewife.net/wp-content/uploads/2019/11/featured-image-resin-snowflakes.png"><img loading="lazy" decoding="async" width="500" height="500" src="https://www.notjustahousewife.net/wp-content/uploads/2019/11/featured-image-resin-snowflakes.png" alt="white resin snowflake ornaments" class="wp-image-21307" srcset="https://www.notjustahousewife.net/wp-content/uploads/2019/11/featured-image-resin-snowflakes.png 500w, https://www.notjustahousewife.net/wp-content/uploads/2019/11/featured-image-resin-snowflakes-150x150.png 150w, https://www.notjustahousewife.net/wp-content/uploads/2019/11/featured-image-resin-snowflakes-300x300.png 300w, https://www.notjustahousewife.net/wp-content/uploads/2019/11/featured-image-resin-snowflakes-110x110.png 110w, https://www.notjustahousewife.net/wp-content/uploads/2019/11/featured-image-resin-snowflakes-290x290.png 290w, https://www.notjustahousewife.net/wp-content/uploads/2019/11/featured-image-resin-snowflakes-250x250.png 250w" sizes="(max-width: 500px) 100vw, 500px" /></a></figure></div> <p class="has-text-align-left">The other kind of <a href="https://www.notjustahousewife.net/snowflake-resin-ornaments/">resin ornament</a> used snowflake confetti. I added clear resin, then added some confetti, and then another layer of resin. The heat hun is great for removing the air bubbles! </p> <div class="wp-block-image"> <figure class="aligncenter size-full"><a href="https://www.notjustahousewife.net/wp-content/uploads/2019/11/Snowflake-ornaments-made-from-resin.png"><img loading="lazy" decoding="async" width="500" height="750" src="https://www.notjustahousewife.net/wp-content/uploads/2019/11/Snowflake-ornaments-made-from-resin.png" alt="snowflake resin ornaments" class="wp-image-21294" srcset="https://www.notjustahousewife.net/wp-content/uploads/2019/11/Snowflake-ornaments-made-from-resin.png 500w, https://www.notjustahousewife.net/wp-content/uploads/2019/11/Snowflake-ornaments-made-from-resin-200x300.png 200w" sizes="(max-width: 500px) 100vw, 500px" /></a></figure></div> <p class="has-text-align-left"><strong>Do you enjoy making homemade ornaments? What have been some of your favorites you have made over the years? I would love to hear about them. Please share in the comments below :)</strong></p> <div style="margin-top: 0px; margin-bottom: 0px;" class="sharethis-inline-share-buttons" ></div> ]]>
</content:encoded>
<wfw:commentRss>https://www.notjustahousewife.net/diy-ornaments-made-with-a-heat-gun/feed/</wfw:commentRss>
<slash:comments>1</slash:comments>
</item>
<item>
<title>DIY Napkin Ring Ideas</title>
<link>https://www.notjustahousewife.net/diy-napkin-ring-ideas/</link>
<comments>https://www.notjustahousewife.net/diy-napkin-ring-ideas/#comments</comments>
<dc:creator>
<![CDATA[ Stacy ]]>
</dc:creator>
<pubDate>Sat, 18 Nov 2023 21:24:23 +0000</pubDate>
<category>
<![CDATA[ DIY Projects & Tutorials ]]>
</category>
<category>
<![CDATA[ Holiday ]]>
</category>
<category>
<![CDATA[ Uncategorized ]]>
</category>
<guid isPermaLink="false">https://www.notjustahousewife.net/?p=26886</guid>
<description>
<![CDATA[ It is that time of year when many are hosting dinners for the holidays. I thought it would be fun to share some DIY napkin ring ideas for your next table setting. Customize your place settings with these easy DIY napkin rings. They are the perfect addition to your holiday table decor!&#160; This post contains...</p><p><a class="more-link" href="https://www.notjustahousewife.net/diy-napkin-ring-ideas/">Read More</a></p> ]]>
</description>
<content:encoded>
<![CDATA[ <p>It is that time of year when many are hosting dinners for the holidays. I thought it would be fun to share some DIY napkin ring ideas for your next table setting. Customize your place settings with these easy DIY napkin rings. They are the perfect addition to your holiday table decor!&nbsp;</p> <p class="has-text-align-center"><em>This post contains affiliate links.</em></p> <div class="wp-block-image"> <figure class="aligncenter size-full is-resized"><a href="https://www.notjustahousewife.net/wp-content/uploads/2023/11/clay-stamped-napkin-ring-DIY.jpg"><img loading="lazy" decoding="async" width="600" height="900" src="https://www.notjustahousewife.net/wp-content/uploads/2023/11/clay-stamped-napkin-ring-DIY.jpg" alt="" class="wp-image-26892" style="aspect-ratio:0.6666666666666666;width:500px;height:auto" srcset="https://www.notjustahousewife.net/wp-content/uploads/2023/11/clay-stamped-napkin-ring-DIY.jpg 600w, https://www.notjustahousewife.net/wp-content/uploads/2023/11/clay-stamped-napkin-ring-DIY-200x300.jpg 200w, https://www.notjustahousewife.net/wp-content/uploads/2023/11/clay-stamped-napkin-ring-DIY-150x225.jpg 150w" sizes="(max-width: 600px) 100vw, 600px" /></a></figure></div> <h2 class="wp-block-heading">Napkin Ring Ideas</h2> <p>Whether you are hosting just a few, or you have a house full, these napkin rings are simple to make and are a great way to elevate your cloth napkins. They are such easy ideas that anyone can make. With just a few craft supplies, I have created 3 versions with different materials but now my mind is full of other ideas too!&nbsp;</p> <h3 class="wp-block-heading">Wood Burned Napkin Rings</h3> <p>Wood napkin rings are super affordable and since they come stained and sealed already, this is a super simple project. It won't take long to customize these wood ring napkin holders. If you have really nice handwriting, you can freehand it. I decided to write it on the wood napkin ring with a pencil before trying to wood burn it. </p> <p>I couldn't find my really pointy tip, so I used this rounded tip which ended up working really well. A <a href="https://amzn.to/3QOkCuu" target="_blank" rel="noreferrer noopener nofollow">wood burner</a> is a very inexpensive tool that I think all crafters should have. </p> <div class="wp-block-image"> <figure class="aligncenter size-full is-resized"><a href="https://www.notjustahousewife.net/wp-content/uploads/2023/11/wood-burned-napkin-ring-tutorial.jpg"><img loading="lazy" decoding="async" width="600" height="900" src="https://www.notjustahousewife.net/wp-content/uploads/2023/11/wood-burned-napkin-ring-tutorial.jpg" alt="" class="wp-image-26891" style="aspect-ratio:0.6666666666666666;width:500px;height:auto" srcset="https://www.notjustahousewife.net/wp-content/uploads/2023/11/wood-burned-napkin-ring-tutorial.jpg 600w, https://www.notjustahousewife.net/wp-content/uploads/2023/11/wood-burned-napkin-ring-tutorial-200x300.jpg 200w, https://www.notjustahousewife.net/wp-content/uploads/2023/11/wood-burned-napkin-ring-tutorial-150x225.jpg 150w" sizes="(max-width: 600px) 100vw, 600px" /></a></figure></div> <p>Once you are done wood burning, you can erase any pencil marks that are showing to clean it up. </p> <p>You can also use <a href="https://amzn.to/46fNEsI" target="_blank" rel="noreferrer noopener nofollow">wood burning letter sets</a>. I have used them for other wood burning crafts in the past. Last year I shared some wood burned plate chargers that went viral on social media. So many of you shared your versions with me and I loved it. Wood burning is a fun DIY project to do. I have also made reusable wood burned gift tags. </p> <div class="wp-block-image"> <figure class="aligncenter size-full is-resized"><a href="https://www.notjustahousewife.net/wp-content/uploads/2020/10/wood-burn-letters-onto-wood.jpg"><img loading="lazy" decoding="async" width="500" height="750" src="https://www.notjustahousewife.net/wp-content/uploads/2020/10/wood-burn-letters-onto-wood.jpg" alt="" class="wp-image-22214" style="aspect-ratio:0.6669921875;width:500px;height:auto" srcset="https://www.notjustahousewife.net/wp-content/uploads/2020/10/wood-burn-letters-onto-wood.jpg 500w, https://www.notjustahousewife.net/wp-content/uploads/2020/10/wood-burn-letters-onto-wood-200x300.jpg 200w" sizes="(max-width: 500px) 100vw, 500px" /></a></figure></div> <p>I like the idea of using the names of your guests, but you could also wood burn holiday related words into the napkin rings. These beautiful napkin rings are sure to make your guest smile.&nbsp;</p> <div class="wp-block-image"> <figure class="aligncenter size-full is-resized"><a href="https://www.notjustahousewife.net/wp-content/uploads/2023/11/wood-burned-napkin-ring.jpg"><img loading="lazy" decoding="async" width="600" height="900" src="https://www.notjustahousewife.net/wp-content/uploads/2023/11/wood-burned-napkin-ring.jpg" alt="" class="wp-image-26896" style="aspect-ratio:0.6666666666666666;width:501px;height:auto" srcset="https://www.notjustahousewife.net/wp-content/uploads/2023/11/wood-burned-napkin-ring.jpg 600w, https://www.notjustahousewife.net/wp-content/uploads/2023/11/wood-burned-napkin-ring-200x300.jpg 200w, https://www.notjustahousewife.net/wp-content/uploads/2023/11/wood-burned-napkin-ring-150x225.jpg 150w" sizes="(max-width: 600px) 100vw, 600px" /></a></figure></div> <h3 class="wp-block-heading">Clay Stamped Napkin Rings</h3> <p>I love using <a href="https://amzn.to/3uf31nS" target="_blank" rel="noreferrer noopener nofollow">polymer clay</a>! It is easy to work with, it never dries out, and once you bake it it is hard and paintable. For these napkin rings, I rolled out the clay into an inch thick "snake" and then used a rolling pin to rolled it flat. I made sure it was about ¼" thick.&nbsp;</p> <p>Use a ruler or straight edge and a knife to cut the edges. Then cut the clay to be 5 inches long. </p> <p>It is time to add the letters into the clay with these <a href="https://amzn.to/3MOp6Aa" target="_blank" rel="noreferrer noopener nofollow">metal letter stamps</a>! You can choose to do the names of your guests, or you can use seasonal words like "blessings", thankful", "celebrate", or "merry".&nbsp;</p> <div class="wp-block-image"> <figure class="aligncenter size-full is-resized"><a href="https://www.notjustahousewife.net/wp-content/uploads/2023/11/clay-napkin-ring-tutorial.jpg"><img loading="lazy" decoding="async" width="600" height="900" src="https://www.notjustahousewife.net/wp-content/uploads/2023/11/clay-napkin-ring-tutorial.jpg" alt="" class="wp-image-26889" style="aspect-ratio:0.6666666666666666;width:501px;height:auto" srcset="https://www.notjustahousewife.net/wp-content/uploads/2023/11/clay-napkin-ring-tutorial.jpg 600w, https://www.notjustahousewife.net/wp-content/uploads/2023/11/clay-napkin-ring-tutorial-200x300.jpg 200w, https://www.notjustahousewife.net/wp-content/uploads/2023/11/clay-napkin-ring-tutorial-150x225.jpg 150w" sizes="(max-width: 600px) 100vw, 600px" /></a></figure></div> <p>To help the words stand out more, I like to add paint. Once you wipe it off, the paint is removed from everywhere but the impressions of the letters. I used brown this time, but other paint colors like gold and silver are beautiful choices too! It is such a simple napkin ring idea, but a personal touch makes a big impact.&nbsp;</p> <div class="wp-block-image"> <figure class="aligncenter size-full is-resized"><a href="https://www.notjustahousewife.net/wp-content/uploads/2023/11/clay-stamped-napkin-ring.jpg"><img loading="lazy" decoding="async" width="600" height="900" src="https://www.notjustahousewife.net/wp-content/uploads/2023/11/clay-stamped-napkin-ring.jpg" alt="" class="wp-image-26893" style="aspect-ratio:0.6666666666666666;width:501px;height:auto" srcset="https://www.notjustahousewife.net/wp-content/uploads/2023/11/clay-stamped-napkin-ring.jpg 600w, https://www.notjustahousewife.net/wp-content/uploads/2023/11/clay-stamped-napkin-ring-200x300.jpg 200w, https://www.notjustahousewife.net/wp-content/uploads/2023/11/clay-stamped-napkin-ring-150x225.jpg 150w" sizes="(max-width: 600px) 100vw, 600px" /></a></figure></div> <p>These metal stamp letter sets are so fun to use for clay. I have made christmas ornaments and &nbsp;gift tags as well.&nbsp;</p> <h3 class="wp-block-heading">Leather Napkin Rings</h3> <p>Remember when our old couch broke and wore out so we cut all the leather off? We saved it in a tote and have spent the past several years using it for all kinds of projects with it. One of my favorites was this leather woven pillow. We are finally down to the last bits of scraps. This was the perfect project for the small scraps I have left.&nbsp;You can buy <a href="https://amzn.to/47IWf8B" target="_blank" rel="noreferrer noopener nofollow">pieces of leather</a> (or faux leather) online as well. </p> <p>You can use scissor to cut the leather but I like to use a <a href="https://amzn.to/3uteOip" target="_blank" rel="noreferrer noopener nofollow">rotary cutter</a> and a straight edge. I made these leather strips 6 inches long since the ends would overlap.&nbsp;</p> <div class="wp-block-image"> <figure class="aligncenter size-full is-resized"><a href="https://www.notjustahousewife.net/wp-content/uploads/2023/11/leather-napkin-ring-tutorial.jpg"><img loading="lazy" decoding="async" width="600" height="900" src="https://www.notjustahousewife.net/wp-content/uploads/2023/11/leather-napkin-ring-tutorial.jpg" alt="" class="wp-image-26890" style="aspect-ratio:0.6666666666666666;width:502px;height:auto" srcset="https://www.notjustahousewife.net/wp-content/uploads/2023/11/leather-napkin-ring-tutorial.jpg 600w, https://www.notjustahousewife.net/wp-content/uploads/2023/11/leather-napkin-ring-tutorial-200x300.jpg 200w, https://www.notjustahousewife.net/wp-content/uploads/2023/11/leather-napkin-ring-tutorial-150x225.jpg 150w" sizes="(max-width: 600px) 100vw, 600px" /></a></figure></div> <p>Use a <a href="https://amzn.to/49KlYiq" target="_blank" rel="noreferrer noopener nofollow">razor blade knife</a> to cut a slit in one end for the button. Test to make sure the button will fit through the hole. You want it to be kind of snug. Once the slit is cut, you will sew on your button to the opposite end of the leather strip.</p> <div class="wp-block-image"> <figure class="aligncenter size-full is-resized"><a href="https://www.notjustahousewife.net/wp-content/uploads/2023/11/DIY-leather-napkin-ring.jpg"><img loading="lazy" decoding="async" width="600" height="855" src="https://www.notjustahousewife.net/wp-content/uploads/2023/11/DIY-leather-napkin-ring.jpg" alt="" class="wp-image-26898" style="aspect-ratio:0.7017543859649122;width:500px;height:auto" srcset="https://www.notjustahousewife.net/wp-content/uploads/2023/11/DIY-leather-napkin-ring.jpg 600w, https://www.notjustahousewife.net/wp-content/uploads/2023/11/DIY-leather-napkin-ring-211x300.jpg 211w, https://www.notjustahousewife.net/wp-content/uploads/2023/11/DIY-leather-napkin-ring-150x214.jpg 150w" sizes="(max-width: 600px) 100vw, 600px" /></a></figure></div> <p>Then simply button it up and you have a leather napkin ring! These gorgeous napkin rings great with greenery or fresh flowers tucked inside. Fall leaves, cinnamon sticks, or faux flowers from the craft store would work too.&nbsp;</p> <div class="wp-block-image"> <figure class="aligncenter size-full is-resized"><a href="https://www.notjustahousewife.net/wp-content/uploads/2023/11/leather-napkin-ring-DIY.jpg"><img loading="lazy" decoding="async" width="600" height="900" src="https://www.notjustahousewife.net/wp-content/uploads/2023/11/leather-napkin-ring-DIY.jpg" alt="" class="wp-image-26895" style="aspect-ratio:0.6666666666666666;width:501px;height:auto" srcset="https://www.notjustahousewife.net/wp-content/uploads/2023/11/leather-napkin-ring-DIY.jpg 600w, https://www.notjustahousewife.net/wp-content/uploads/2023/11/leather-napkin-ring-DIY-200x300.jpg 200w, https://www.notjustahousewife.net/wp-content/uploads/2023/11/leather-napkin-ring-DIY-150x225.jpg 150w" sizes="(max-width: 600px) 100vw, 600px" /></a></figure></div> <p>Whether you use these for your Thanksgiving table, Christmas, Hanukkah, or any other special occasion dinner party, they give your dining table that extra touch to make your guests feel special. This holiday season, consider creating your own napkin rings! Get creative and make your own versions.&nbsp;</p> <h3 class="wp-block-heading">PIN For Later:</h3> <div class="wp-block-image"> <figure class="aligncenter size-full"><a href="https://www.notjustahousewife.net/wp-content/uploads/2023/11/DIY-napkin-ring-ideas.jpg"><img loading="lazy" decoding="async" width="600" height="900" src="https://www.notjustahousewife.net/wp-content/uploads/2023/11/DIY-napkin-ring-ideas.jpg" alt="" class="wp-image-26899" srcset="https://www.notjustahousewife.net/wp-content/uploads/2023/11/DIY-napkin-ring-ideas.jpg 600w, https://www.notjustahousewife.net/wp-content/uploads/2023/11/DIY-napkin-ring-ideas-200x300.jpg 200w, https://www.notjustahousewife.net/wp-content/uploads/2023/11/DIY-napkin-ring-ideas-150x225.jpg 150w" sizes="(max-width: 600px) 100vw, 600px" /></a></figure></div><div style="margin-top: 0px; margin-bottom: 0px;" class="sharethis-inline-share-buttons" ></div> ]]>
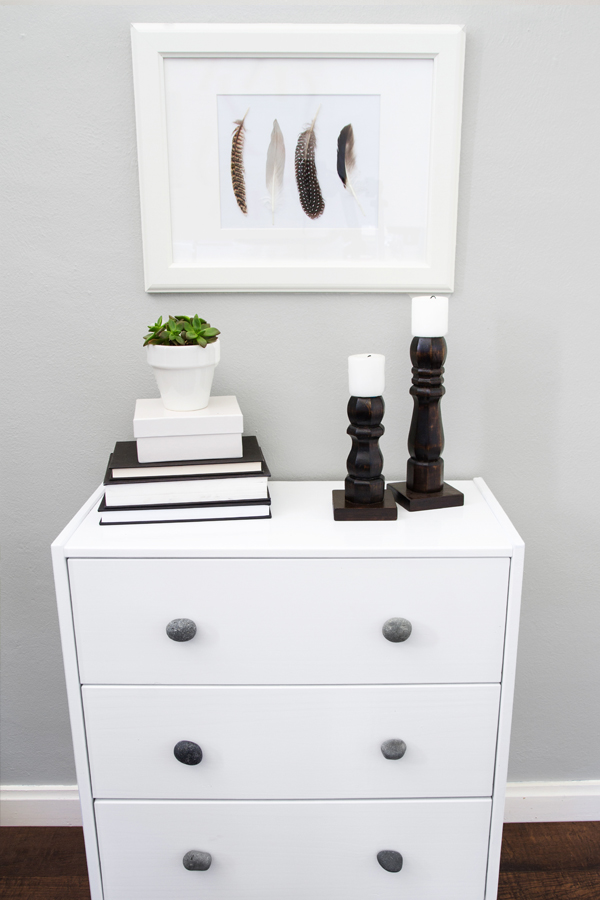

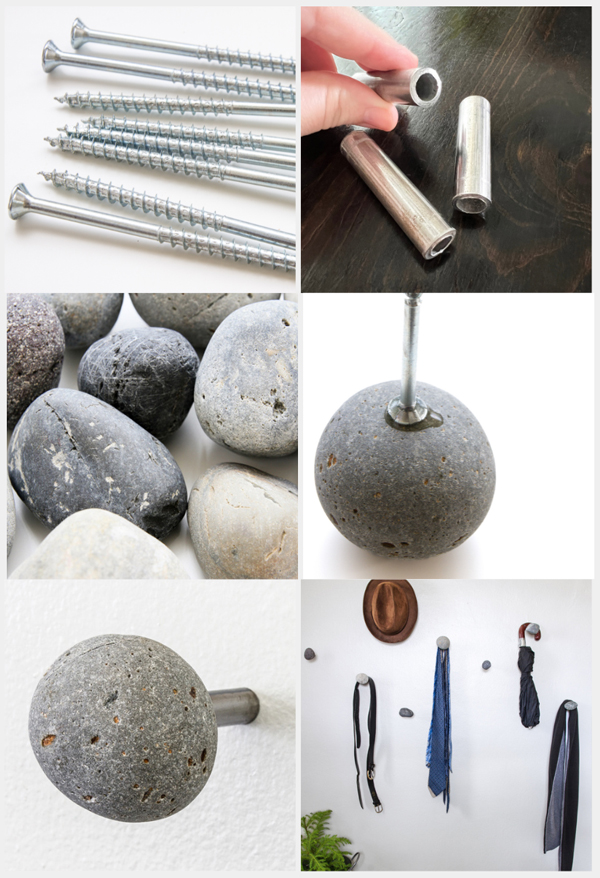
</content:encoded>
<wfw:commentRss>https://www.notjustahousewife.net/diy-napkin-ring-ideas/feed/</wfw:commentRss>
<slash:comments>1</slash:comments>
</item>
</channel>
</rss>
<!-- Comet Cache is NOT caching this page, because `$_SERVER['REQUEST_URI']` indicates this is a `/feed`; and the configuration of this site says not to cache XML-based feeds. -->